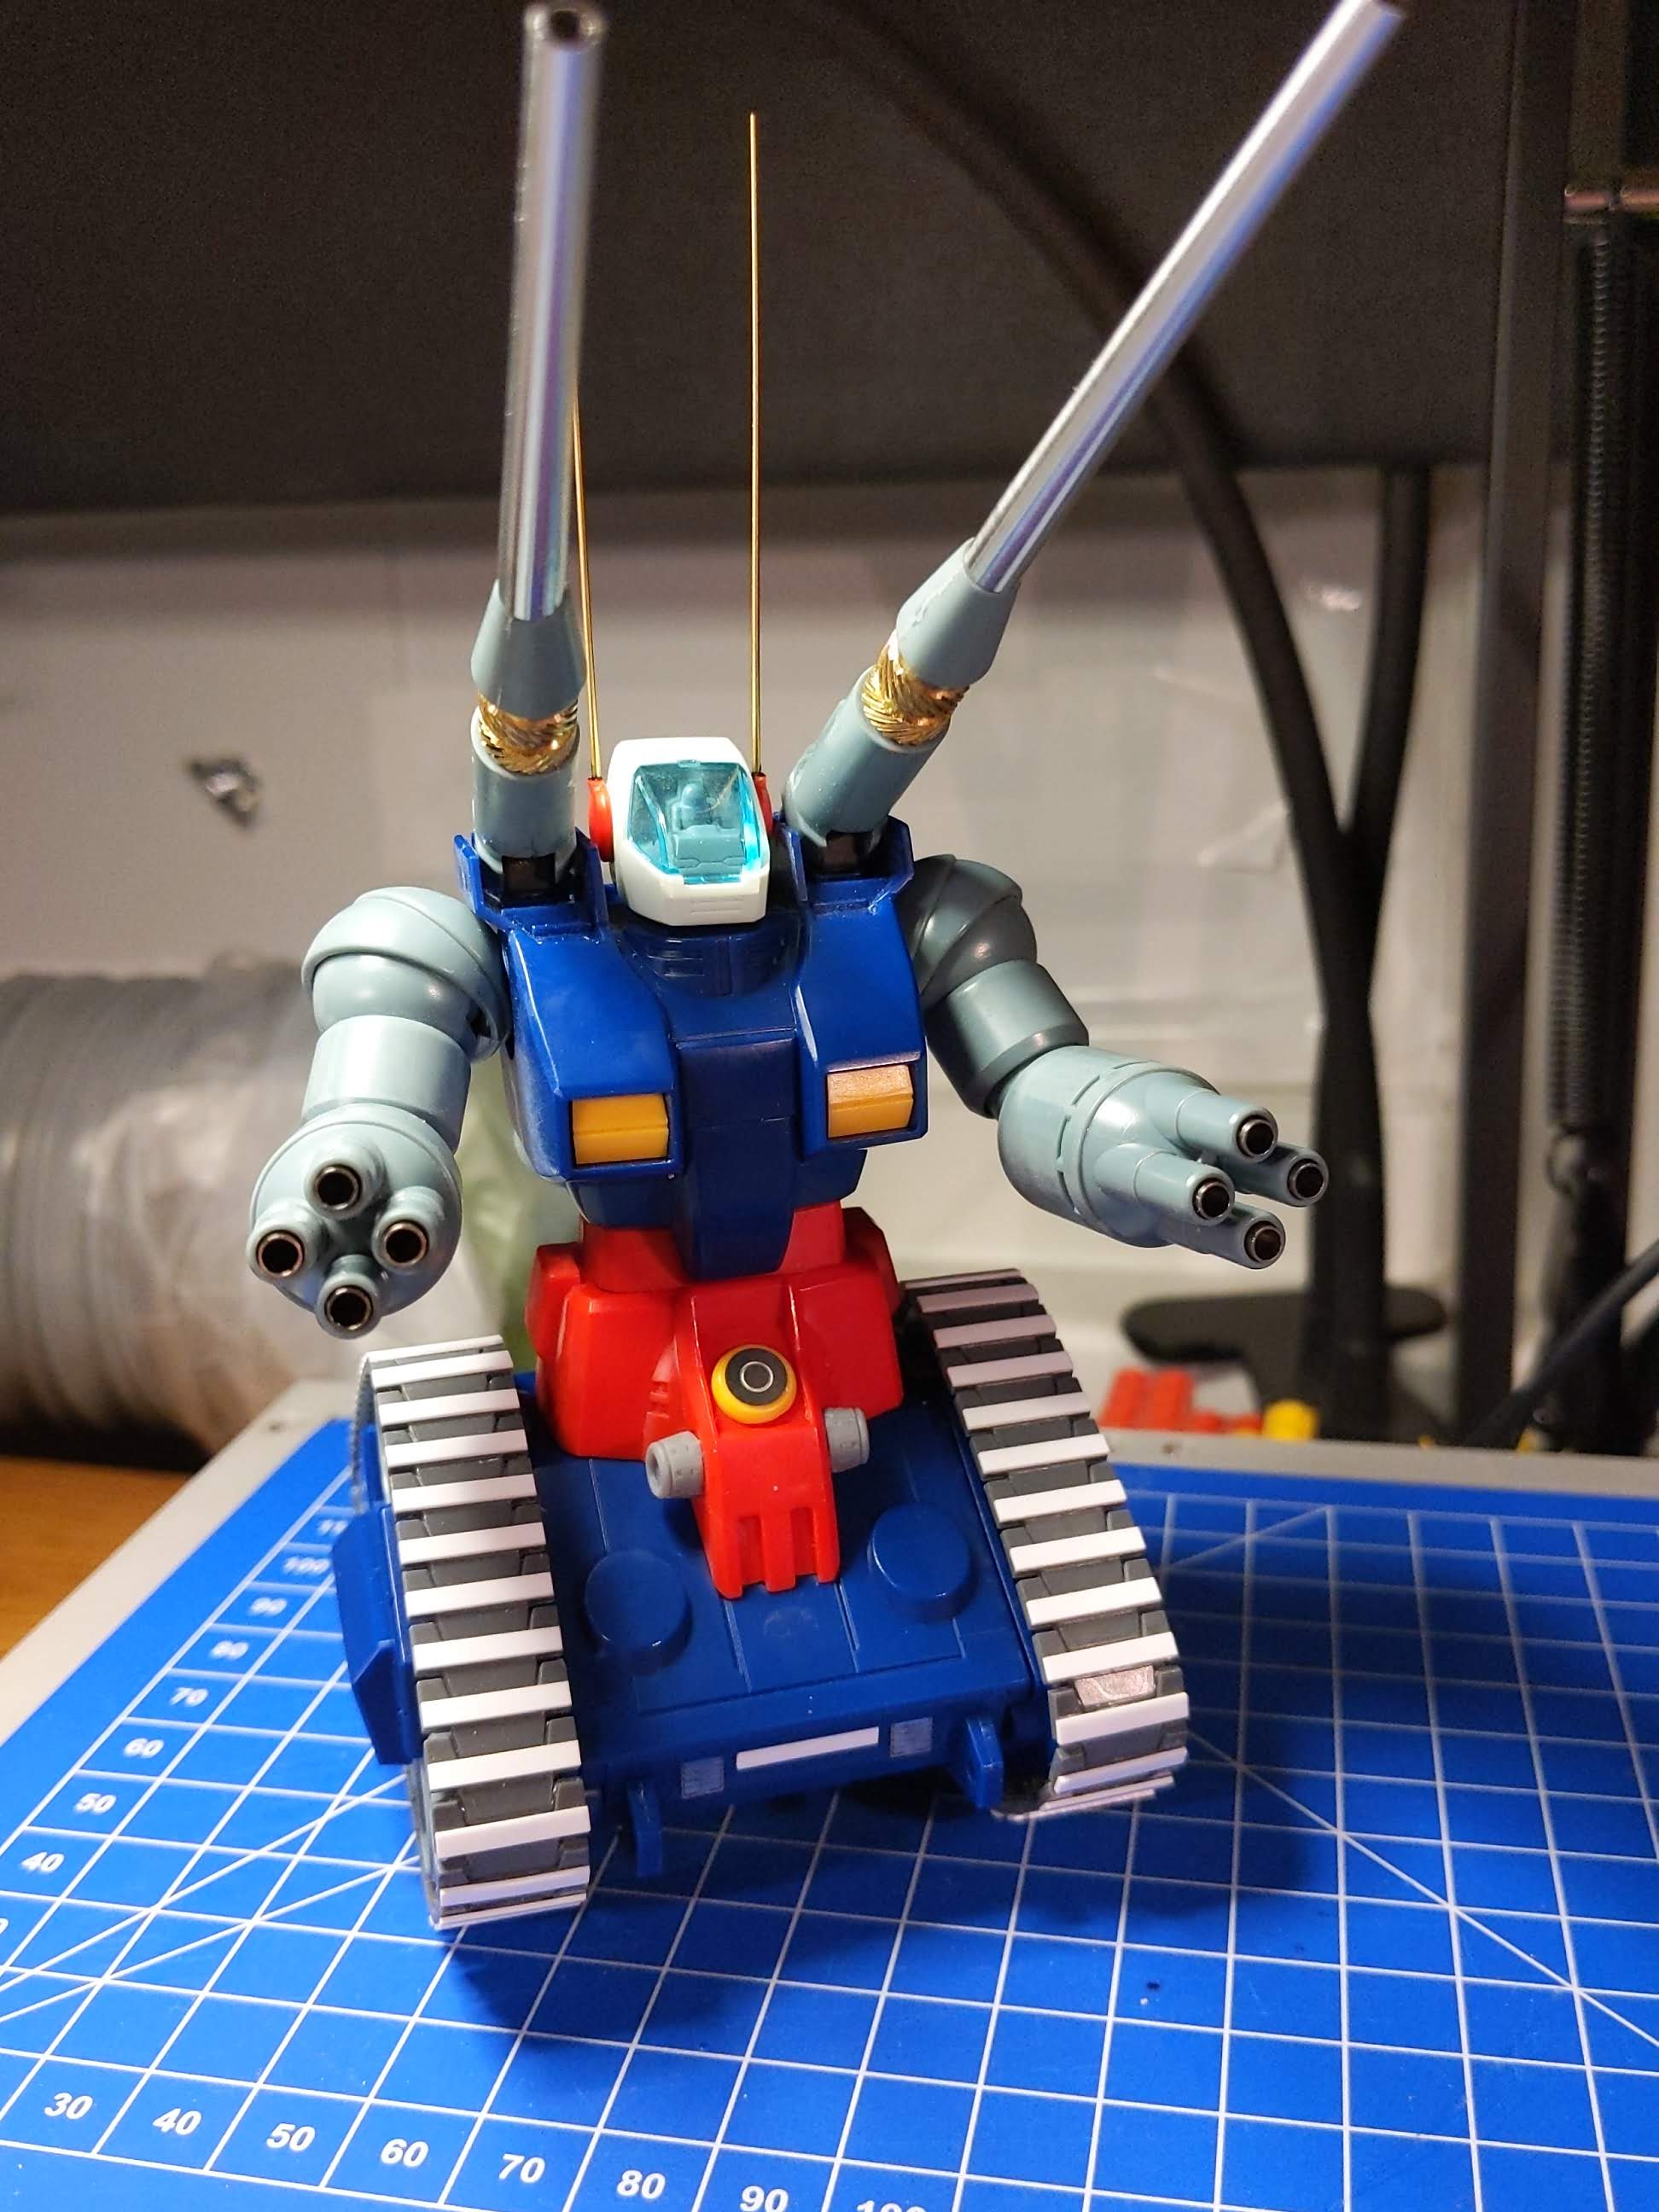
This is the HGUC Guntank, introduced in 2000 as part of the High Grade Universal Century line. In the anime, the Guntank is one of three prototype mobile suits that are the result of Operation V along with the titular Gundam and the Guncannon.
This particular build is part of Project V, a group build here on Hangar V that takes one of each of the High Grade model kits from Operation V & produces it as a custom in some manner.
As such, this is the first entry for my part of the project. My goal is to take the dated High Grade and expand upon it through scratch building, photo etch, metal, and resin parts.
Onto the build!
This particular model kit is over 20 years old and since then a lot has progressed since then in terms of design and manufacturing regarding the High Grade line.
While it does not have a lot of the flairs that have come to be expected, it is still an excellent canvas and I aim to use it as such.
The construction itself is very straightforward, mostly large sandwiched together parts and just enough articulation to emulate its animated counterpart. Many of the surfaces are quite plain, but the tank body itself has a lot of molded detail in terms of panel lines to break it up as well as molded in exhaust vents.
In some areas the old tooling is starting to show its age where the parting lines are a bit egregious, but that’s nothing a little filler can’t fix.
If you are looking for a more modern High Grade Guntank, the Early Type may be a better option as it has lot more of the features one has come to expect.
The plan for this build was to go beyond just a basic snap build paint job, I wanted to try doing more customizations with such a blank canvas of a model. I started drawing inspirations from the Guntank Early Type and more specifically the Guntank Mass Production Type. My plan for the design is to hit somewhere part way between the prototype that is the Guntank along the design iterations that led to the Mass Production variation.
Plus this was a good excuse as any for some scratch building.

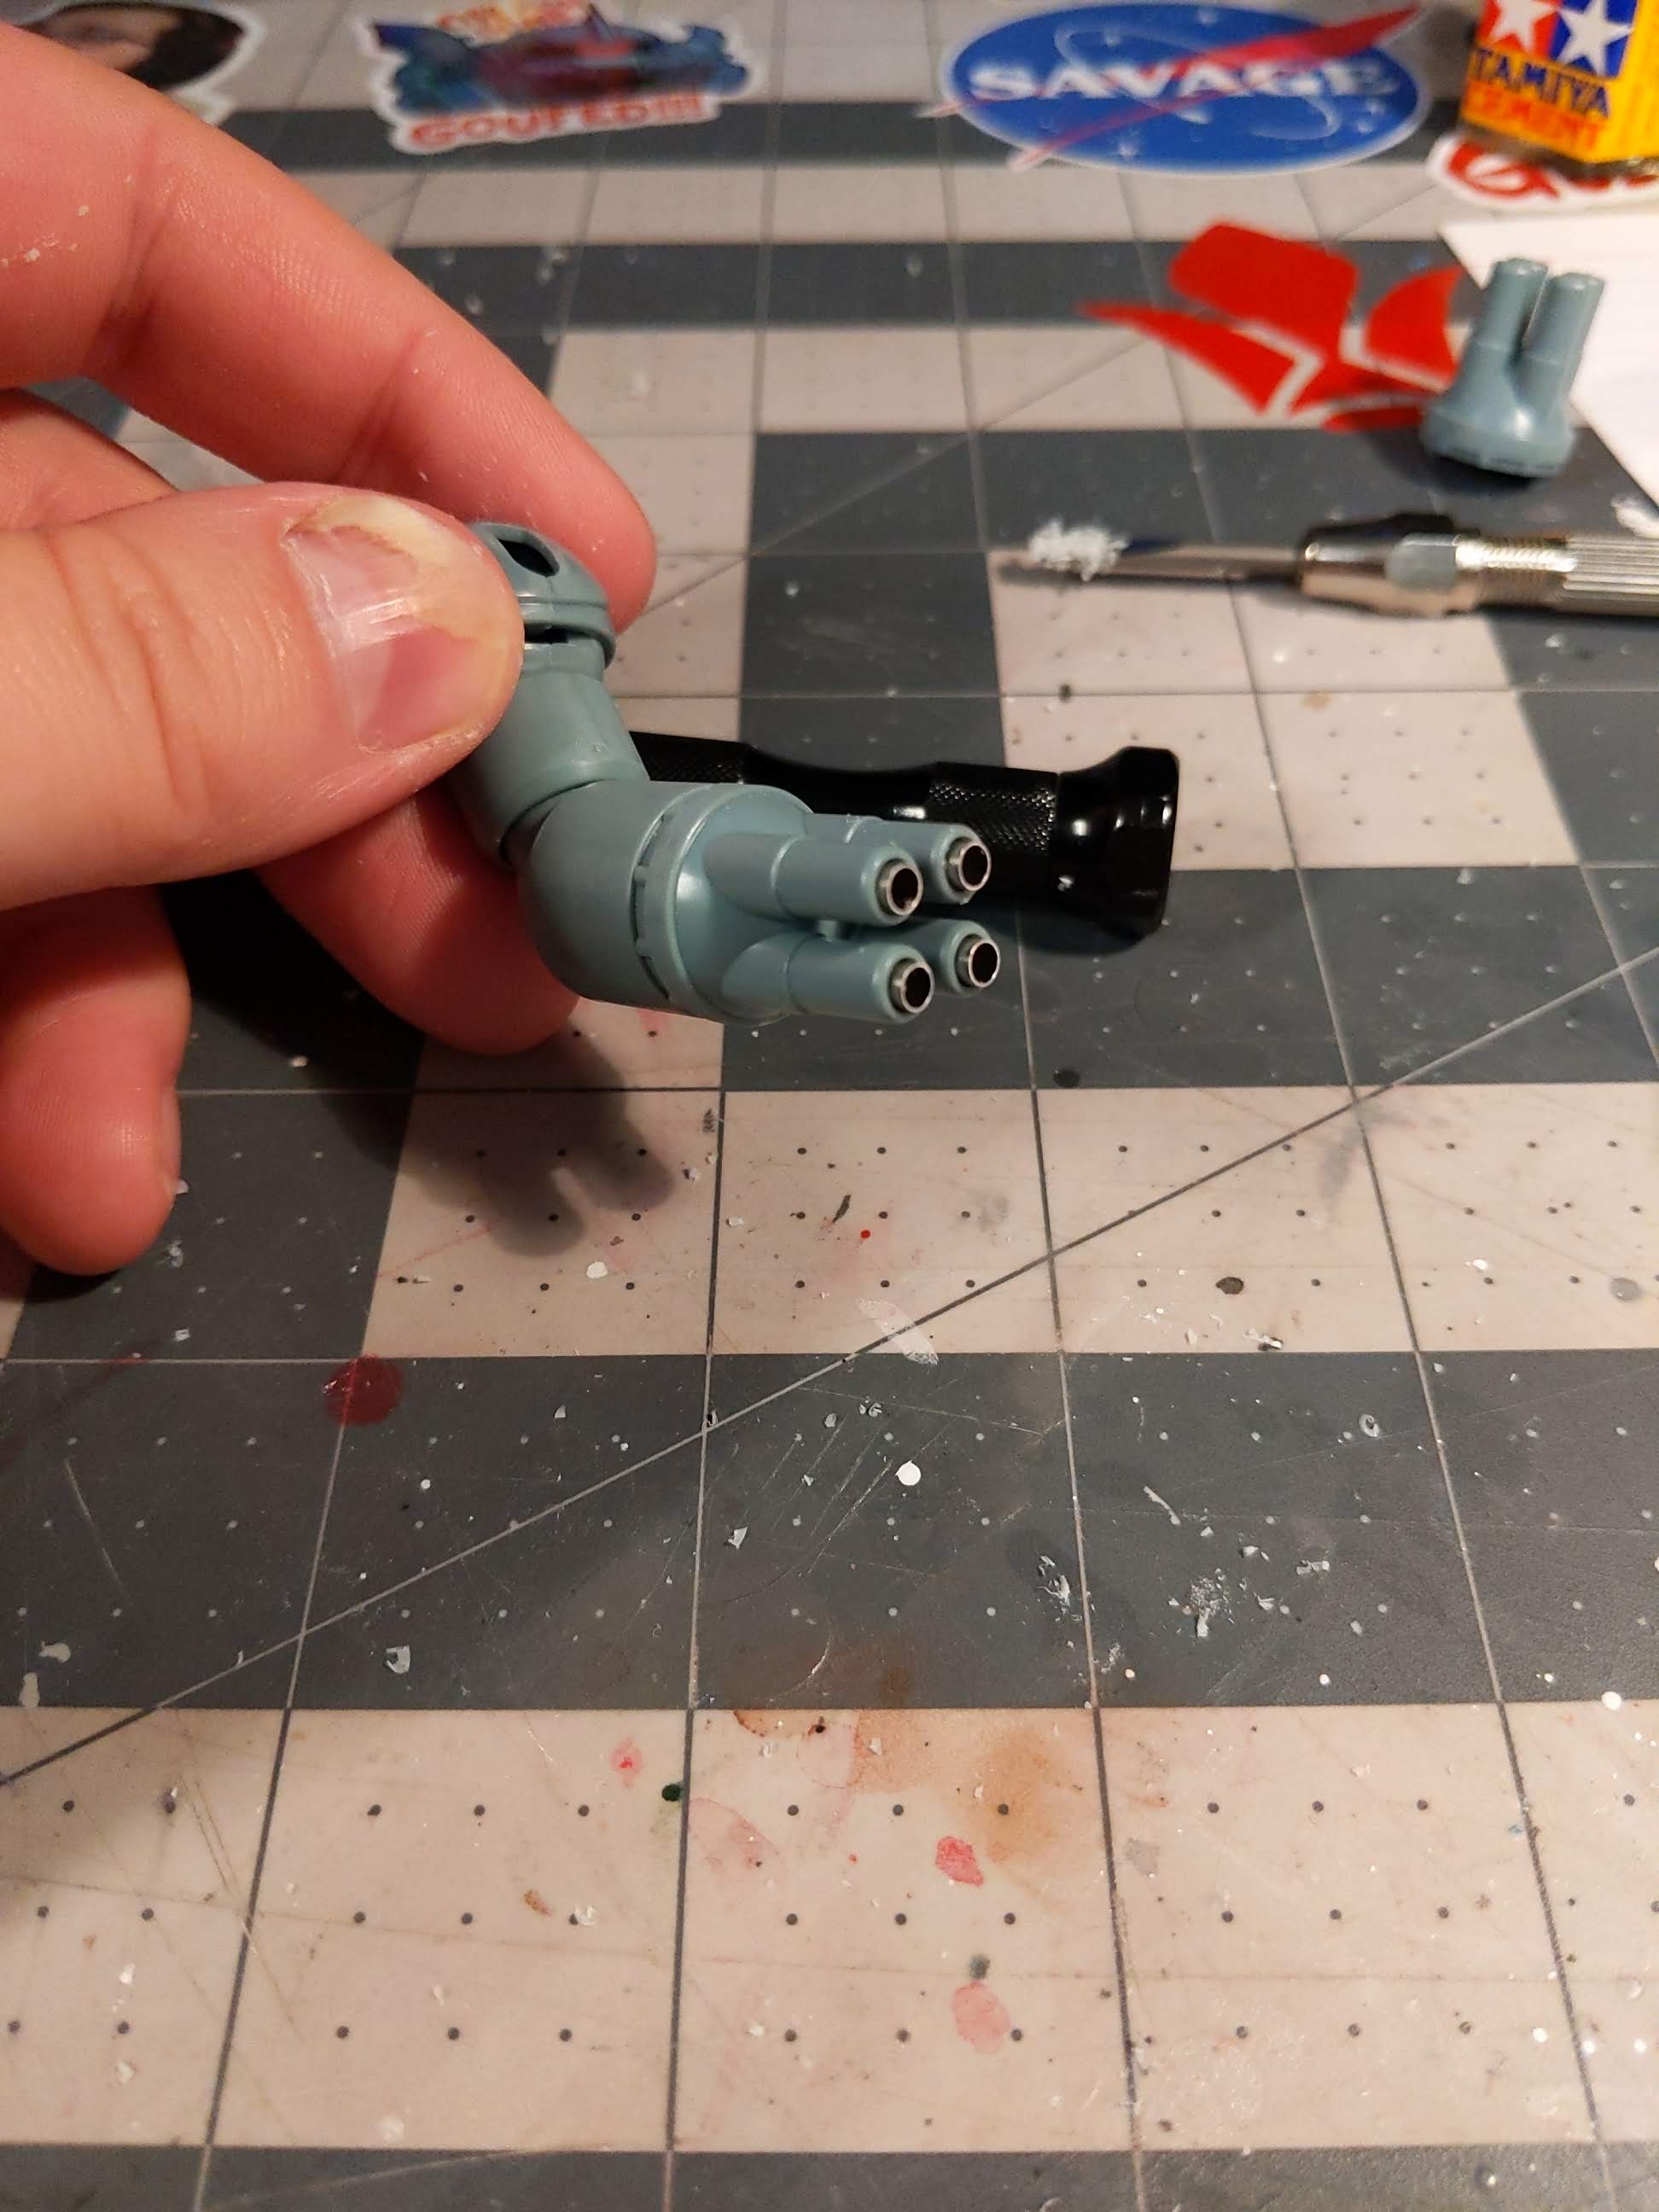
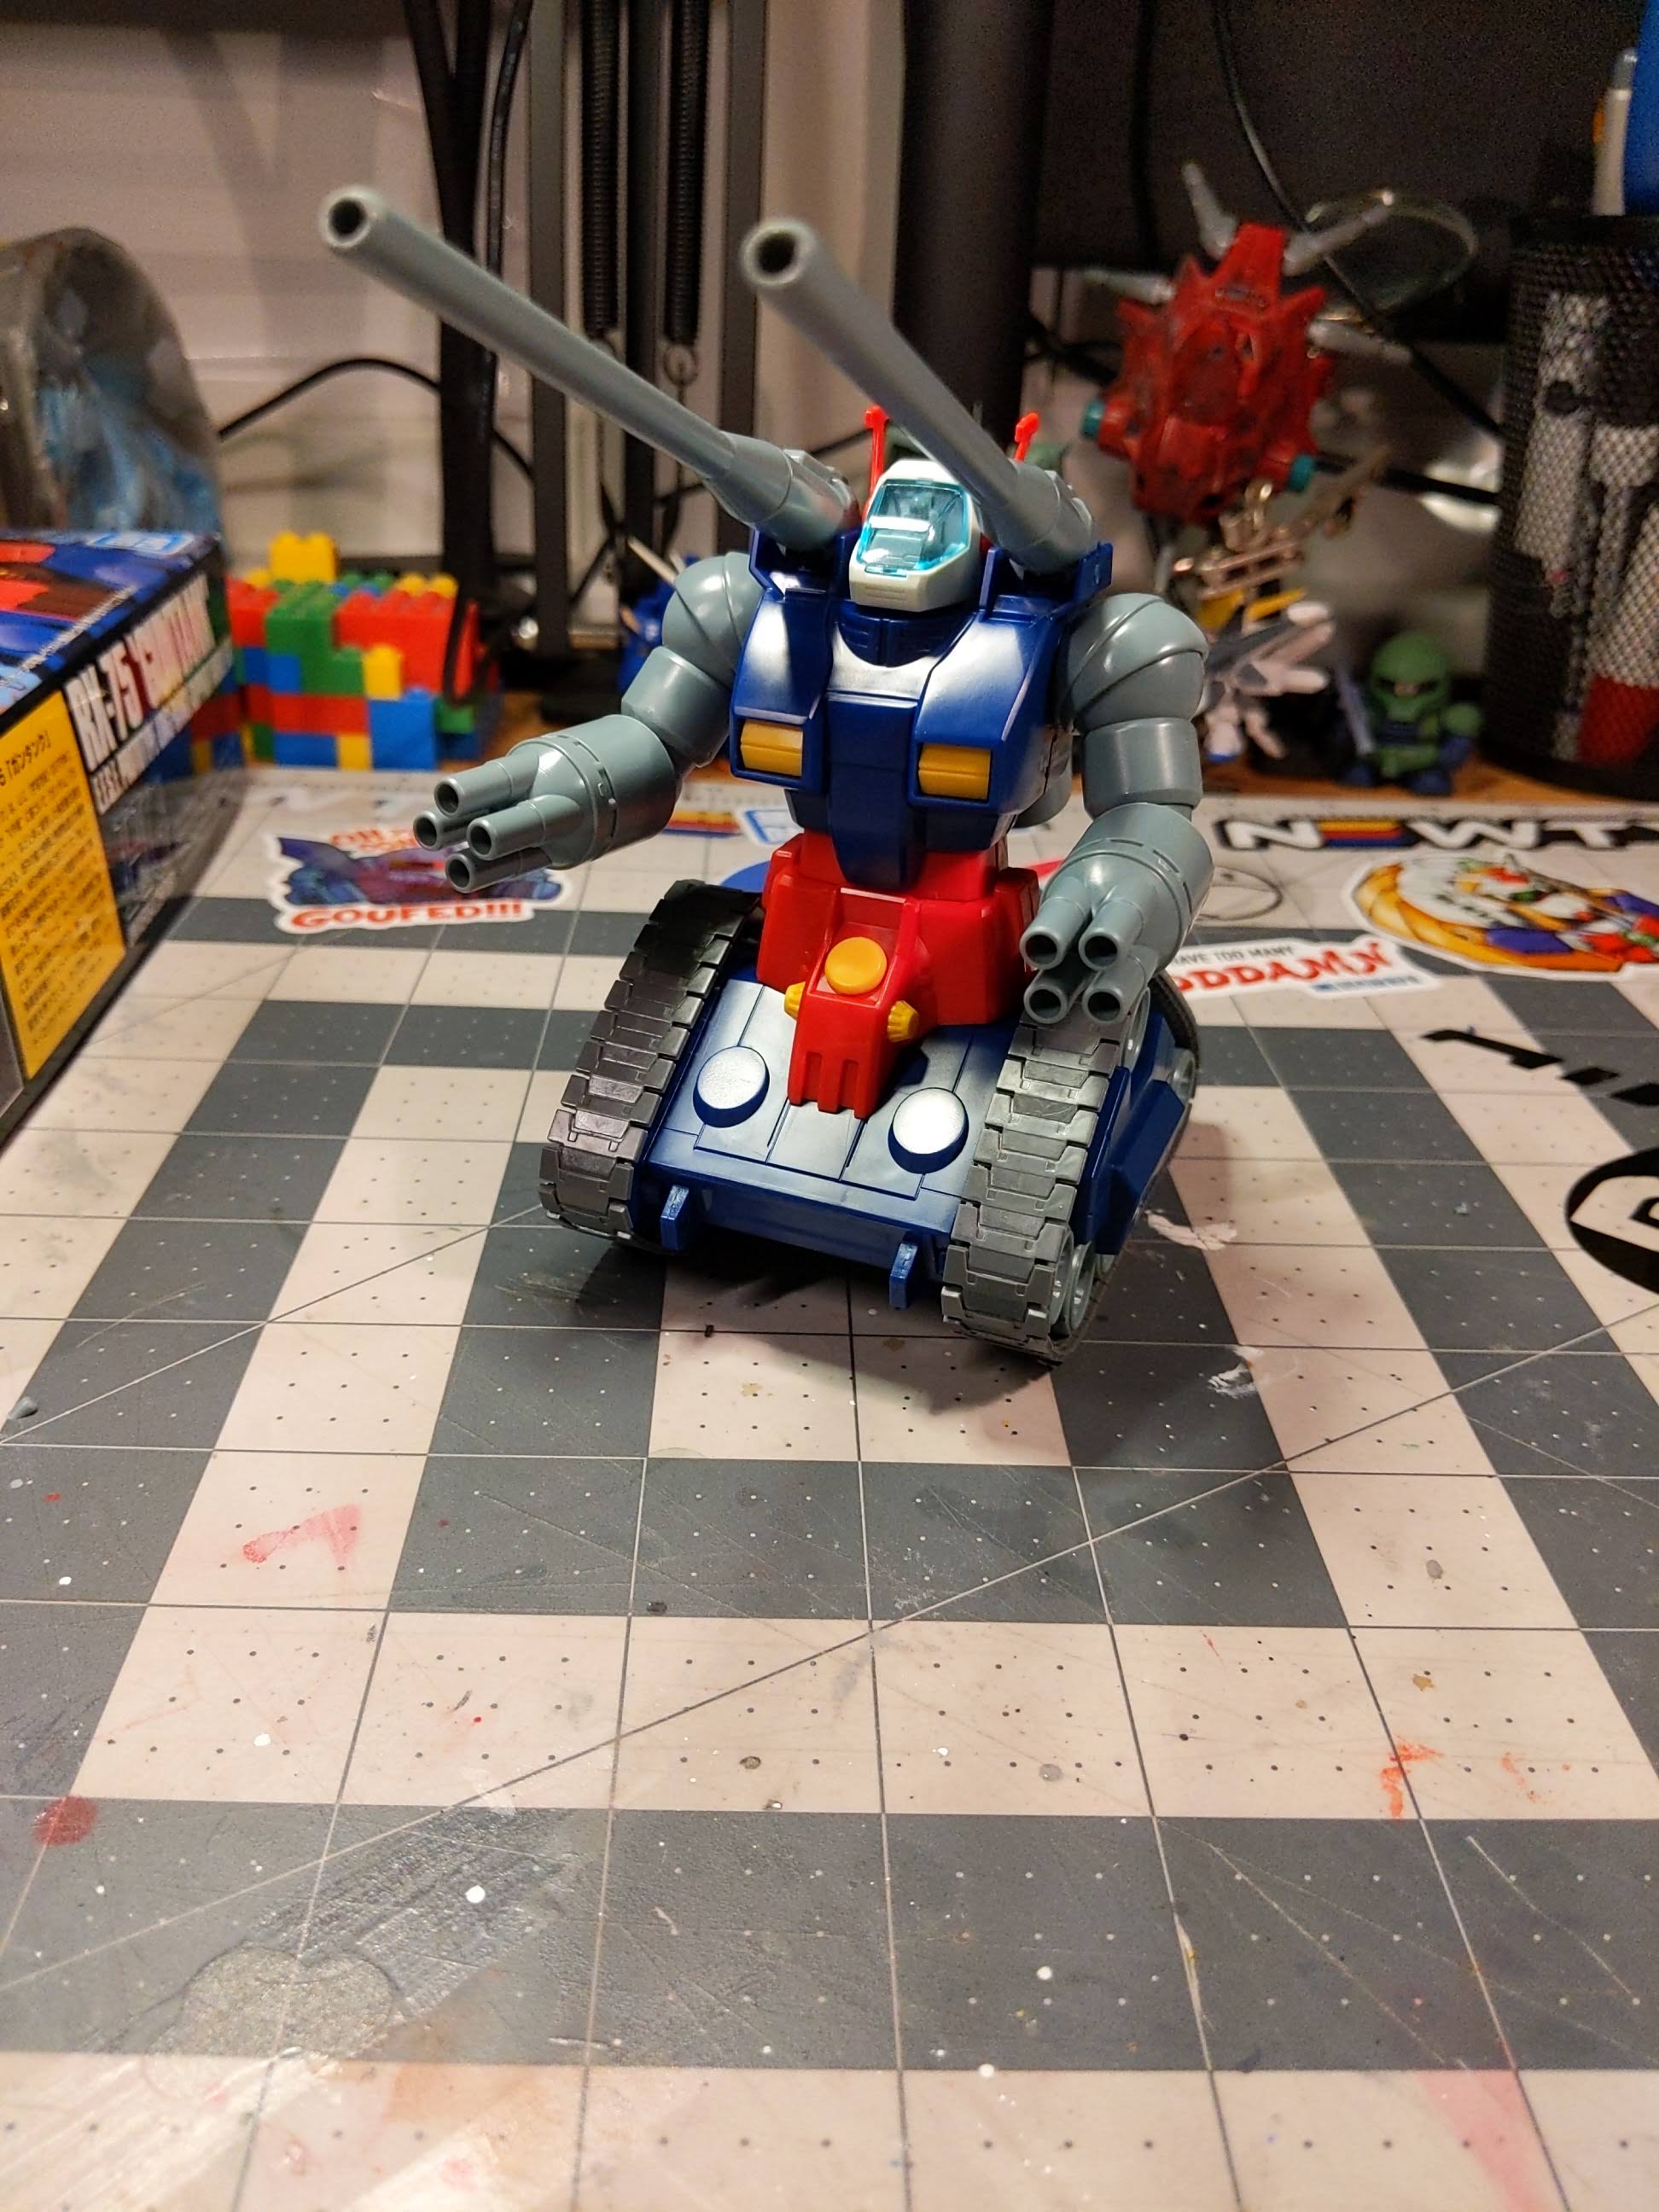
First thing I took to was enhancing the forearm mounted missile launchers, I opted to get hold of some metal spacer beads that have a diameter of 3mm and fit perfectly in the molded barrels after a bit of drilling.
These are going to remain unpainted to add a nice metal detail in the end and give a bit more depth to the missile launchers.
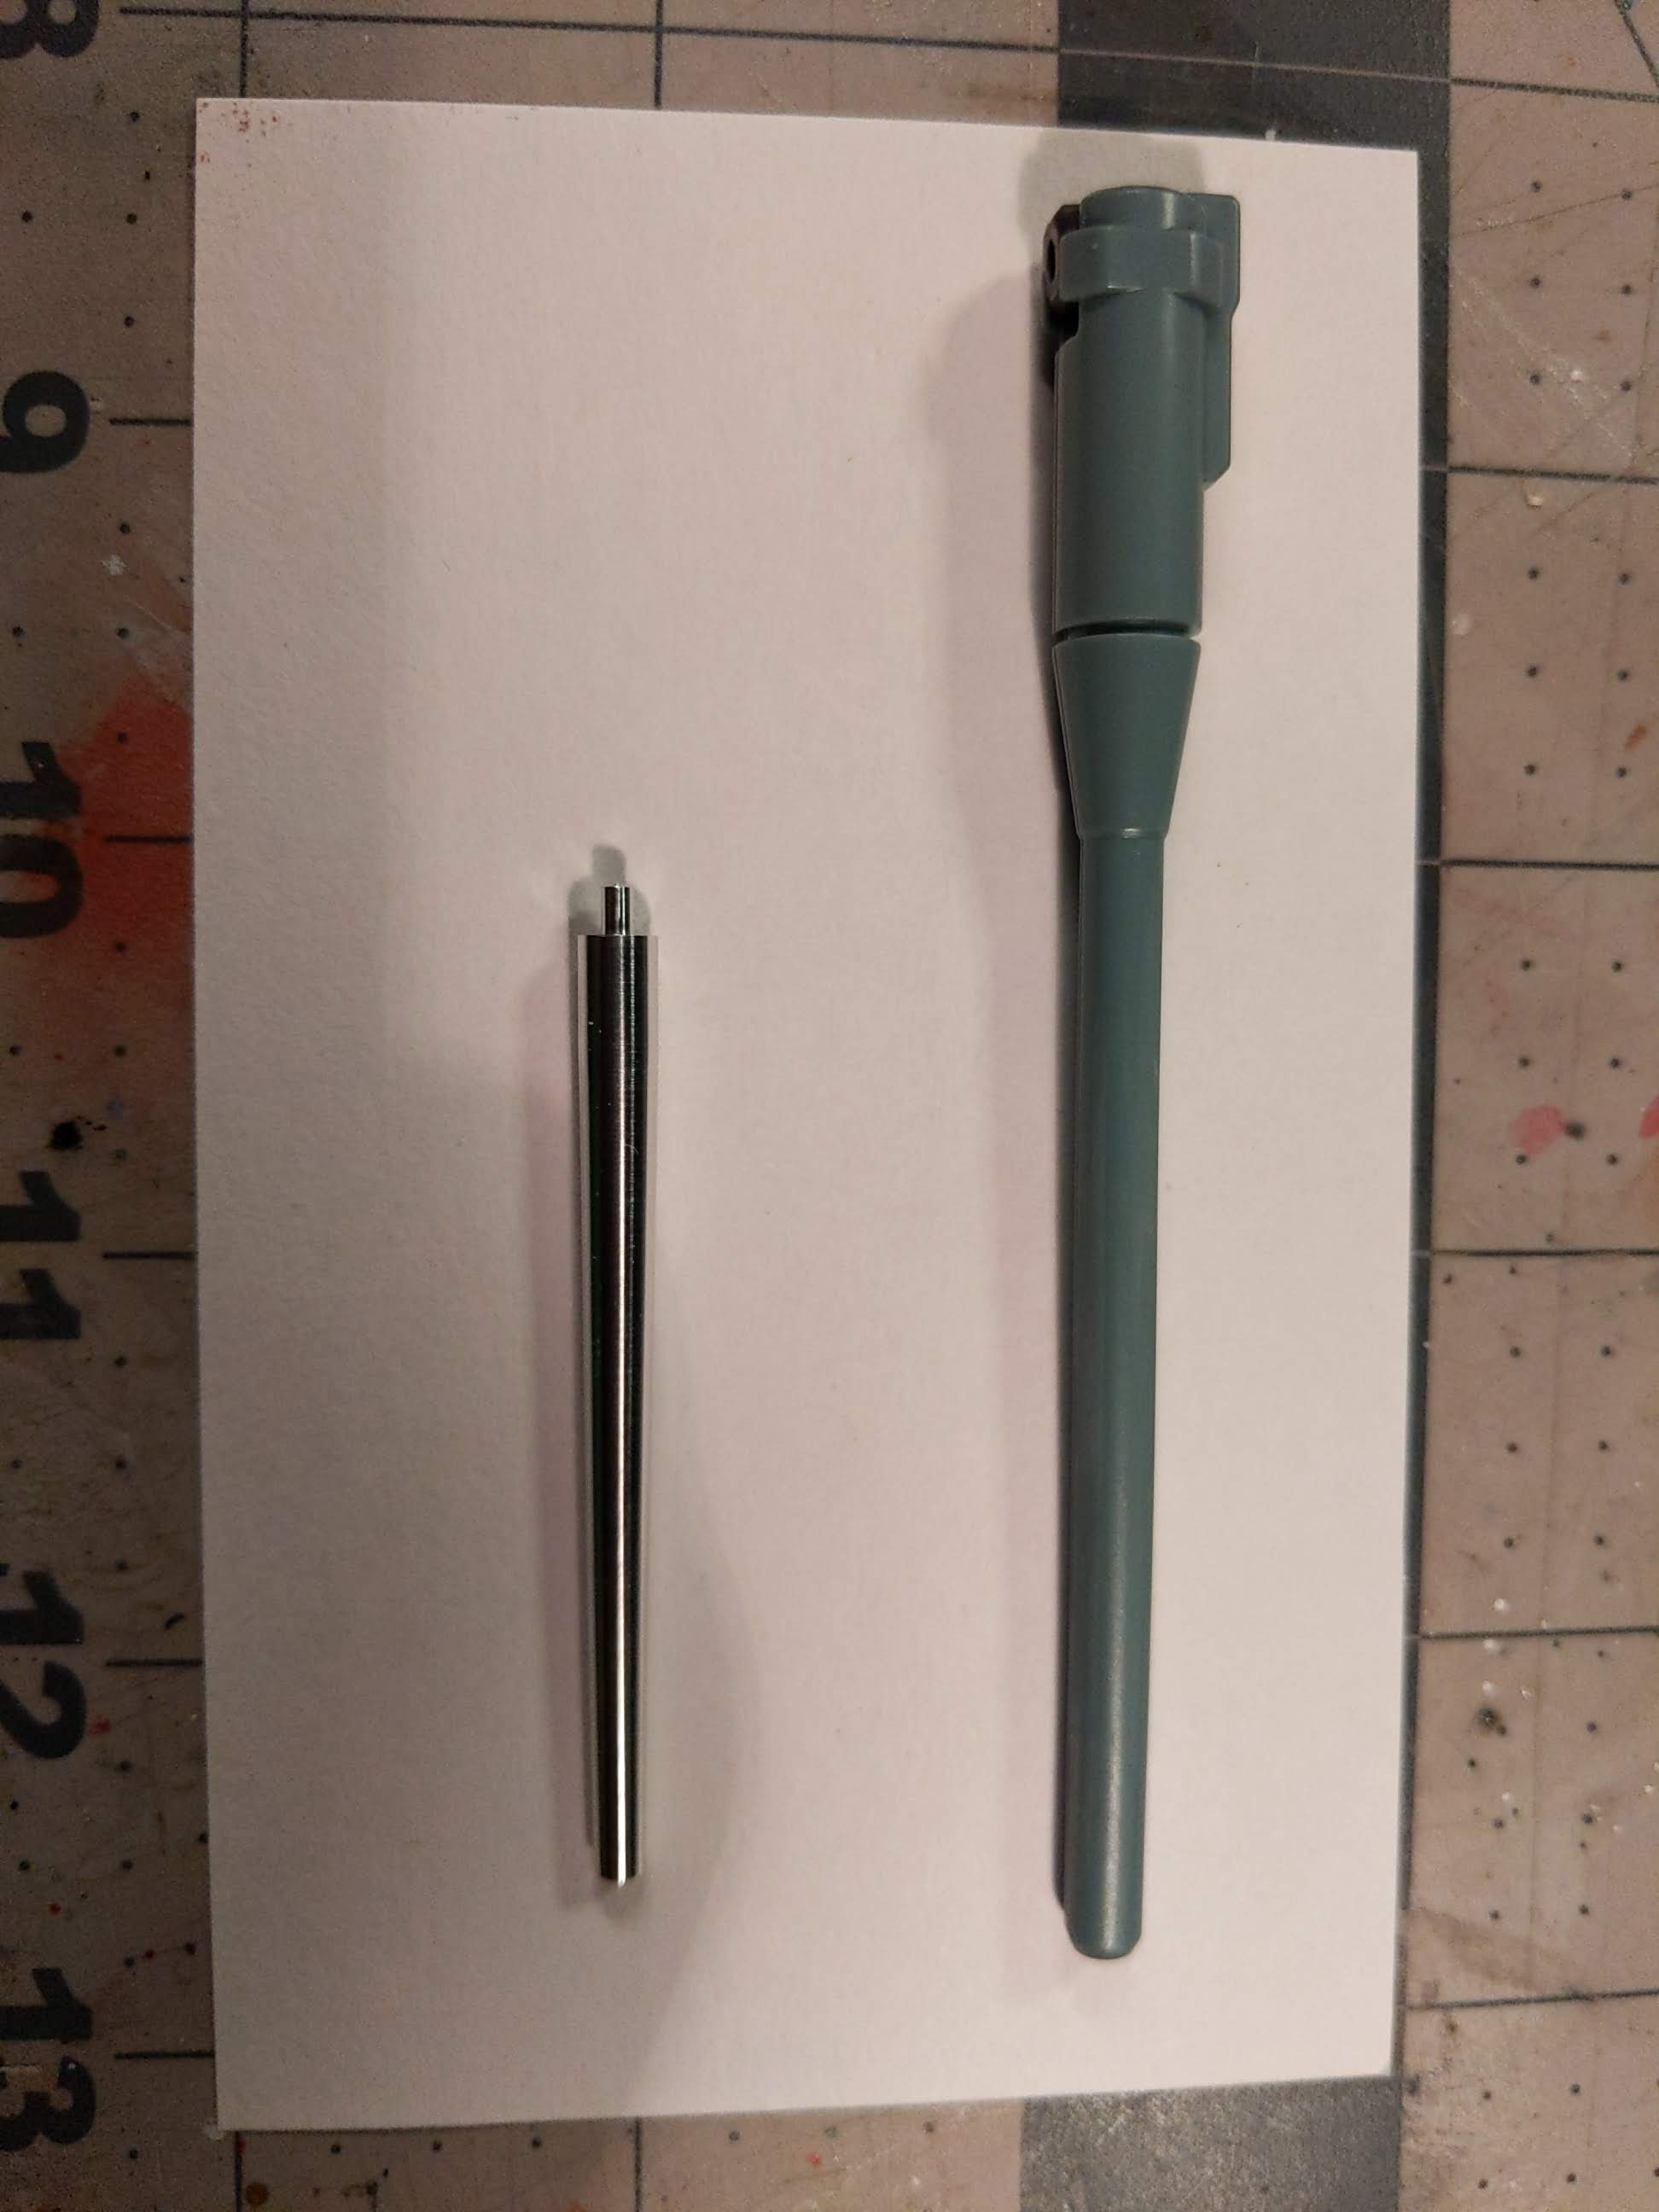
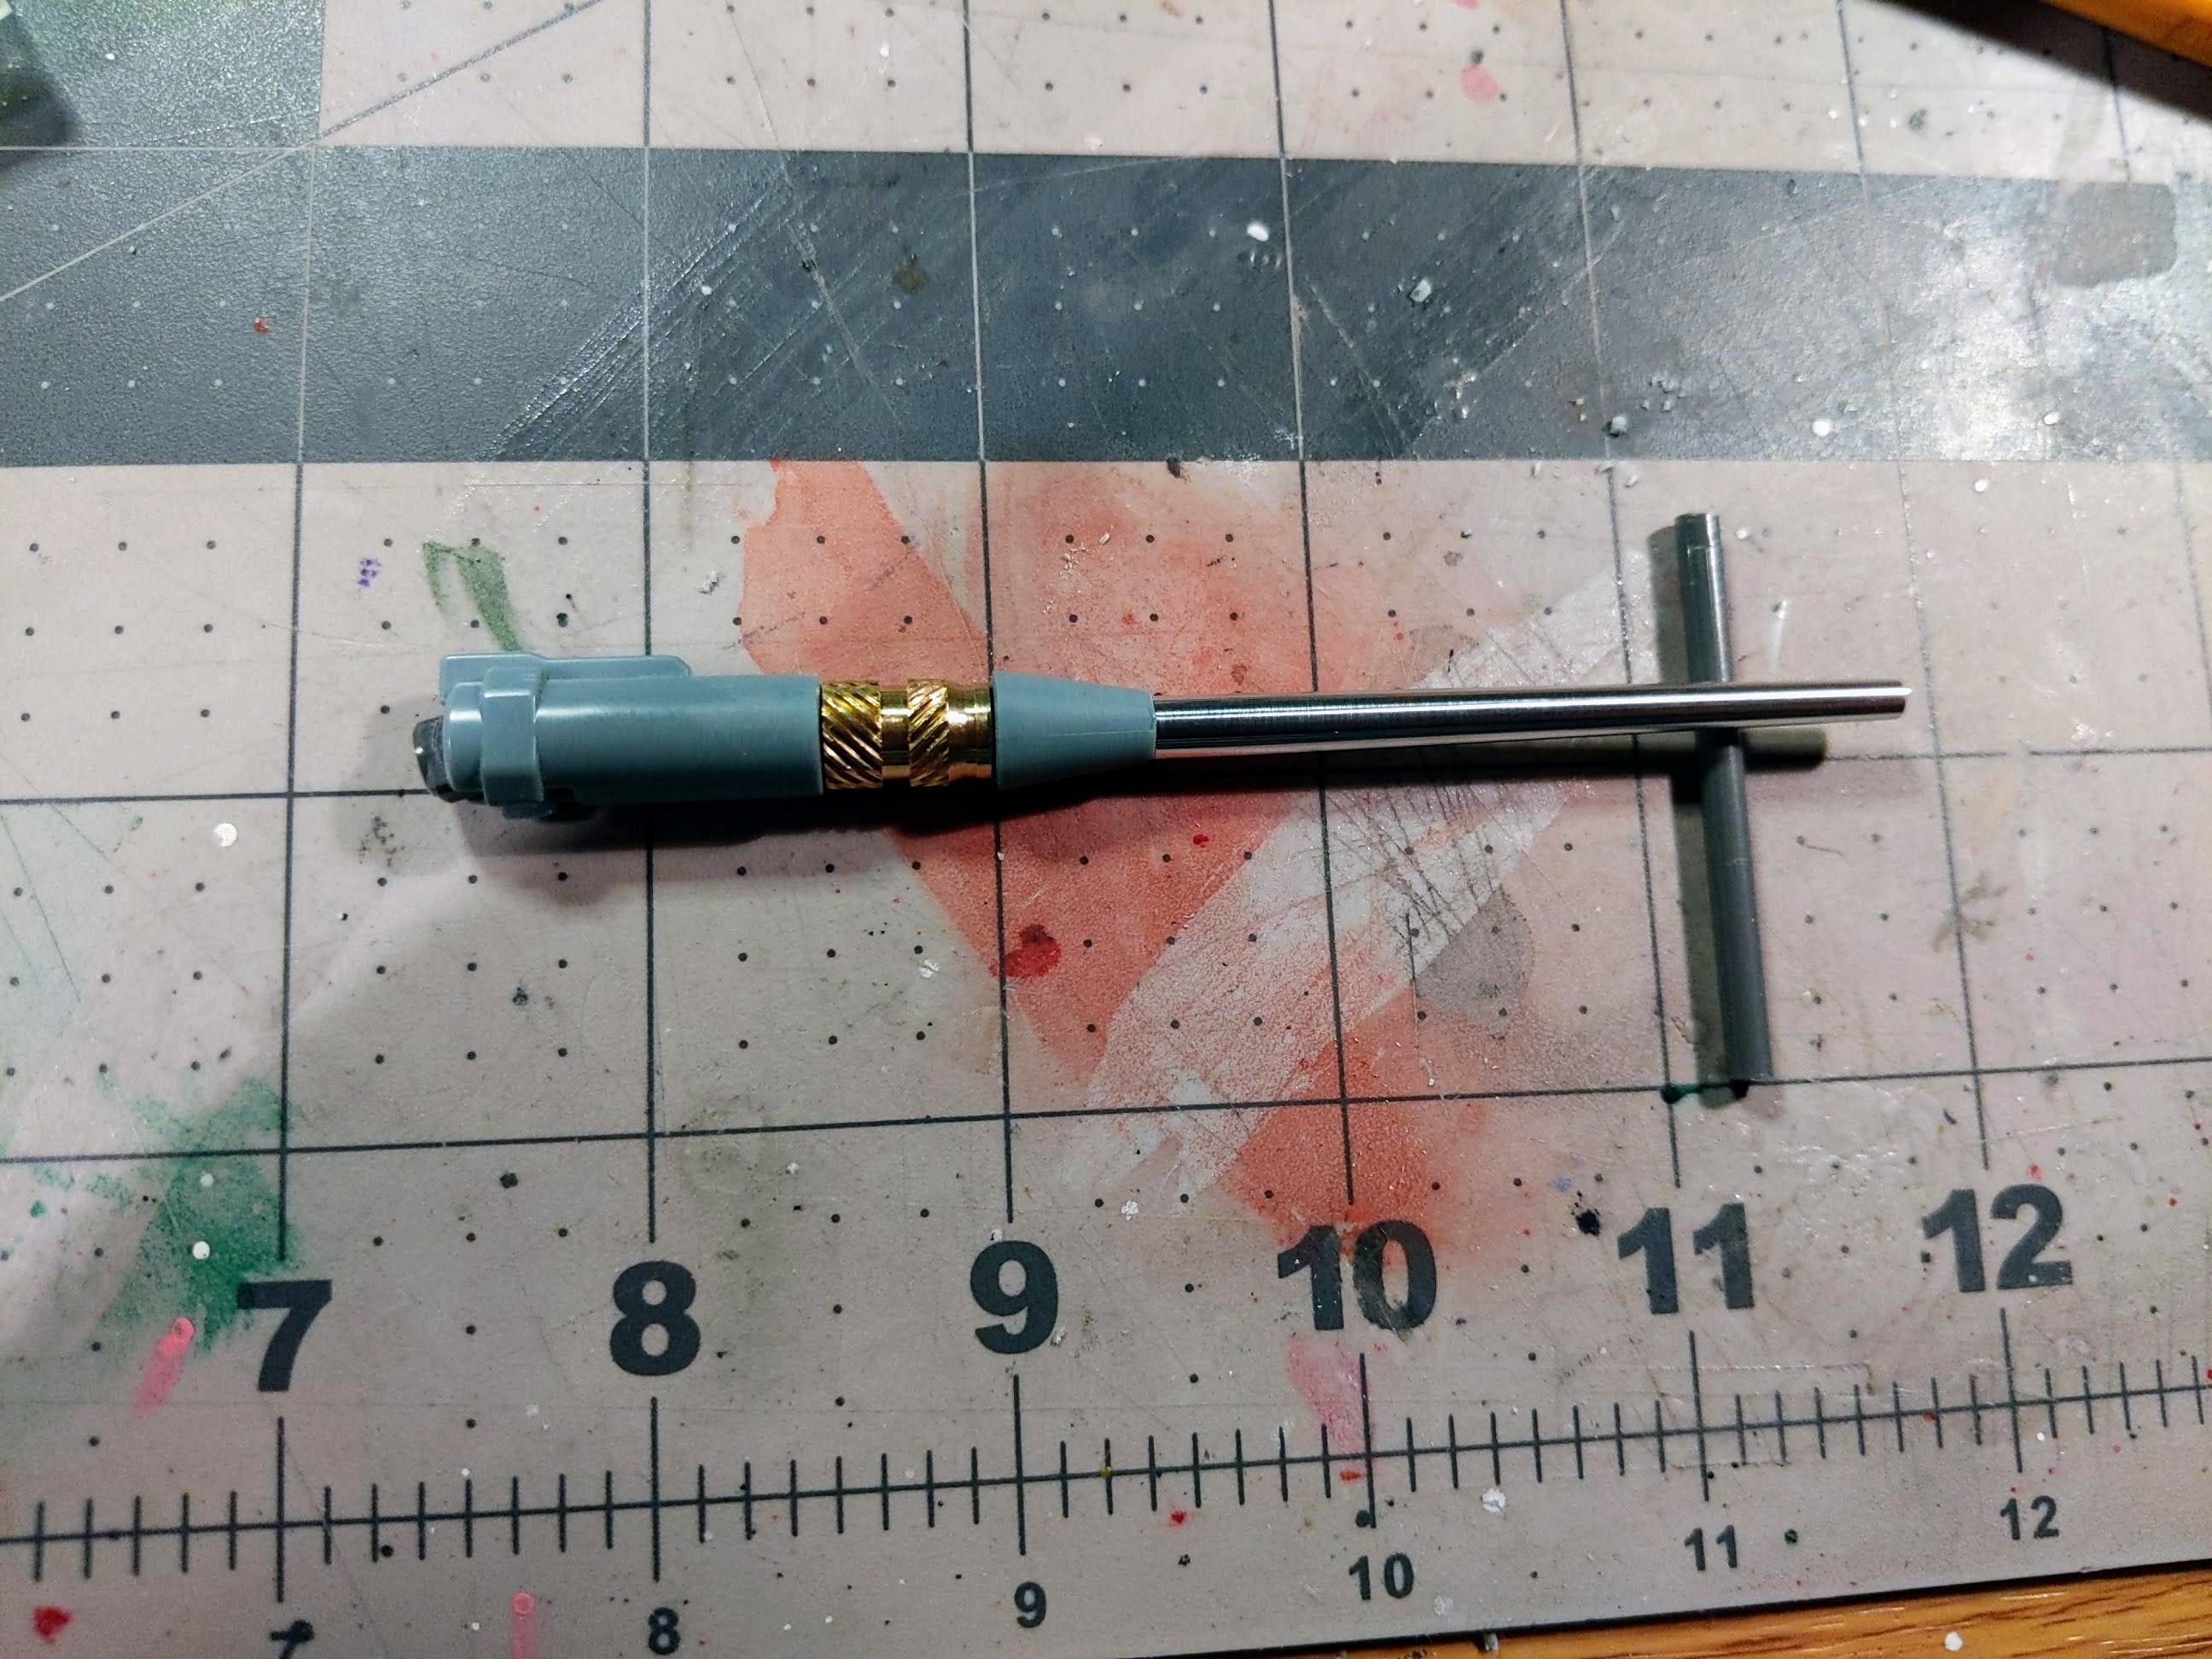
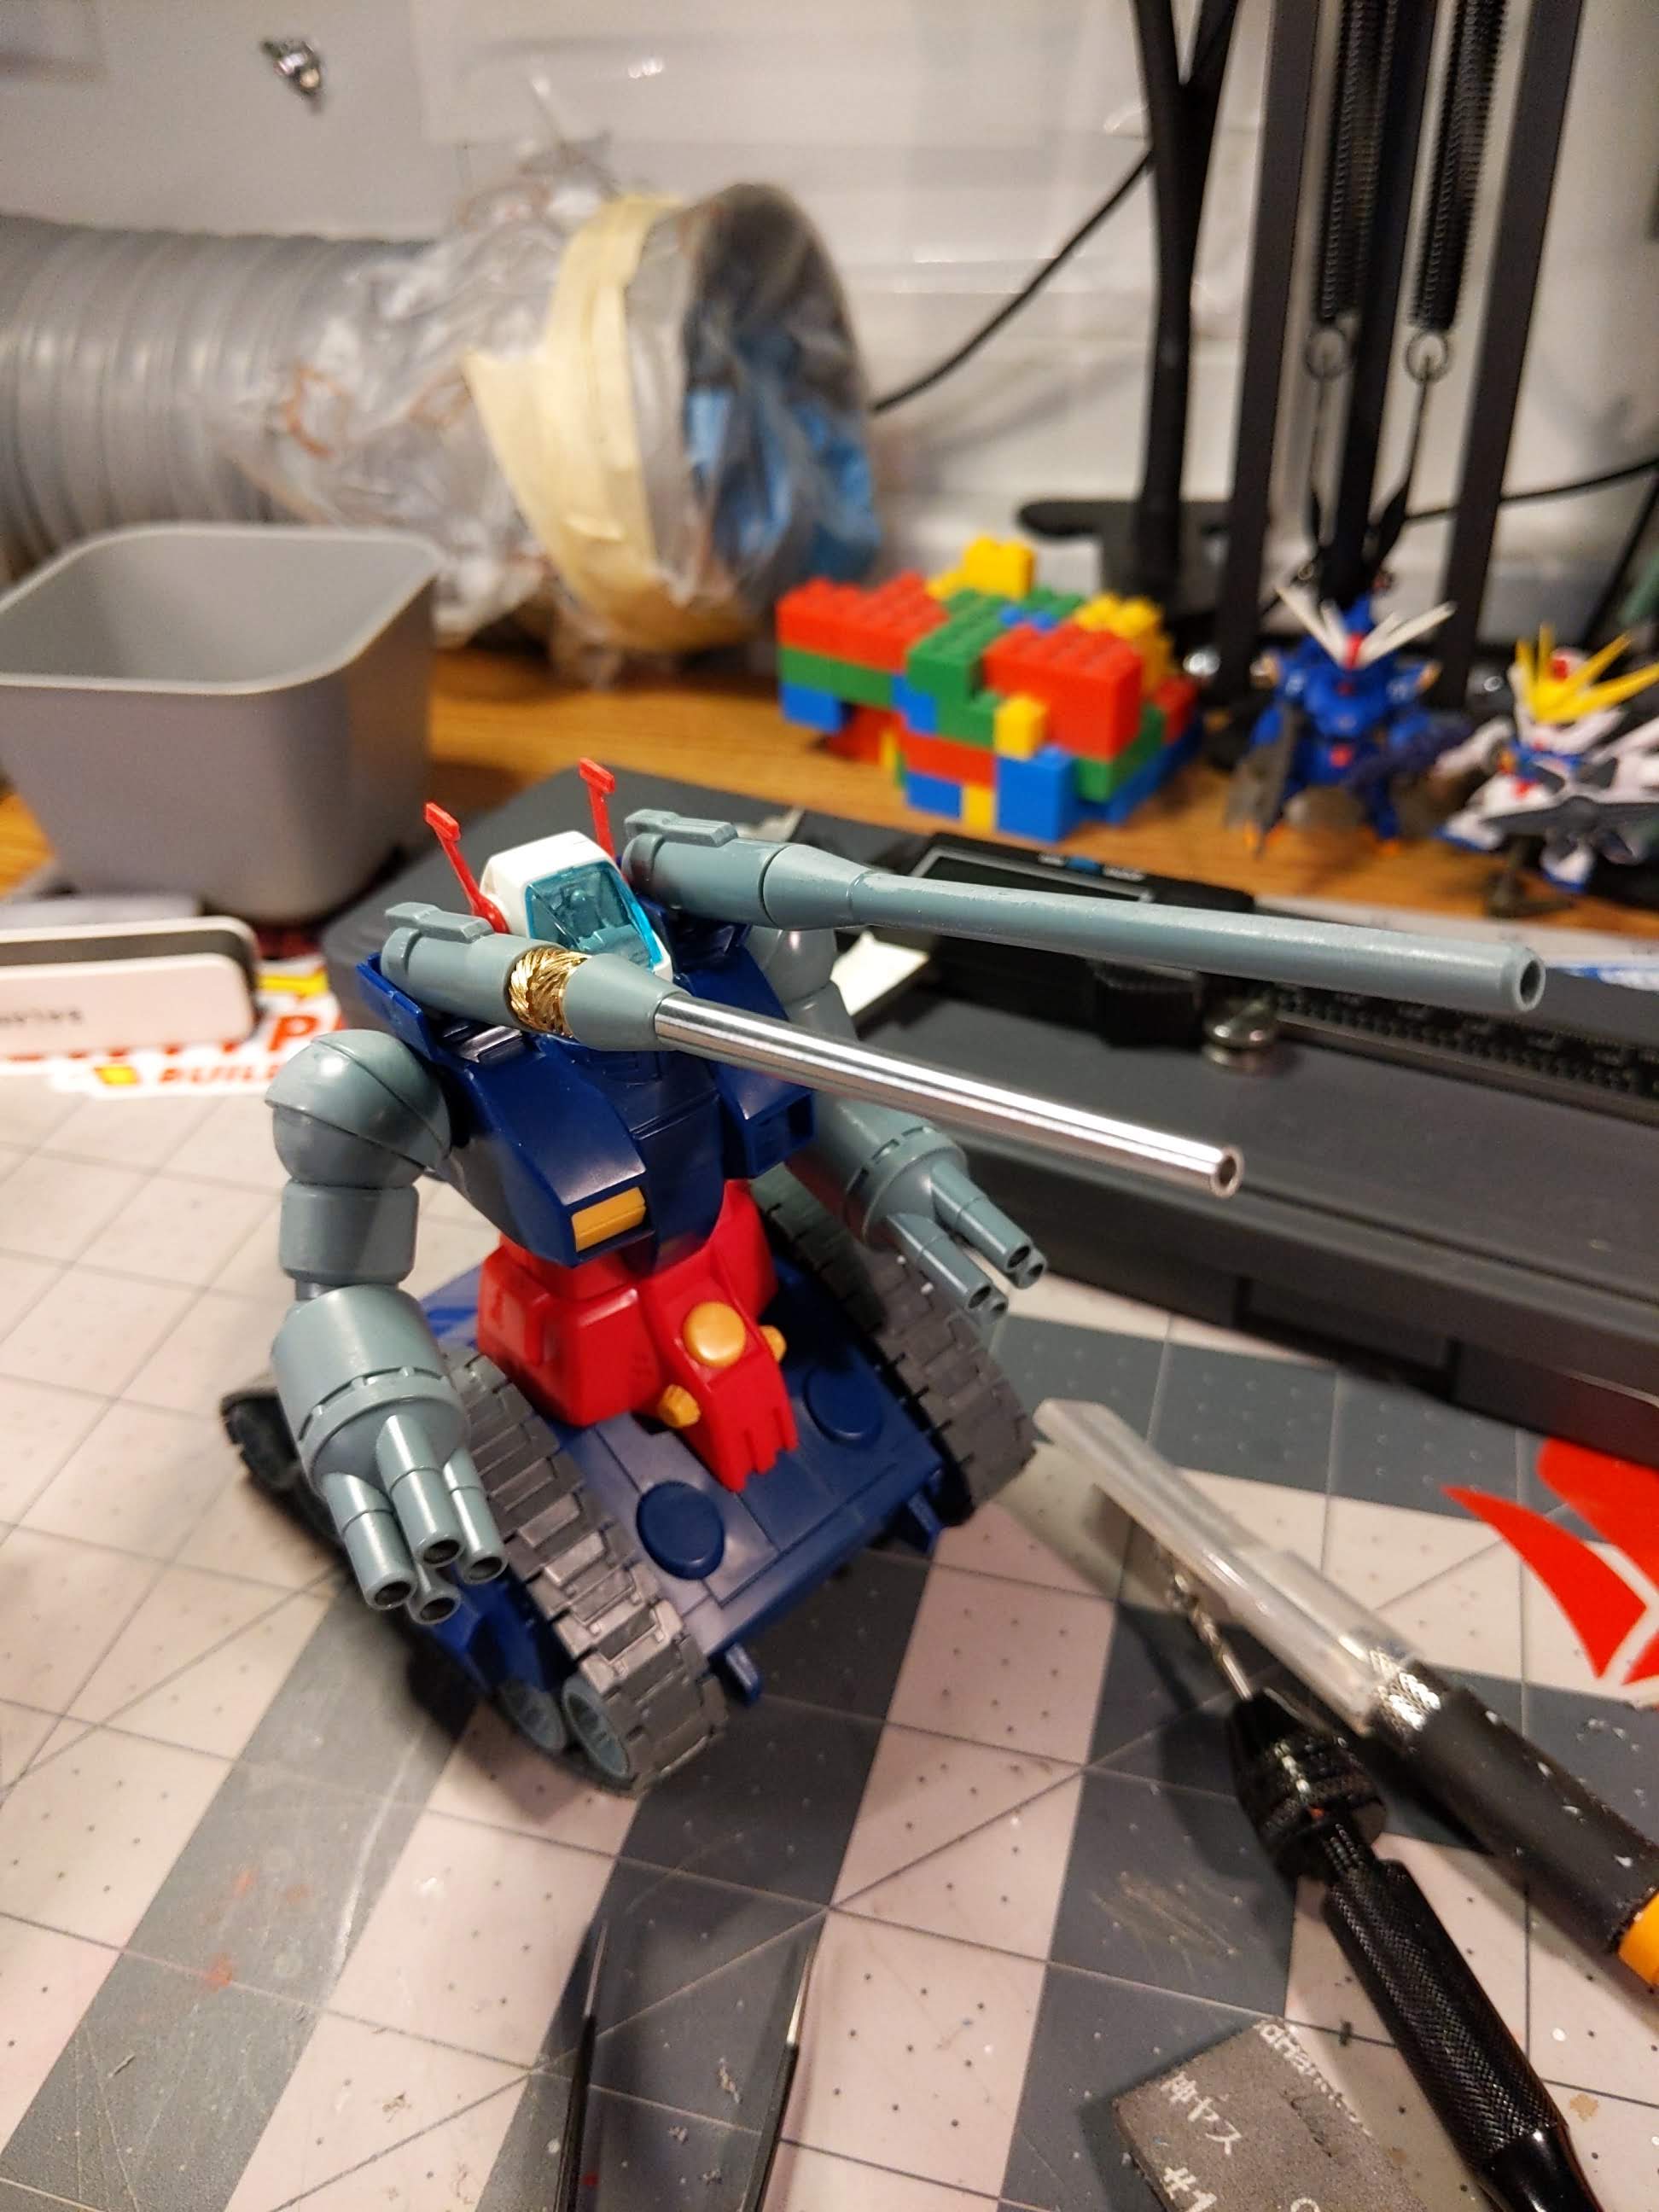
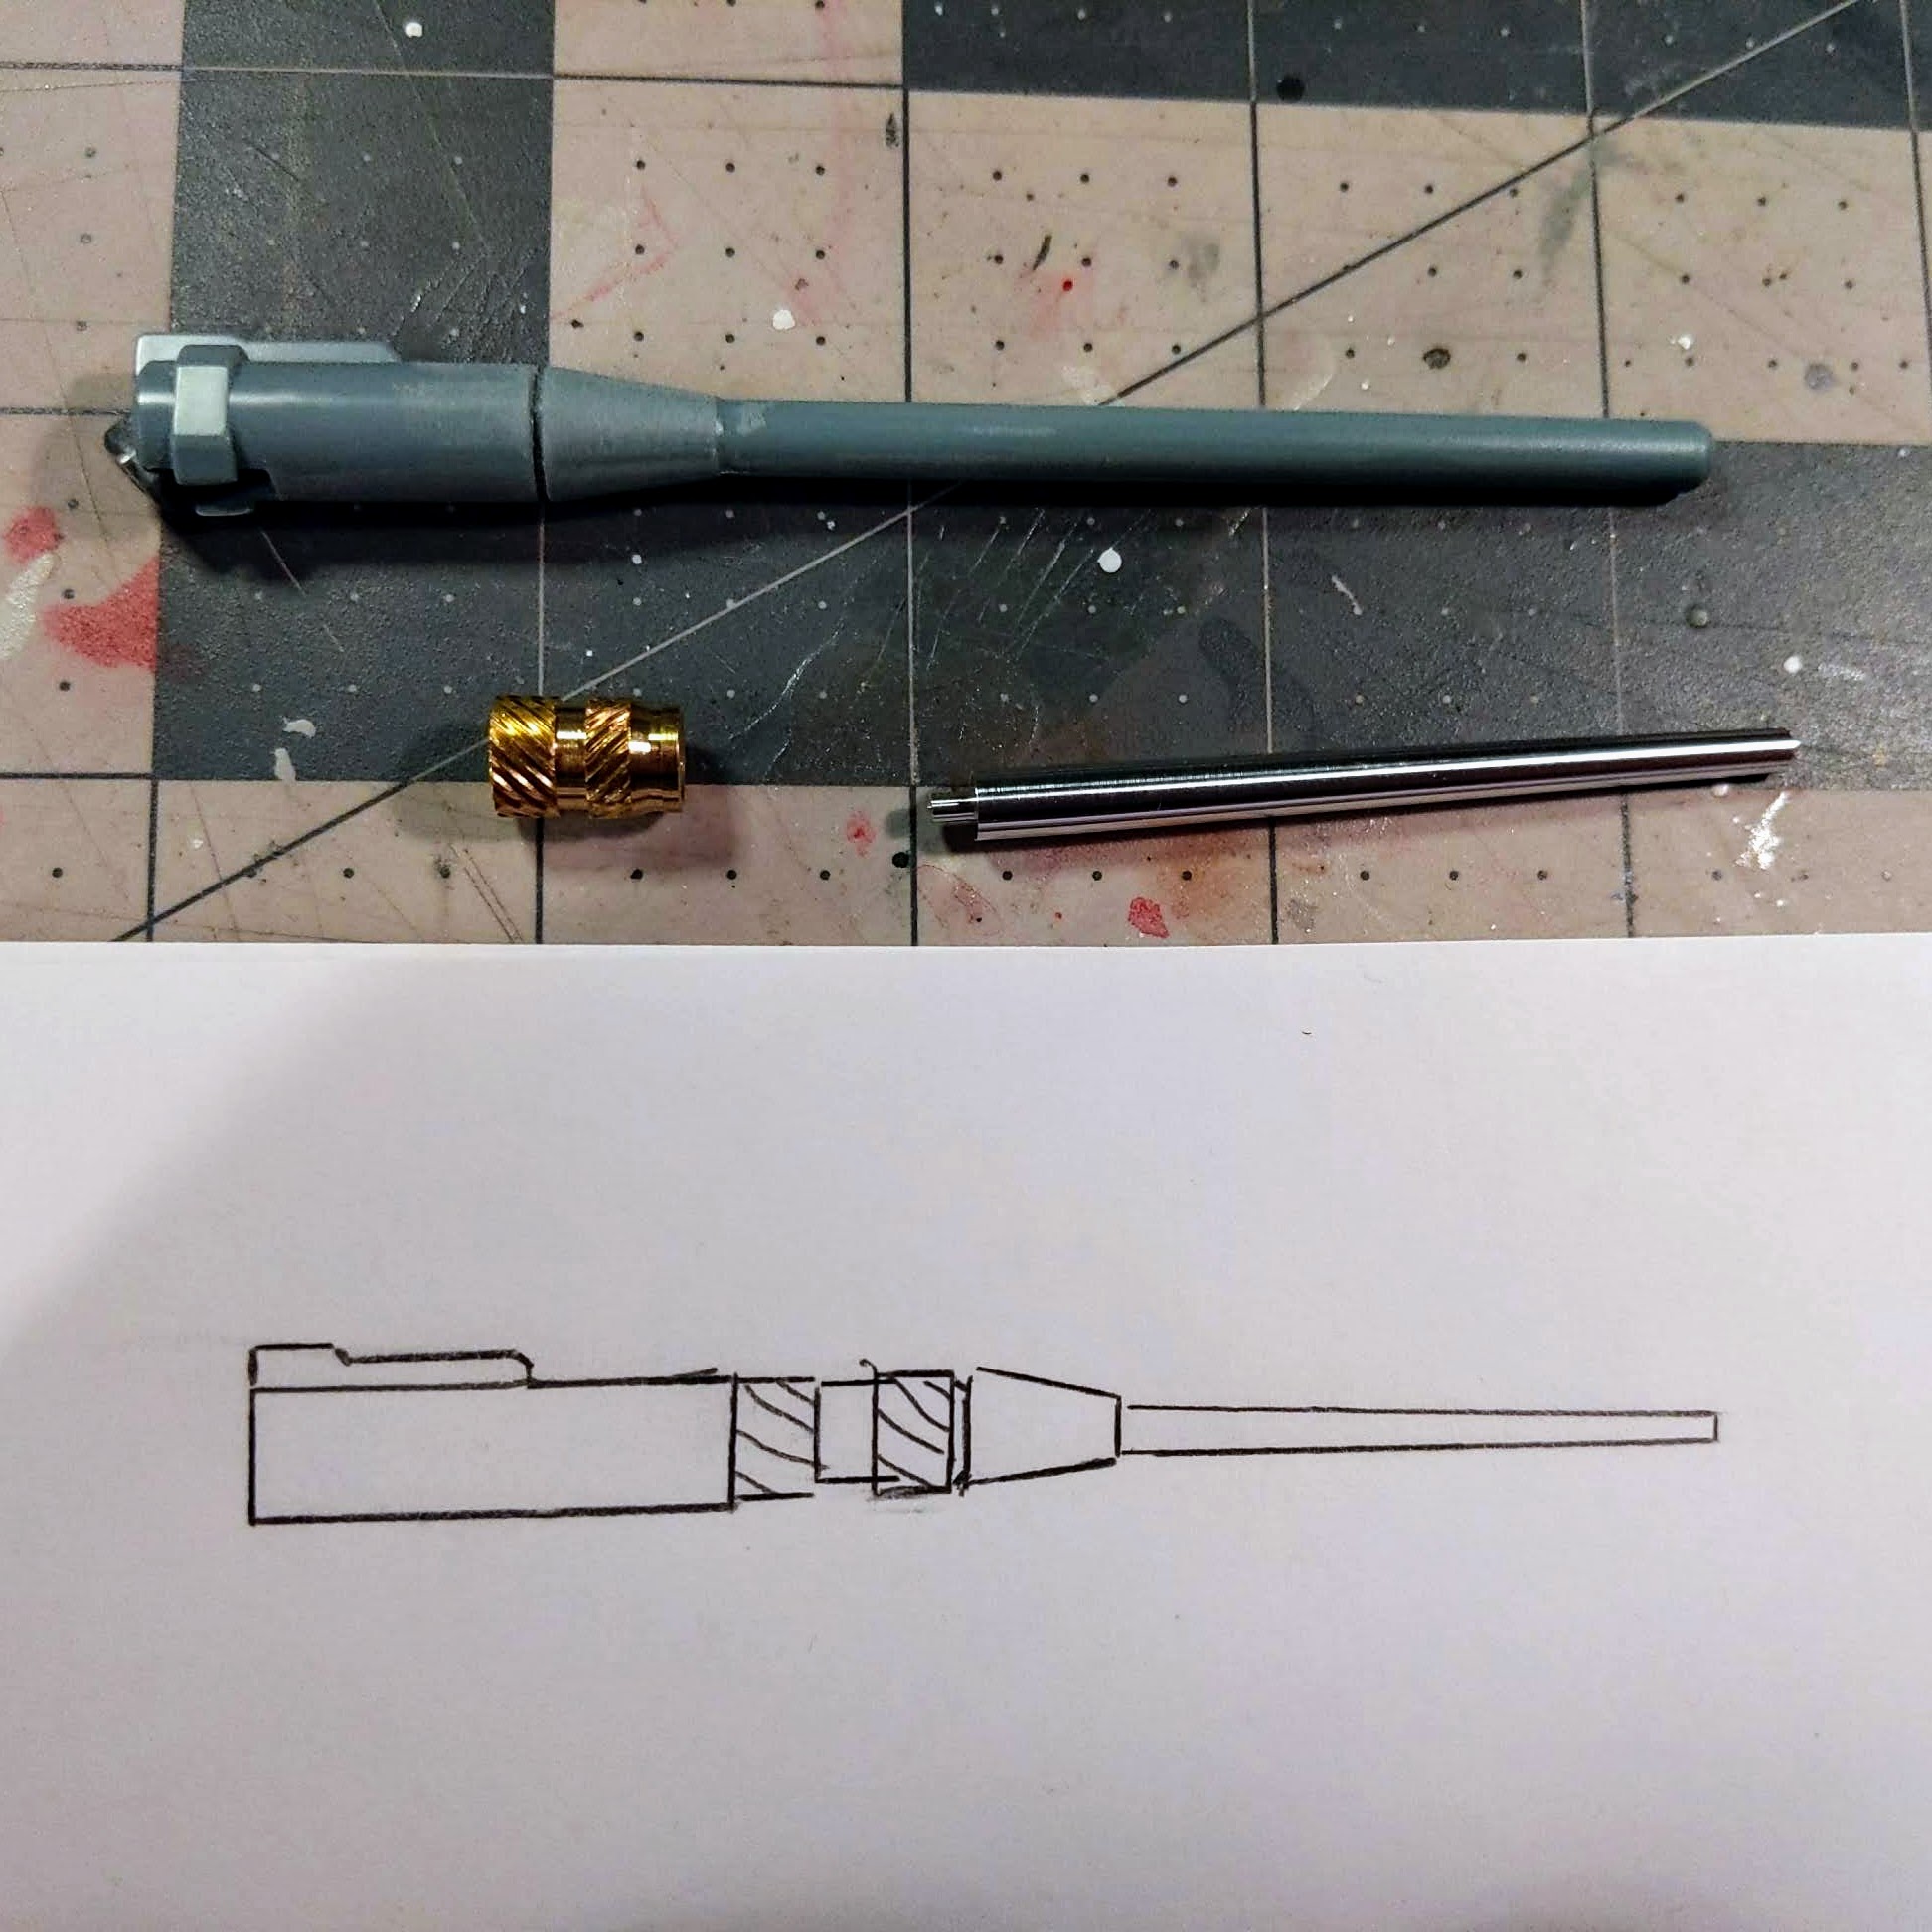
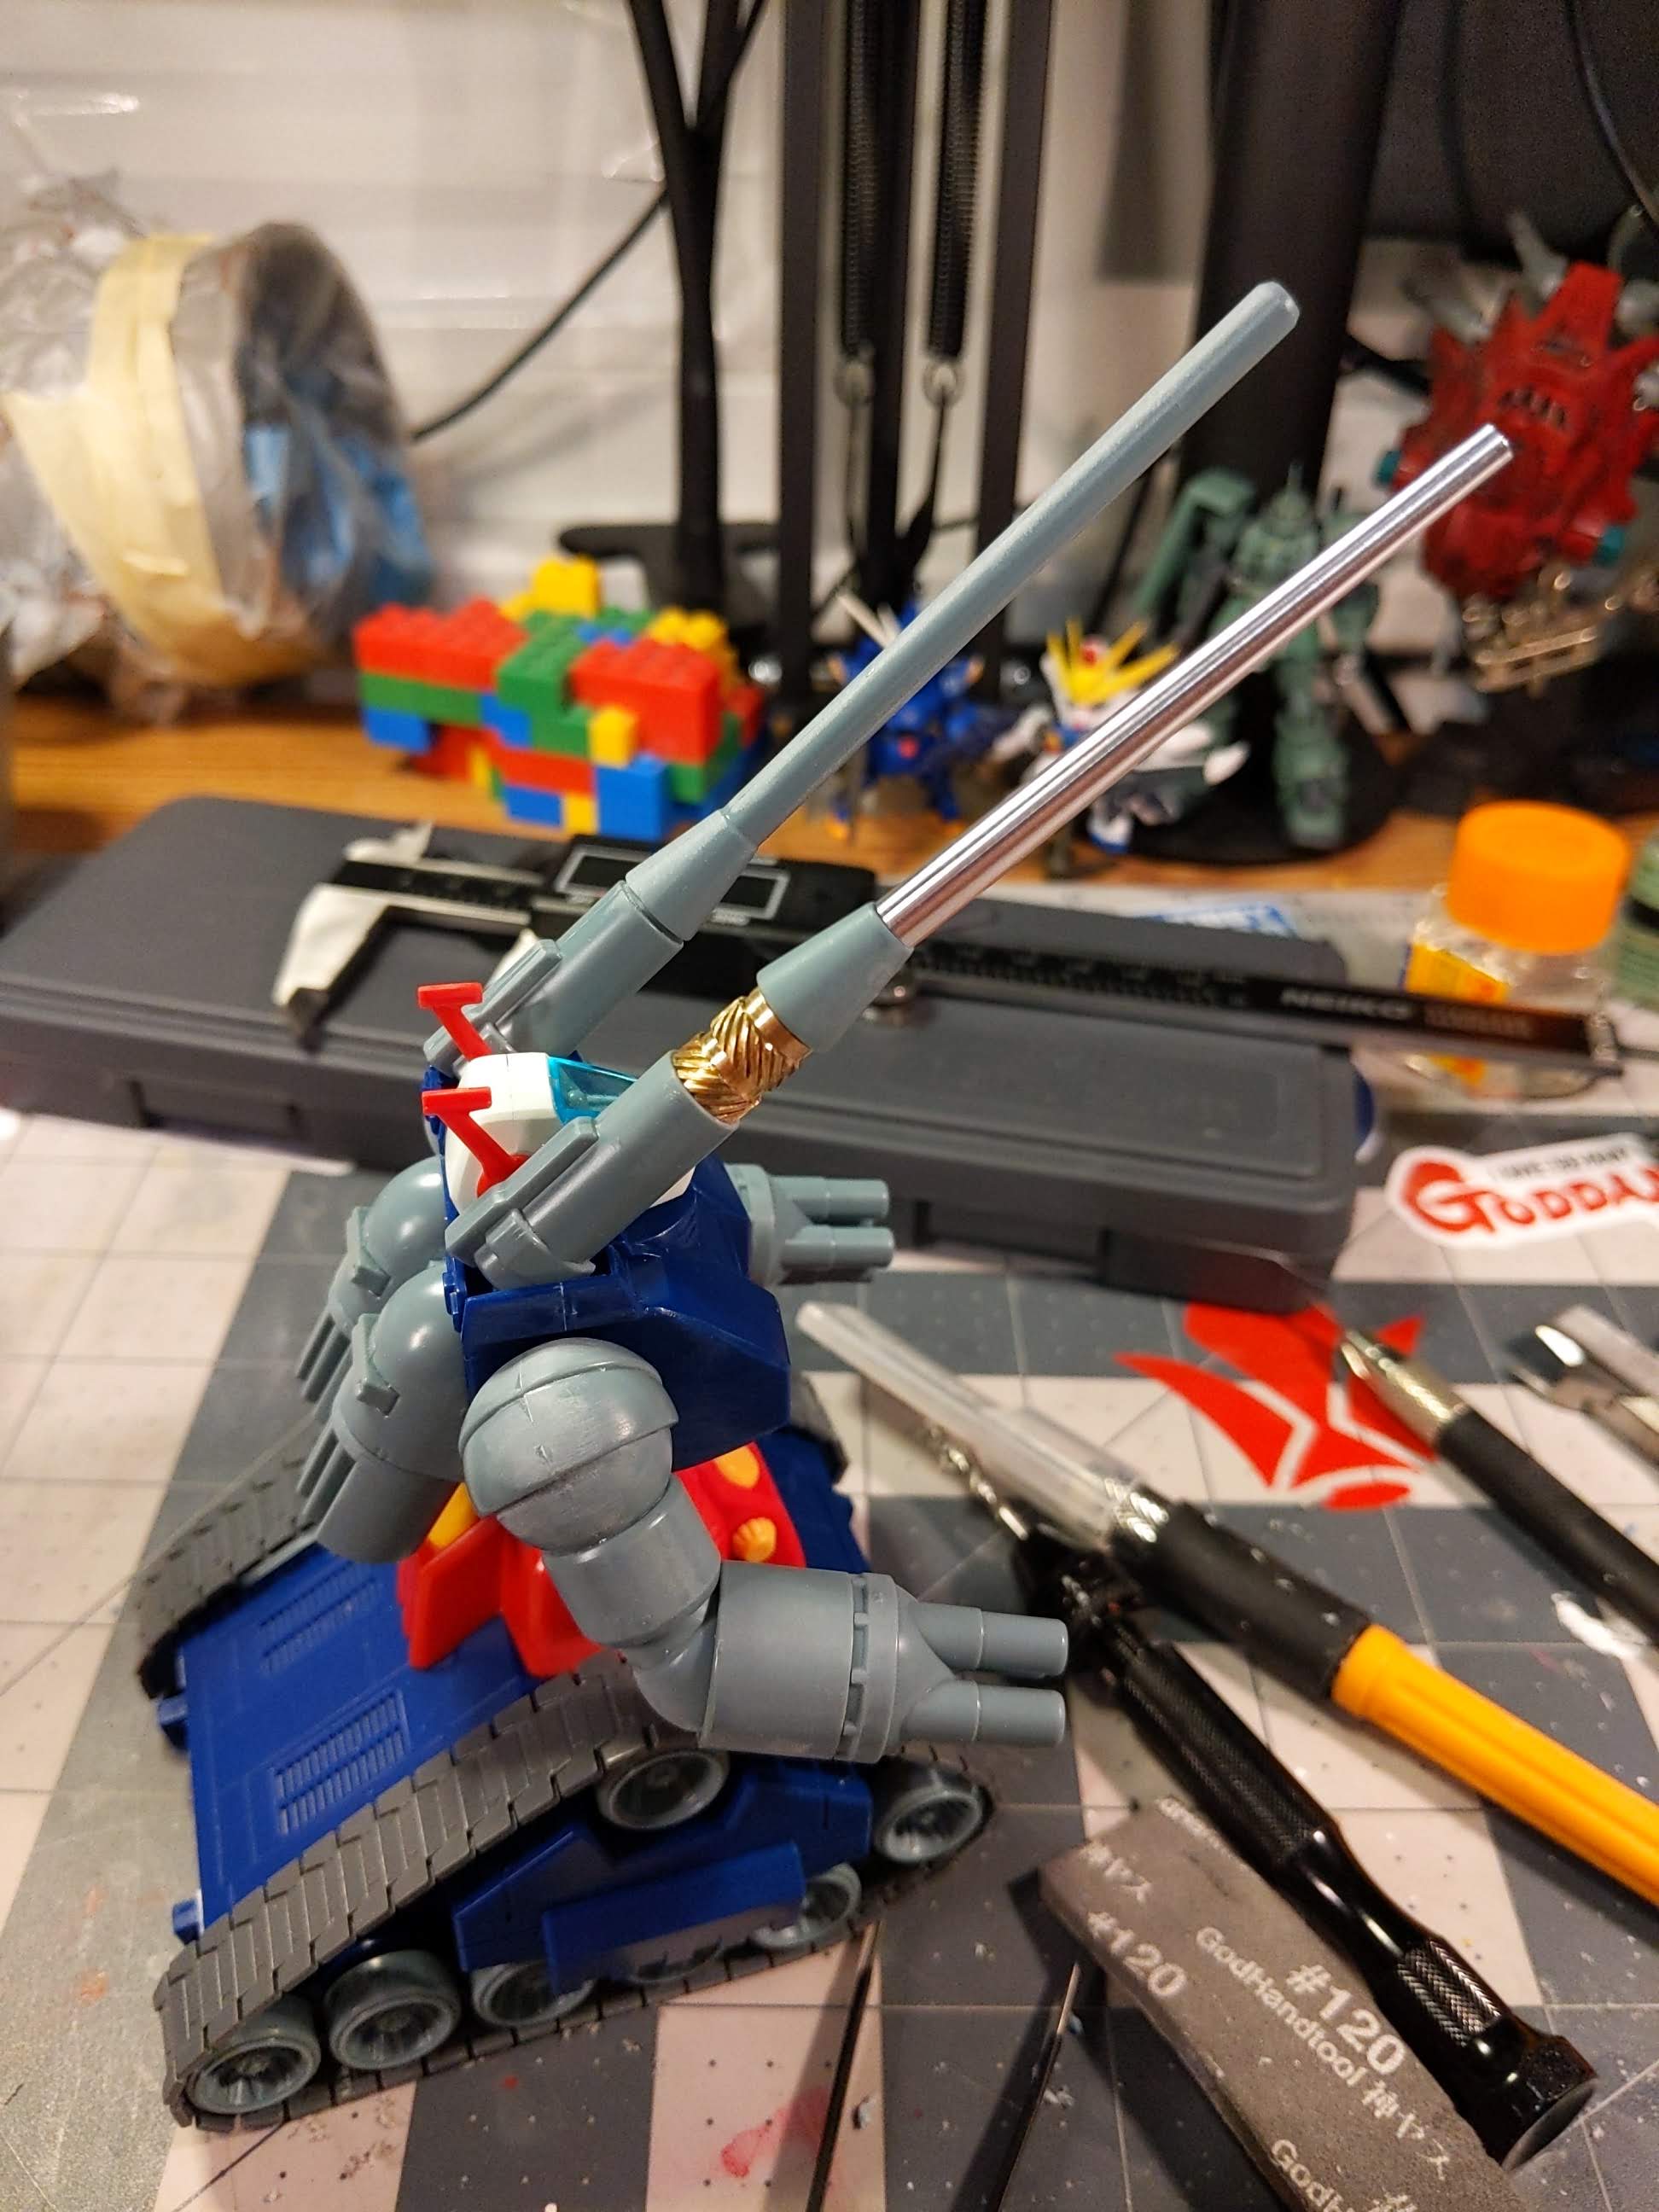
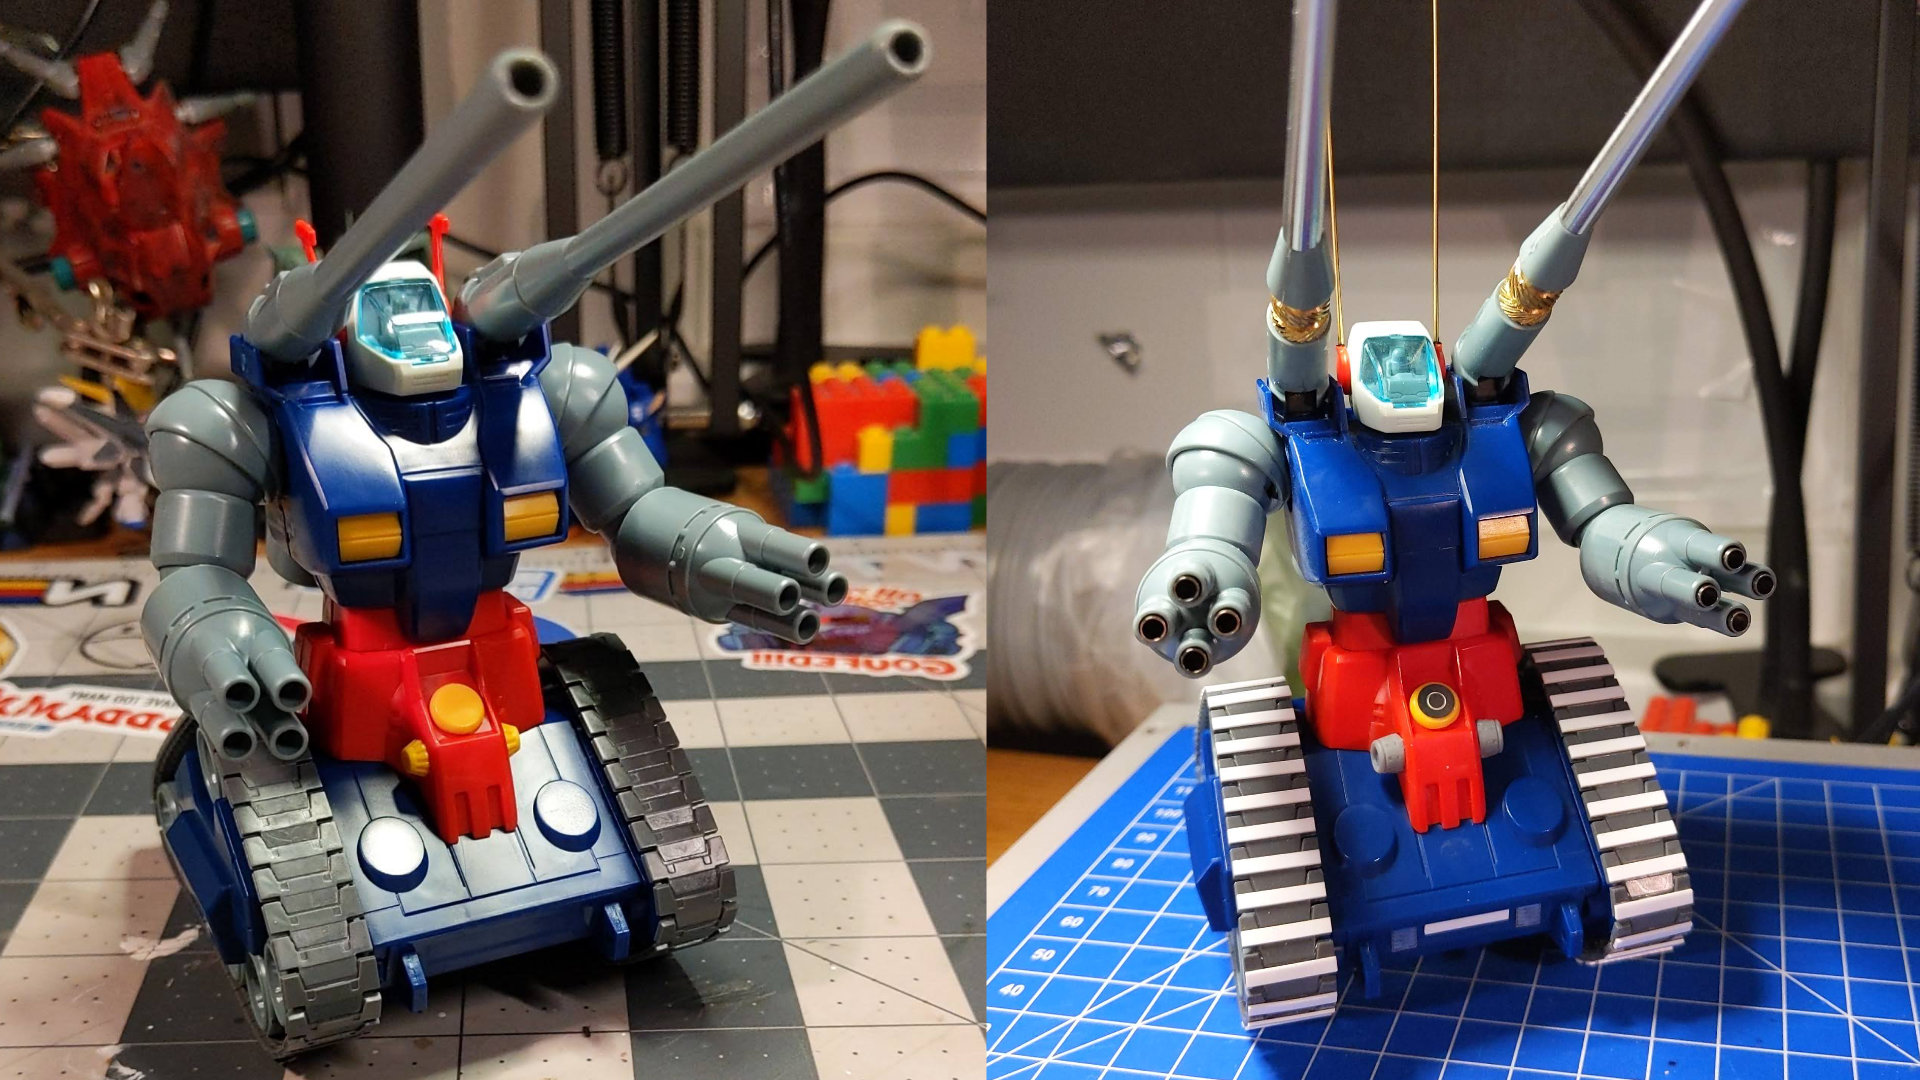
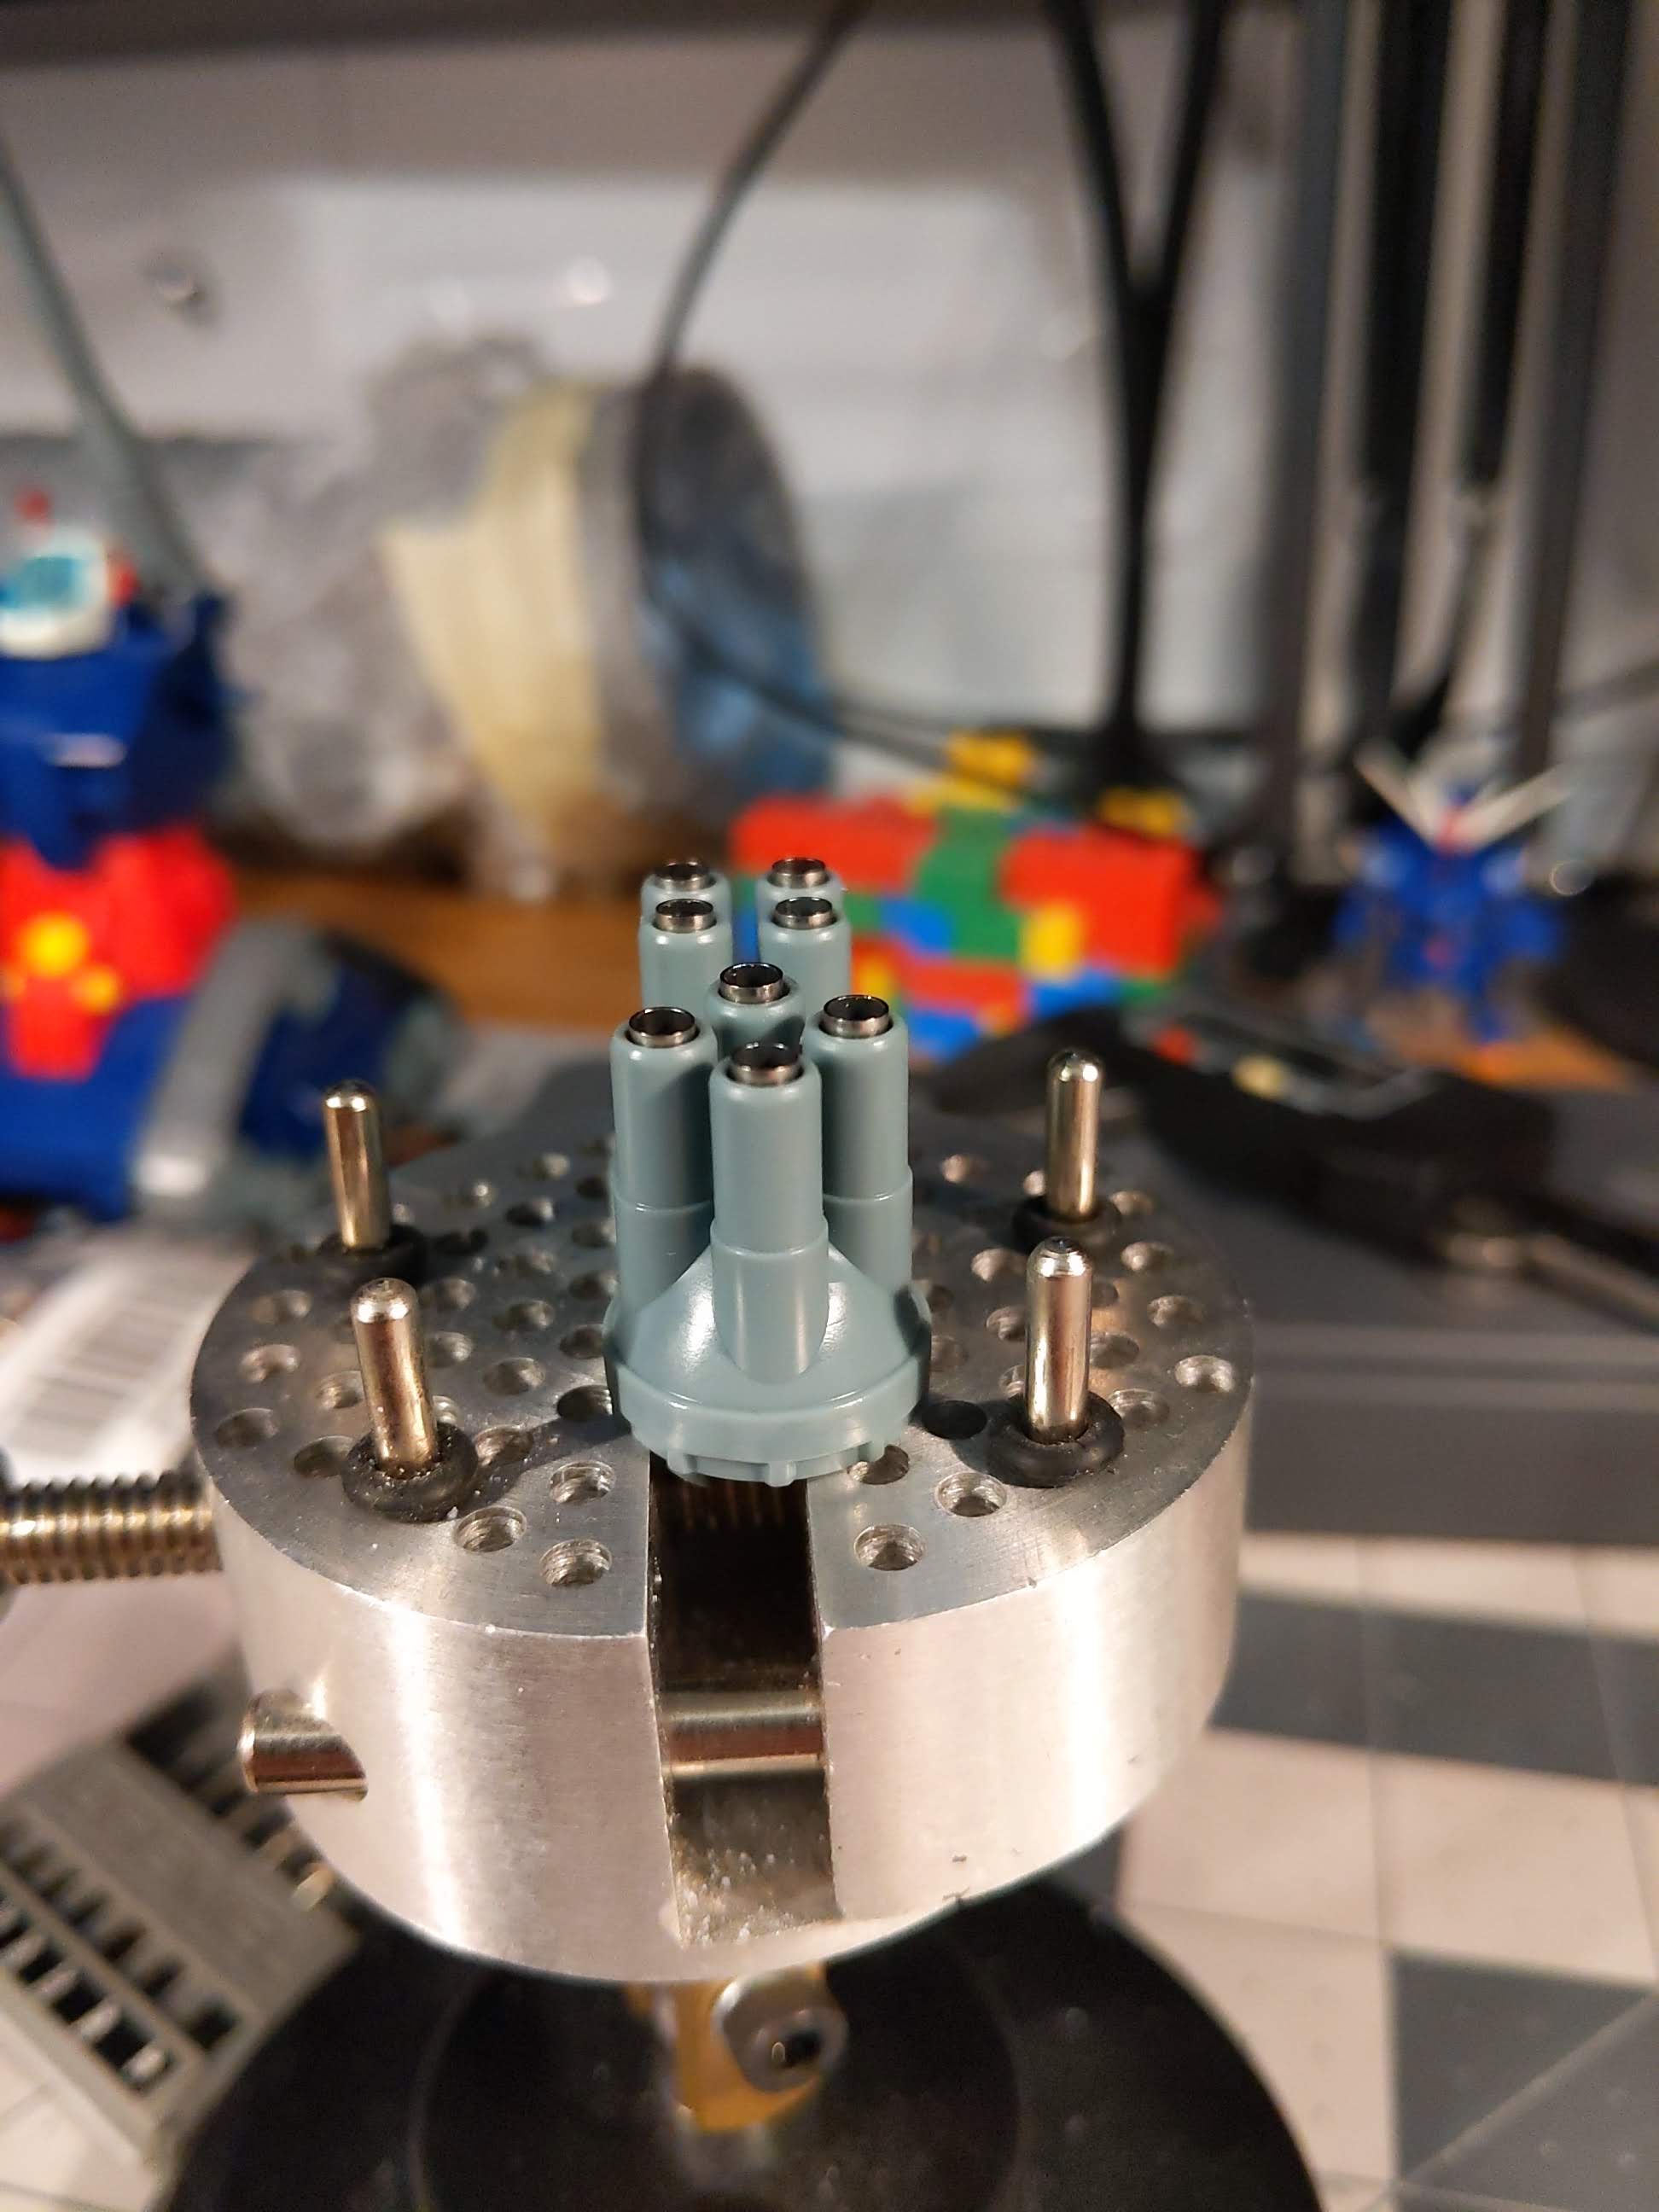
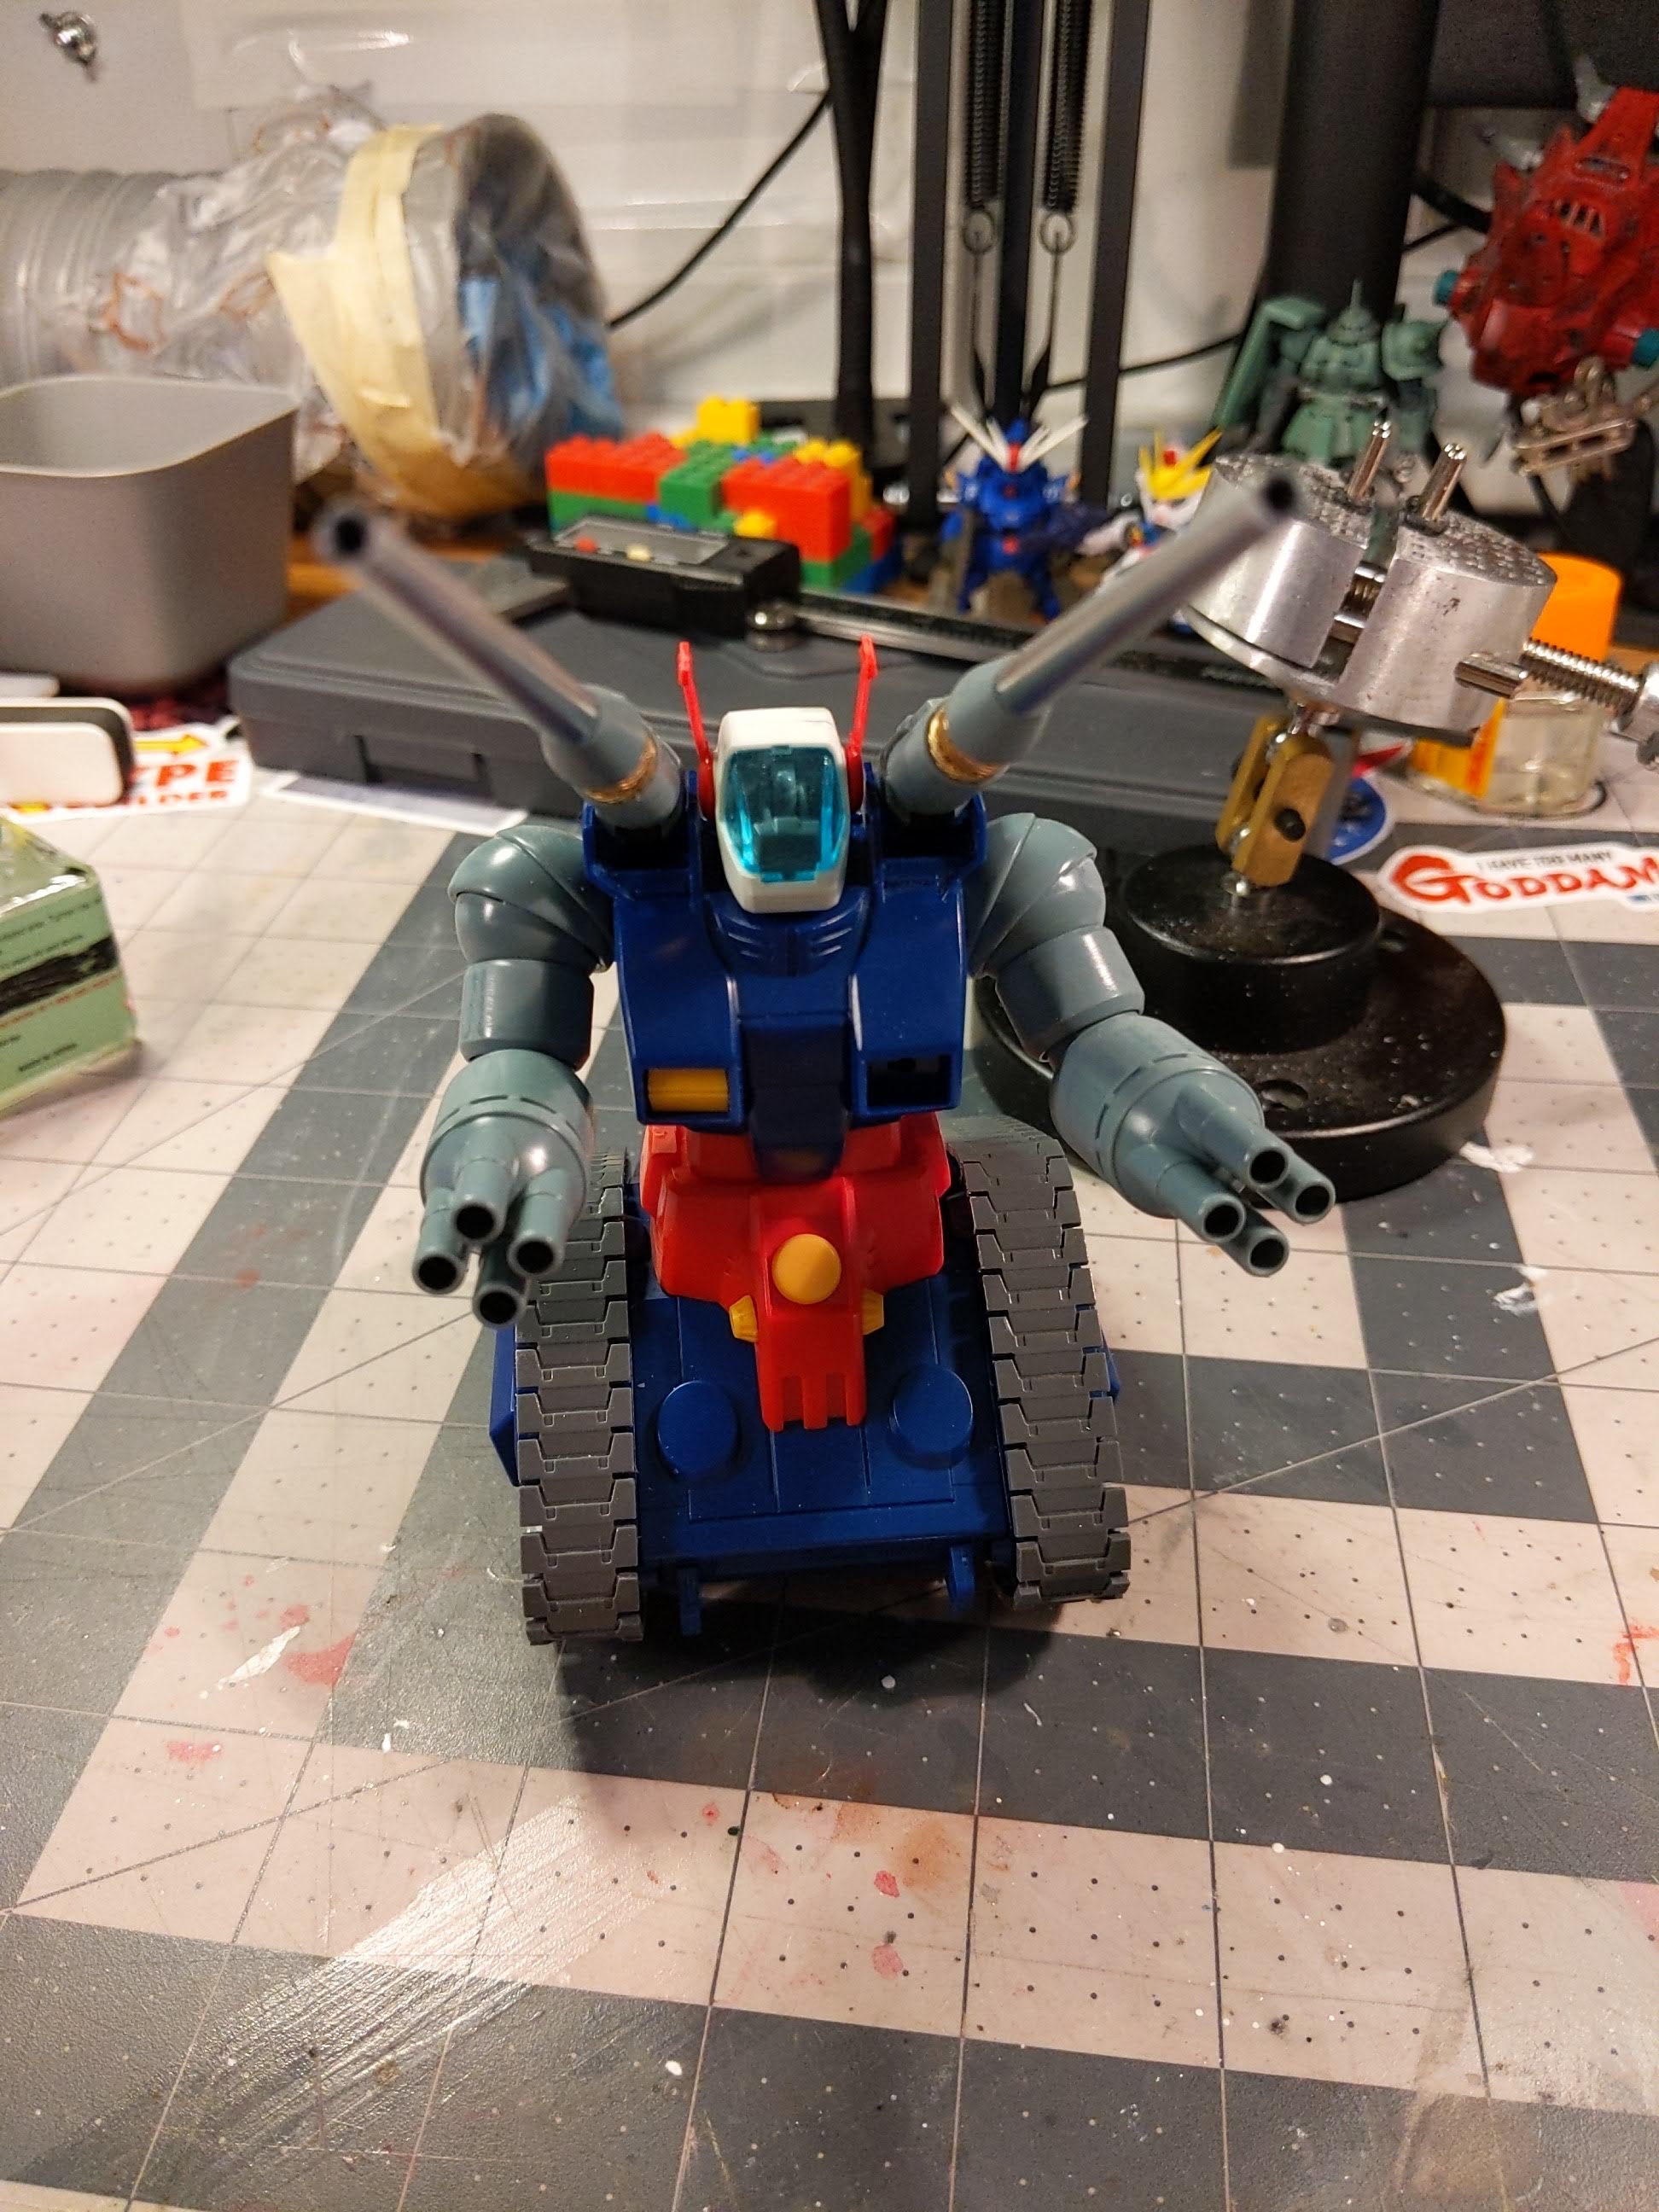
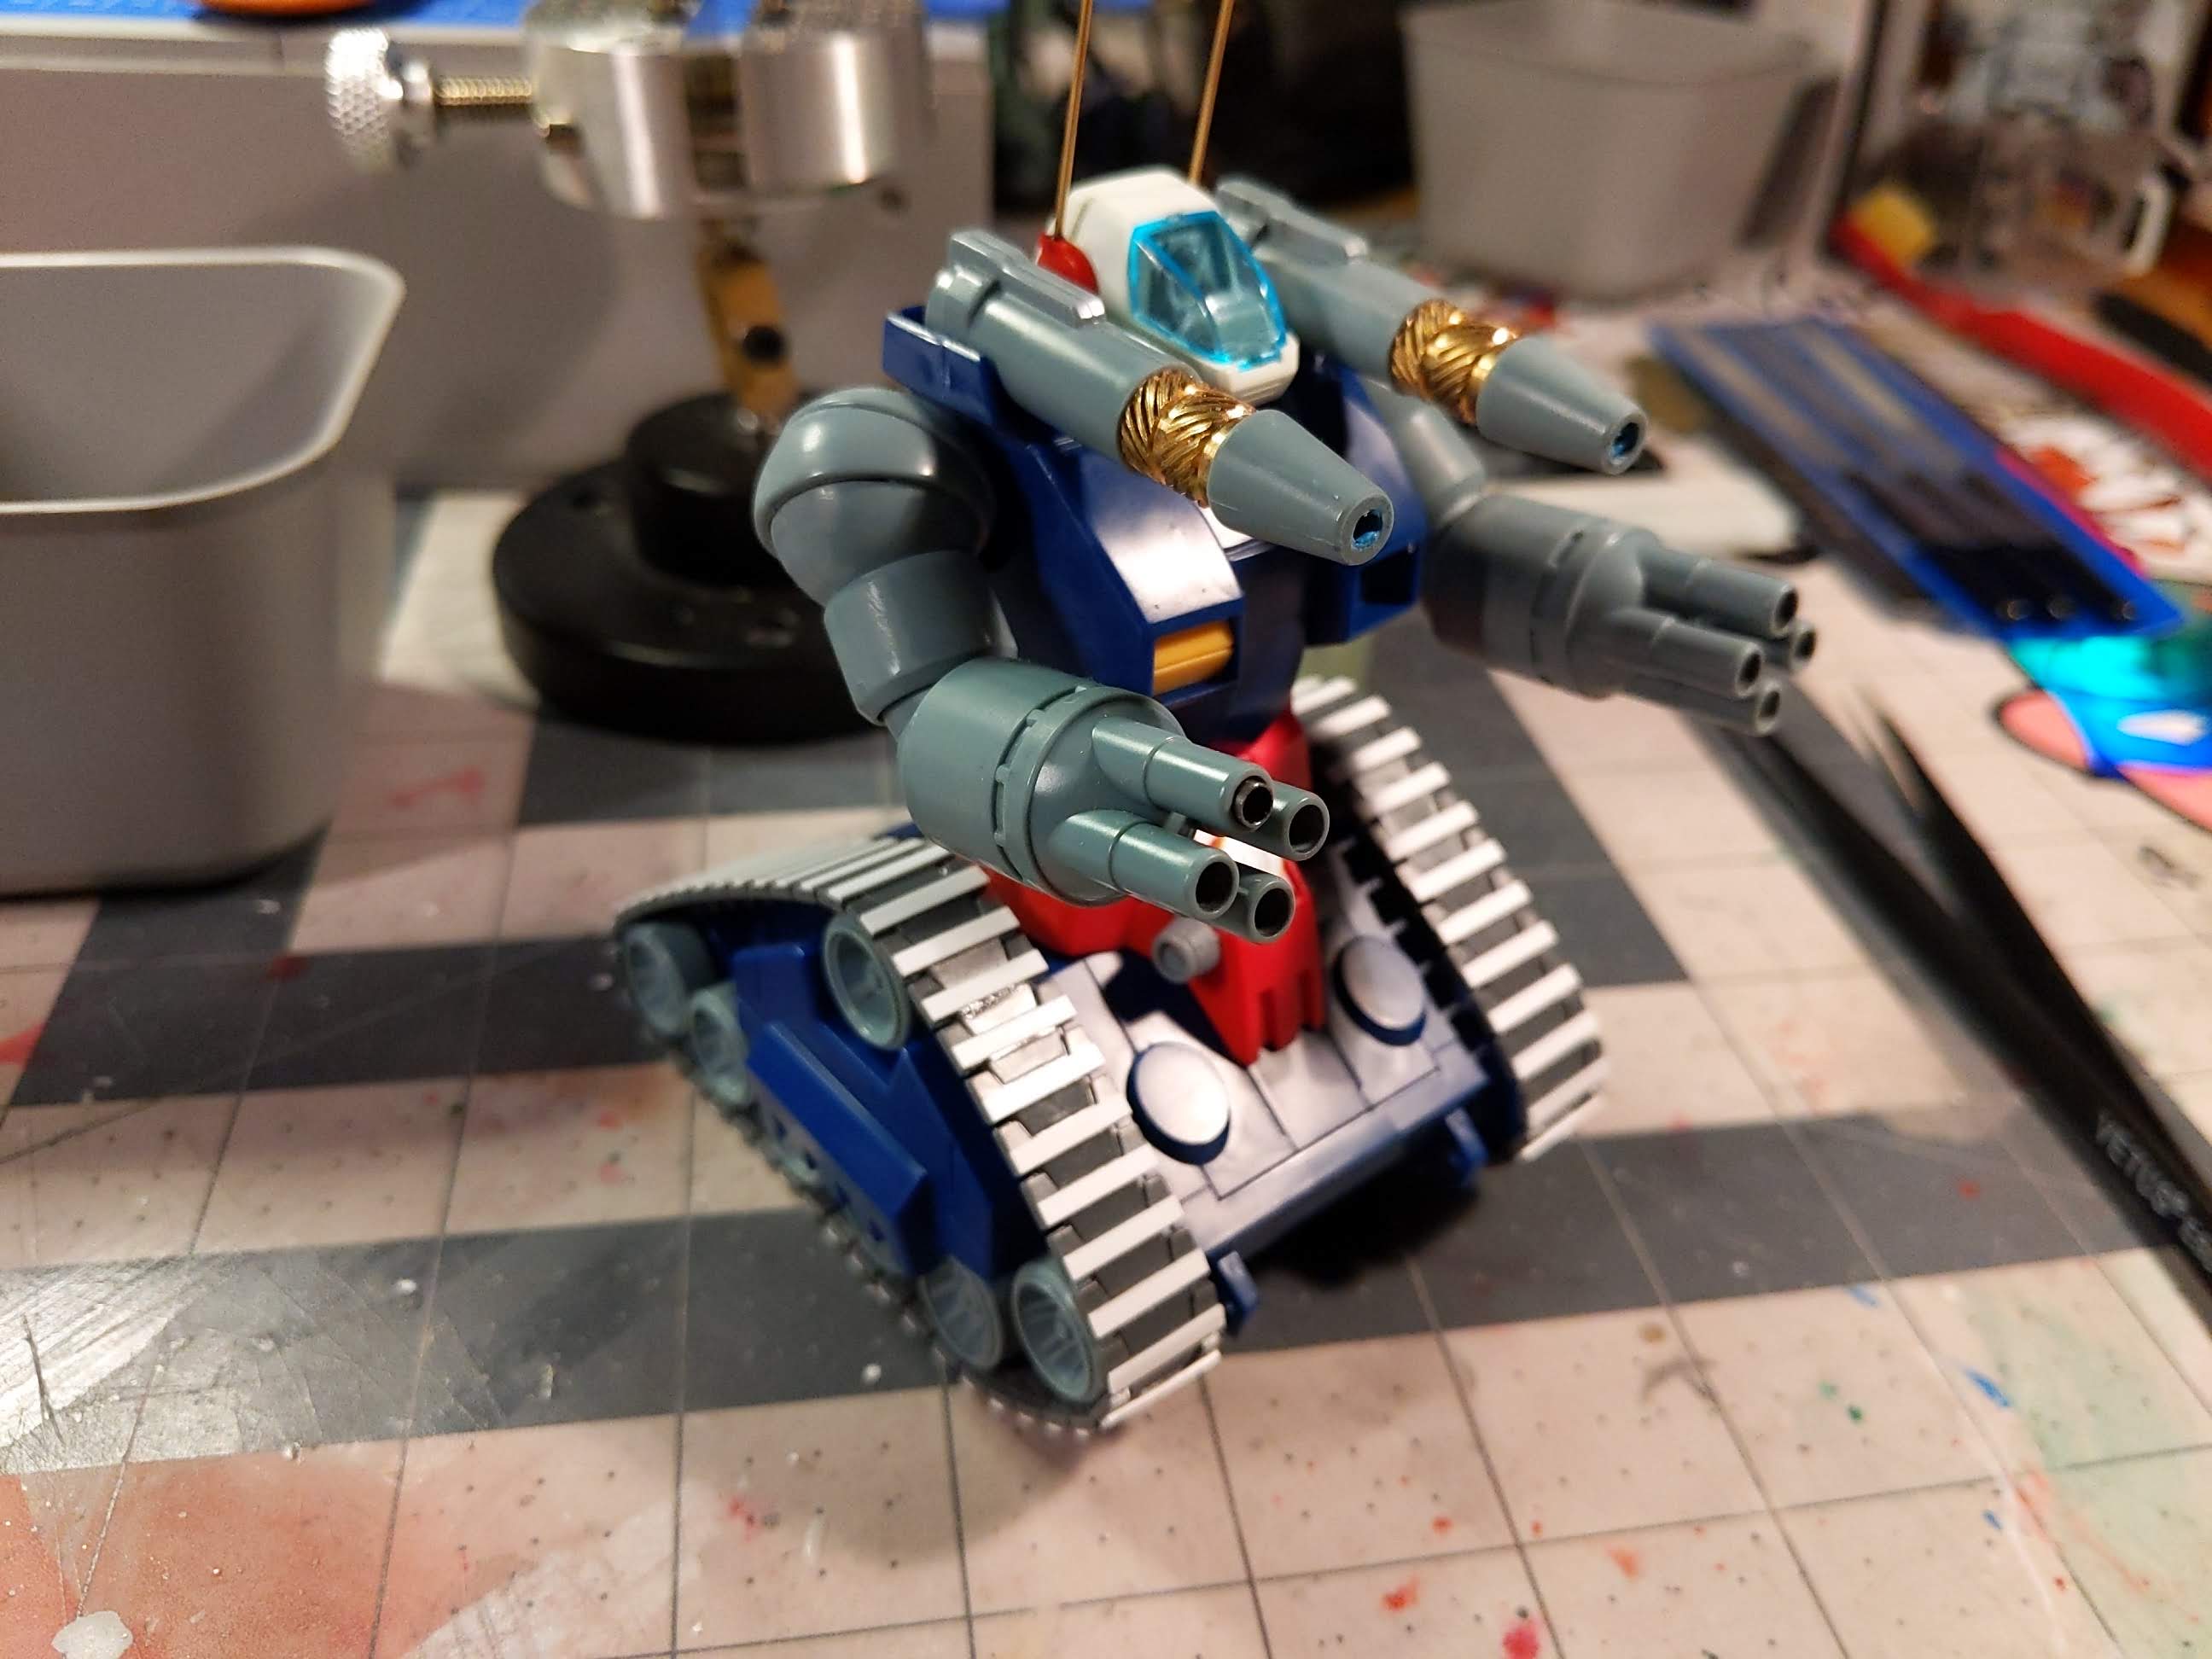
One of the main changes I wanted to make was to revamp the main cannons in the build. The originals are these long plain looking barrels that felt like they could have used a bit more fire power. I opted to use this as an opportunity for a bit of scratch building and incorporating more metal parts for detailing.
The barrel itself comes from a metal replacement for a 1/35 scale M4 Sherman tank. The brass colored section is a heat press insert for giving threaded connections on 3D prints. Heat press inserts provide a lot of detail especially for any sort of connection or weapon barrel and are fairly cheap to get in bulk.
I cut the barrel off into 3 segments. The long barrel itself, and split it at the line in the shorter portion. I then shaved out the insides to allow me to use a segment of the original barrel and some blue tack to combine it all together temporarily so I could see how it worked before inserting magnetic connections to allow it to be broken down for painting.
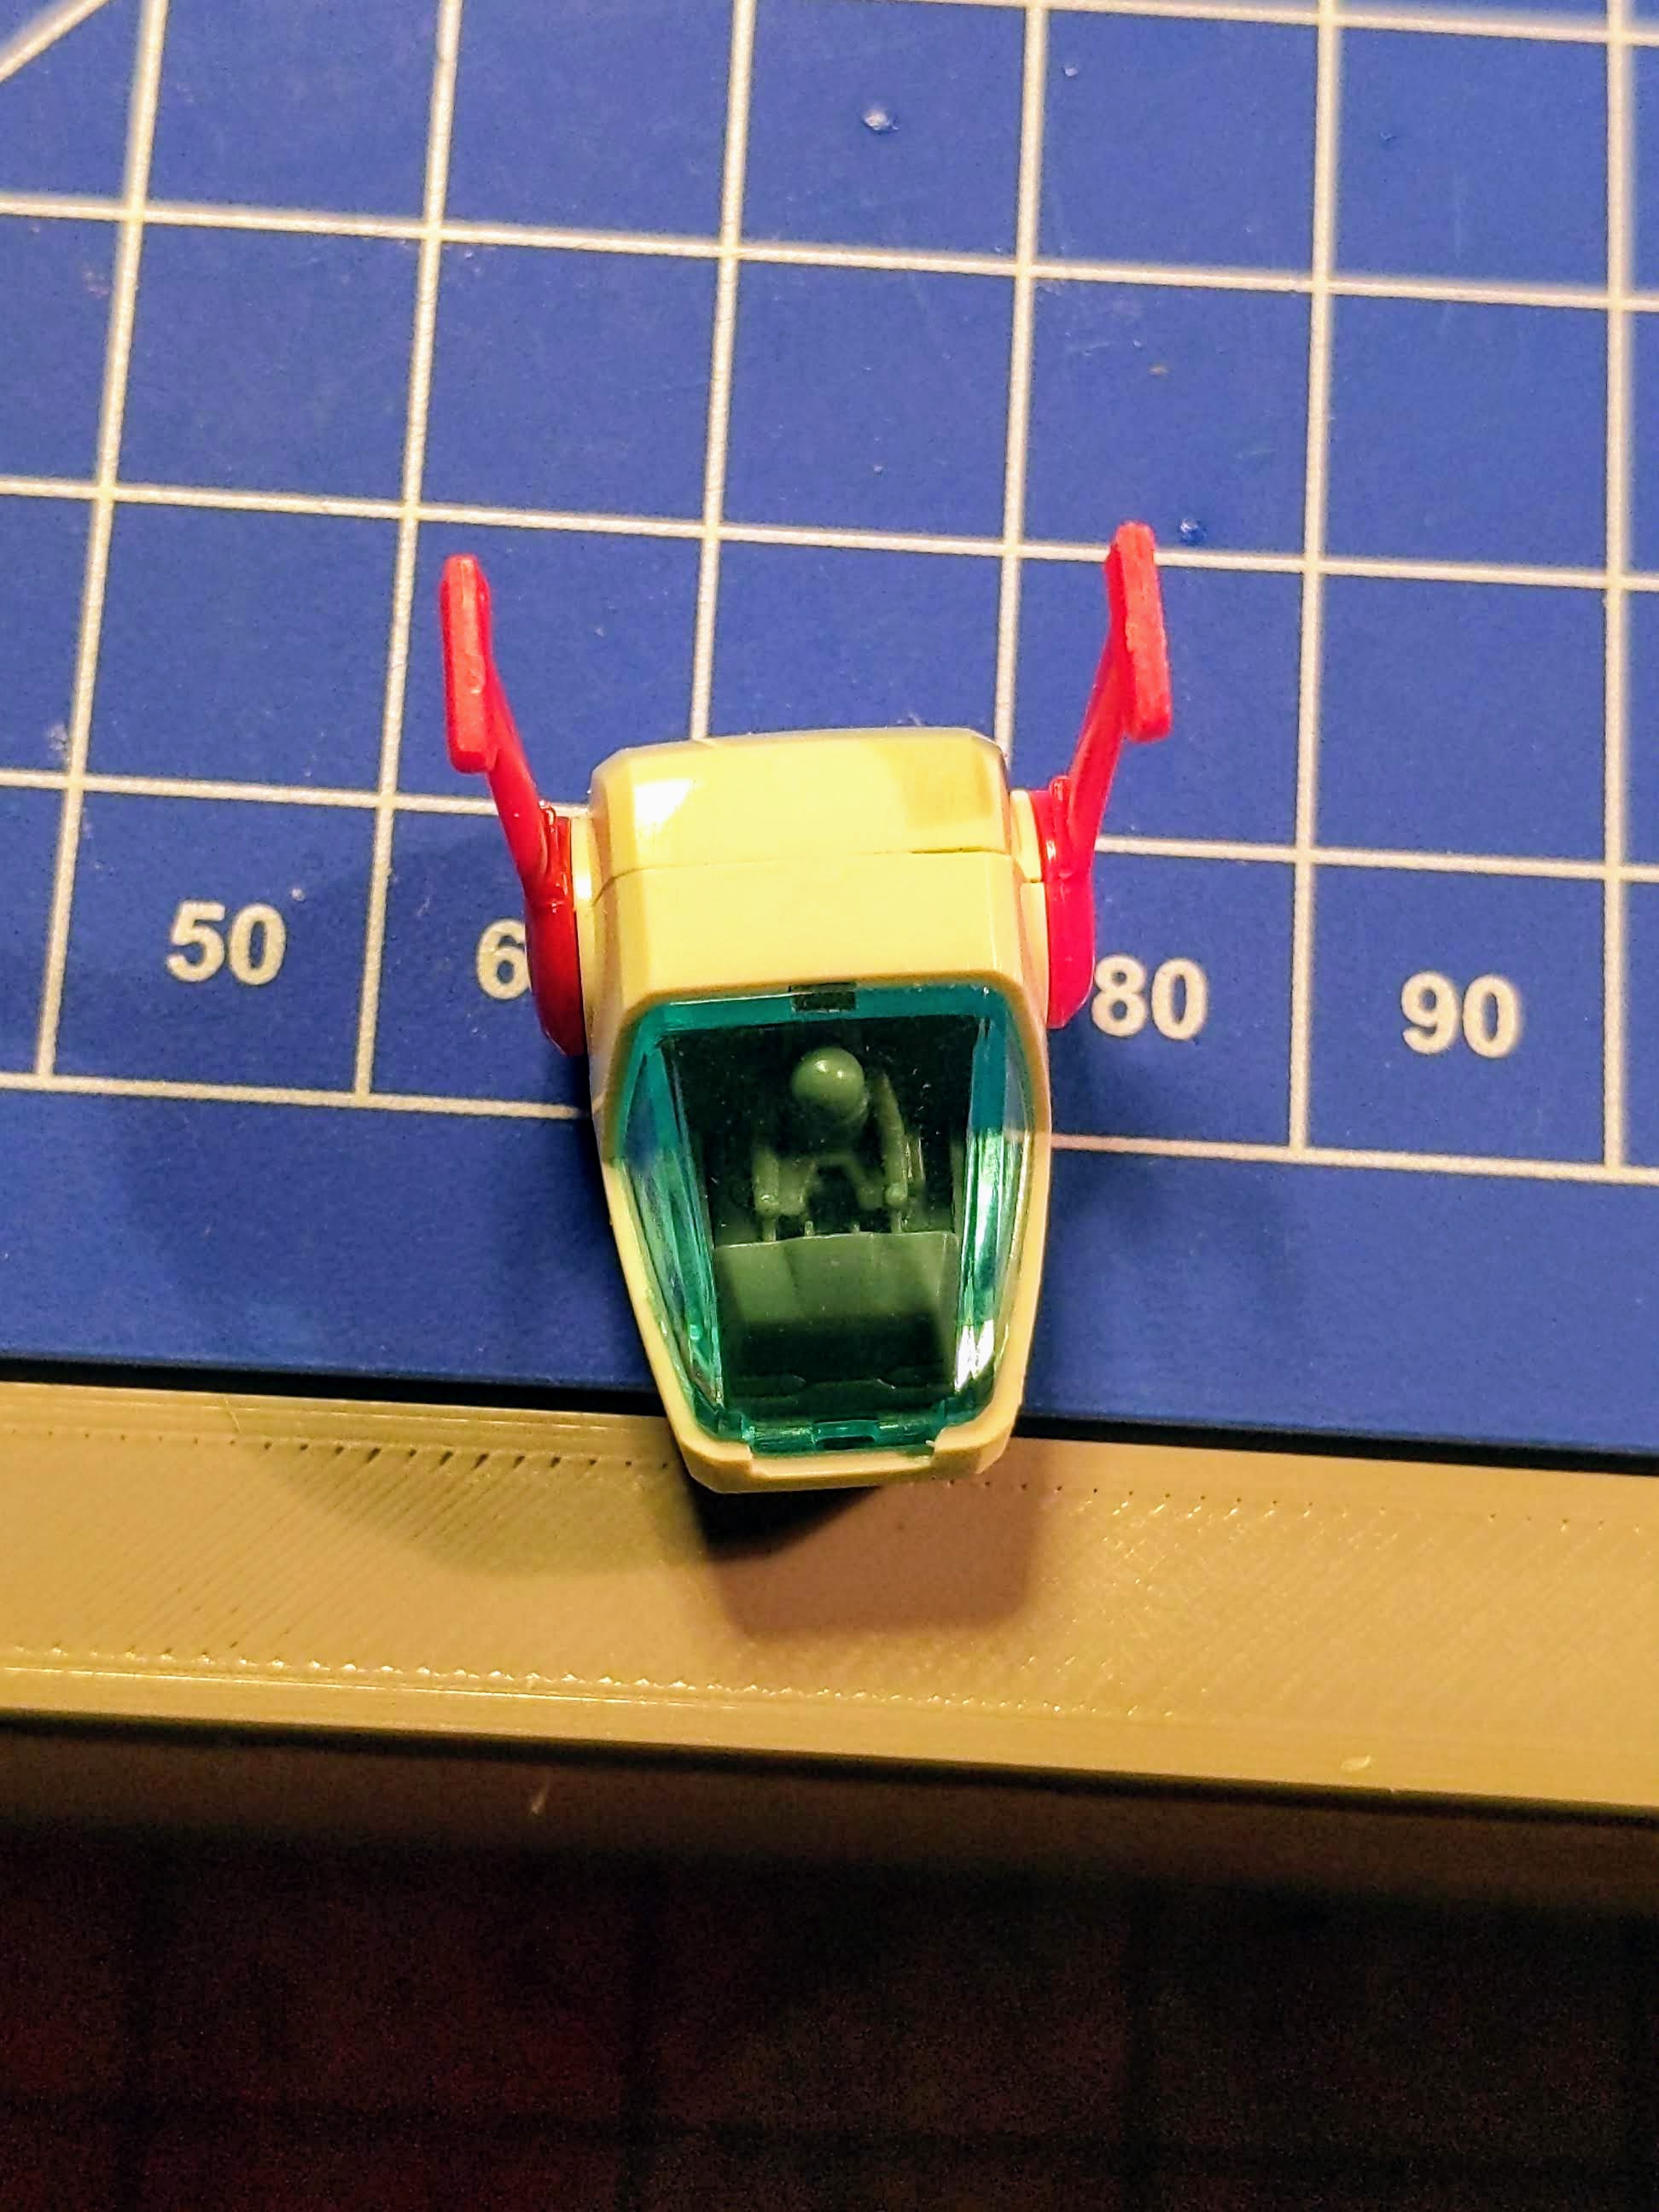
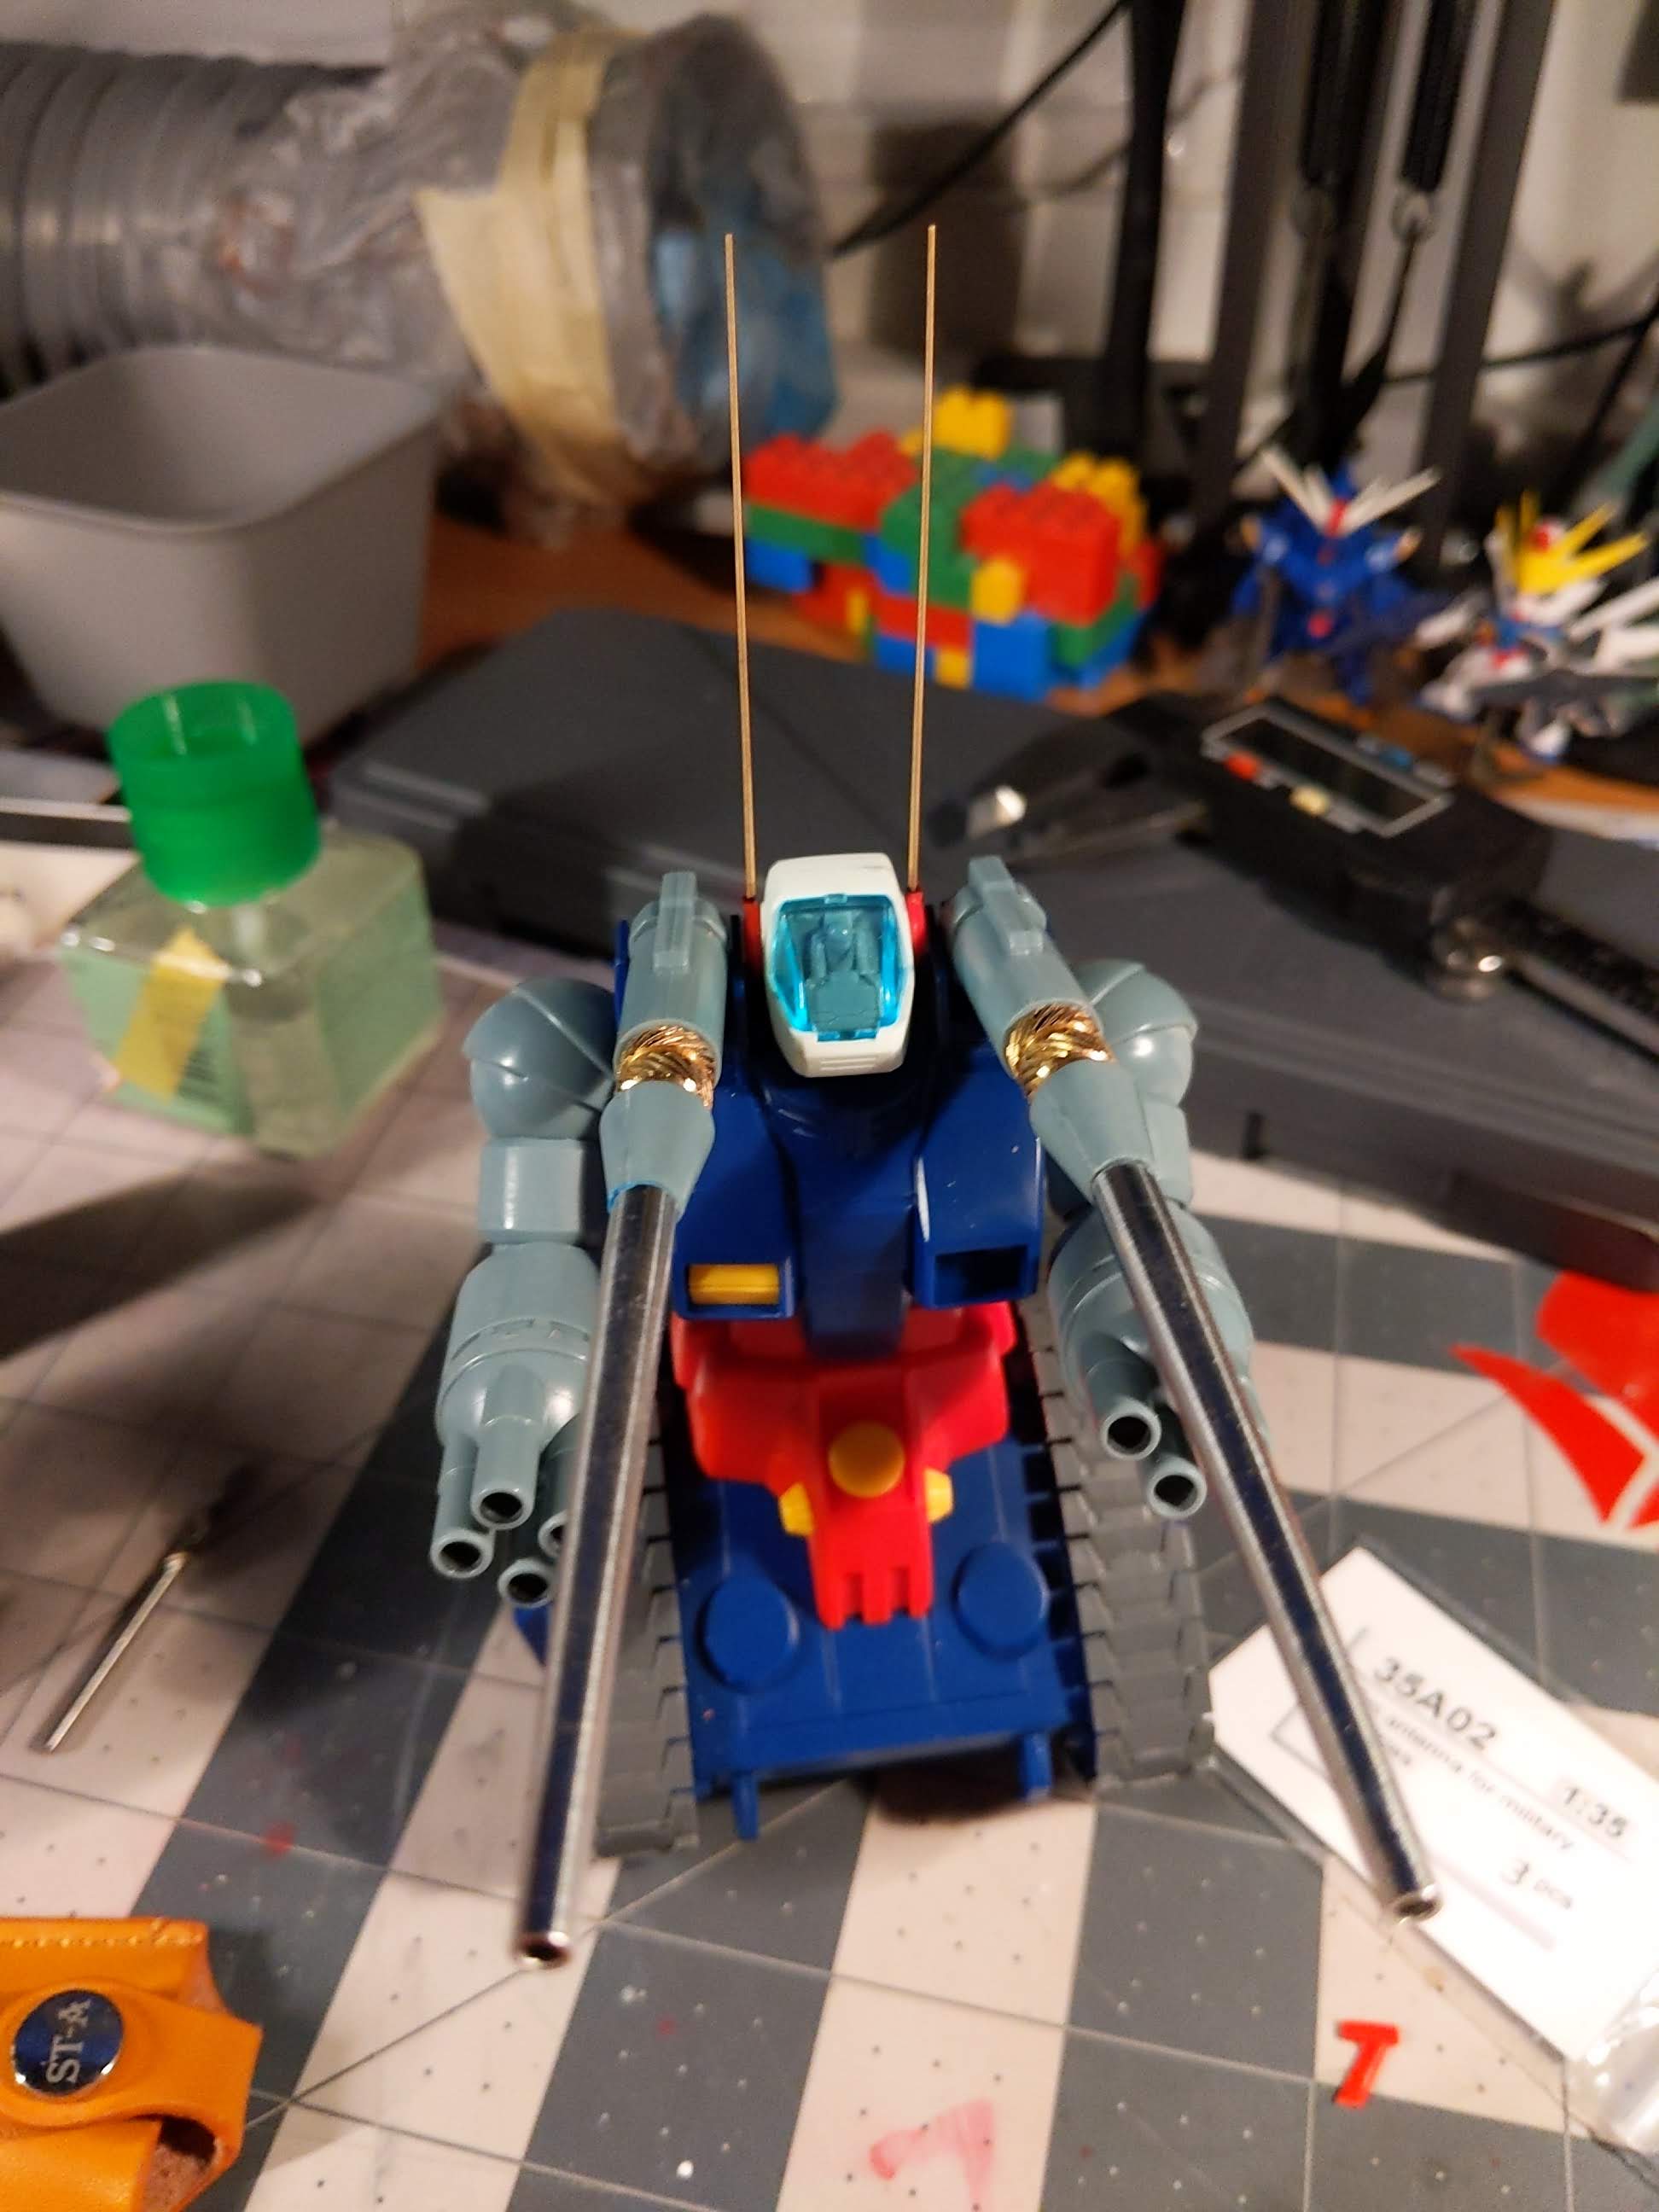
The head modifications draw inspiration directly from the Guntank Mass Production type. I really liked the antenna coming off the head, and to be fair I wasn’t much a fan of the red fin radar it has originally.
Similar to the cannons, I used a 1/35 scale generic metal aerial antenna to replace it. I chopped off the originals and bored out a tiny 1mm hole to mount in the replacement parts.
Keeping with the theme of enhancing existing surfaces, I opted to make use of photo etch and resin components to provide detail to otherwise sparse areas of the build - and of course to justify having a collection of miscellaneous bits for detailing in the first place.
I added a Wave photo etched circle to the yellow discs that sit on the “waist” area to just add a bit more surface detail. I had played around with replacing it entirely and that still isn’t out of the question.
I replaced the front facing yellow joint looking components with MCMS resin detail parts, partially because it adds more overall and partially because of due to nub placement on the piece I had one side that was missing a chunk from it.
I’m still not 100% on these choices and may add a bit more to the areas to greeble it up further.
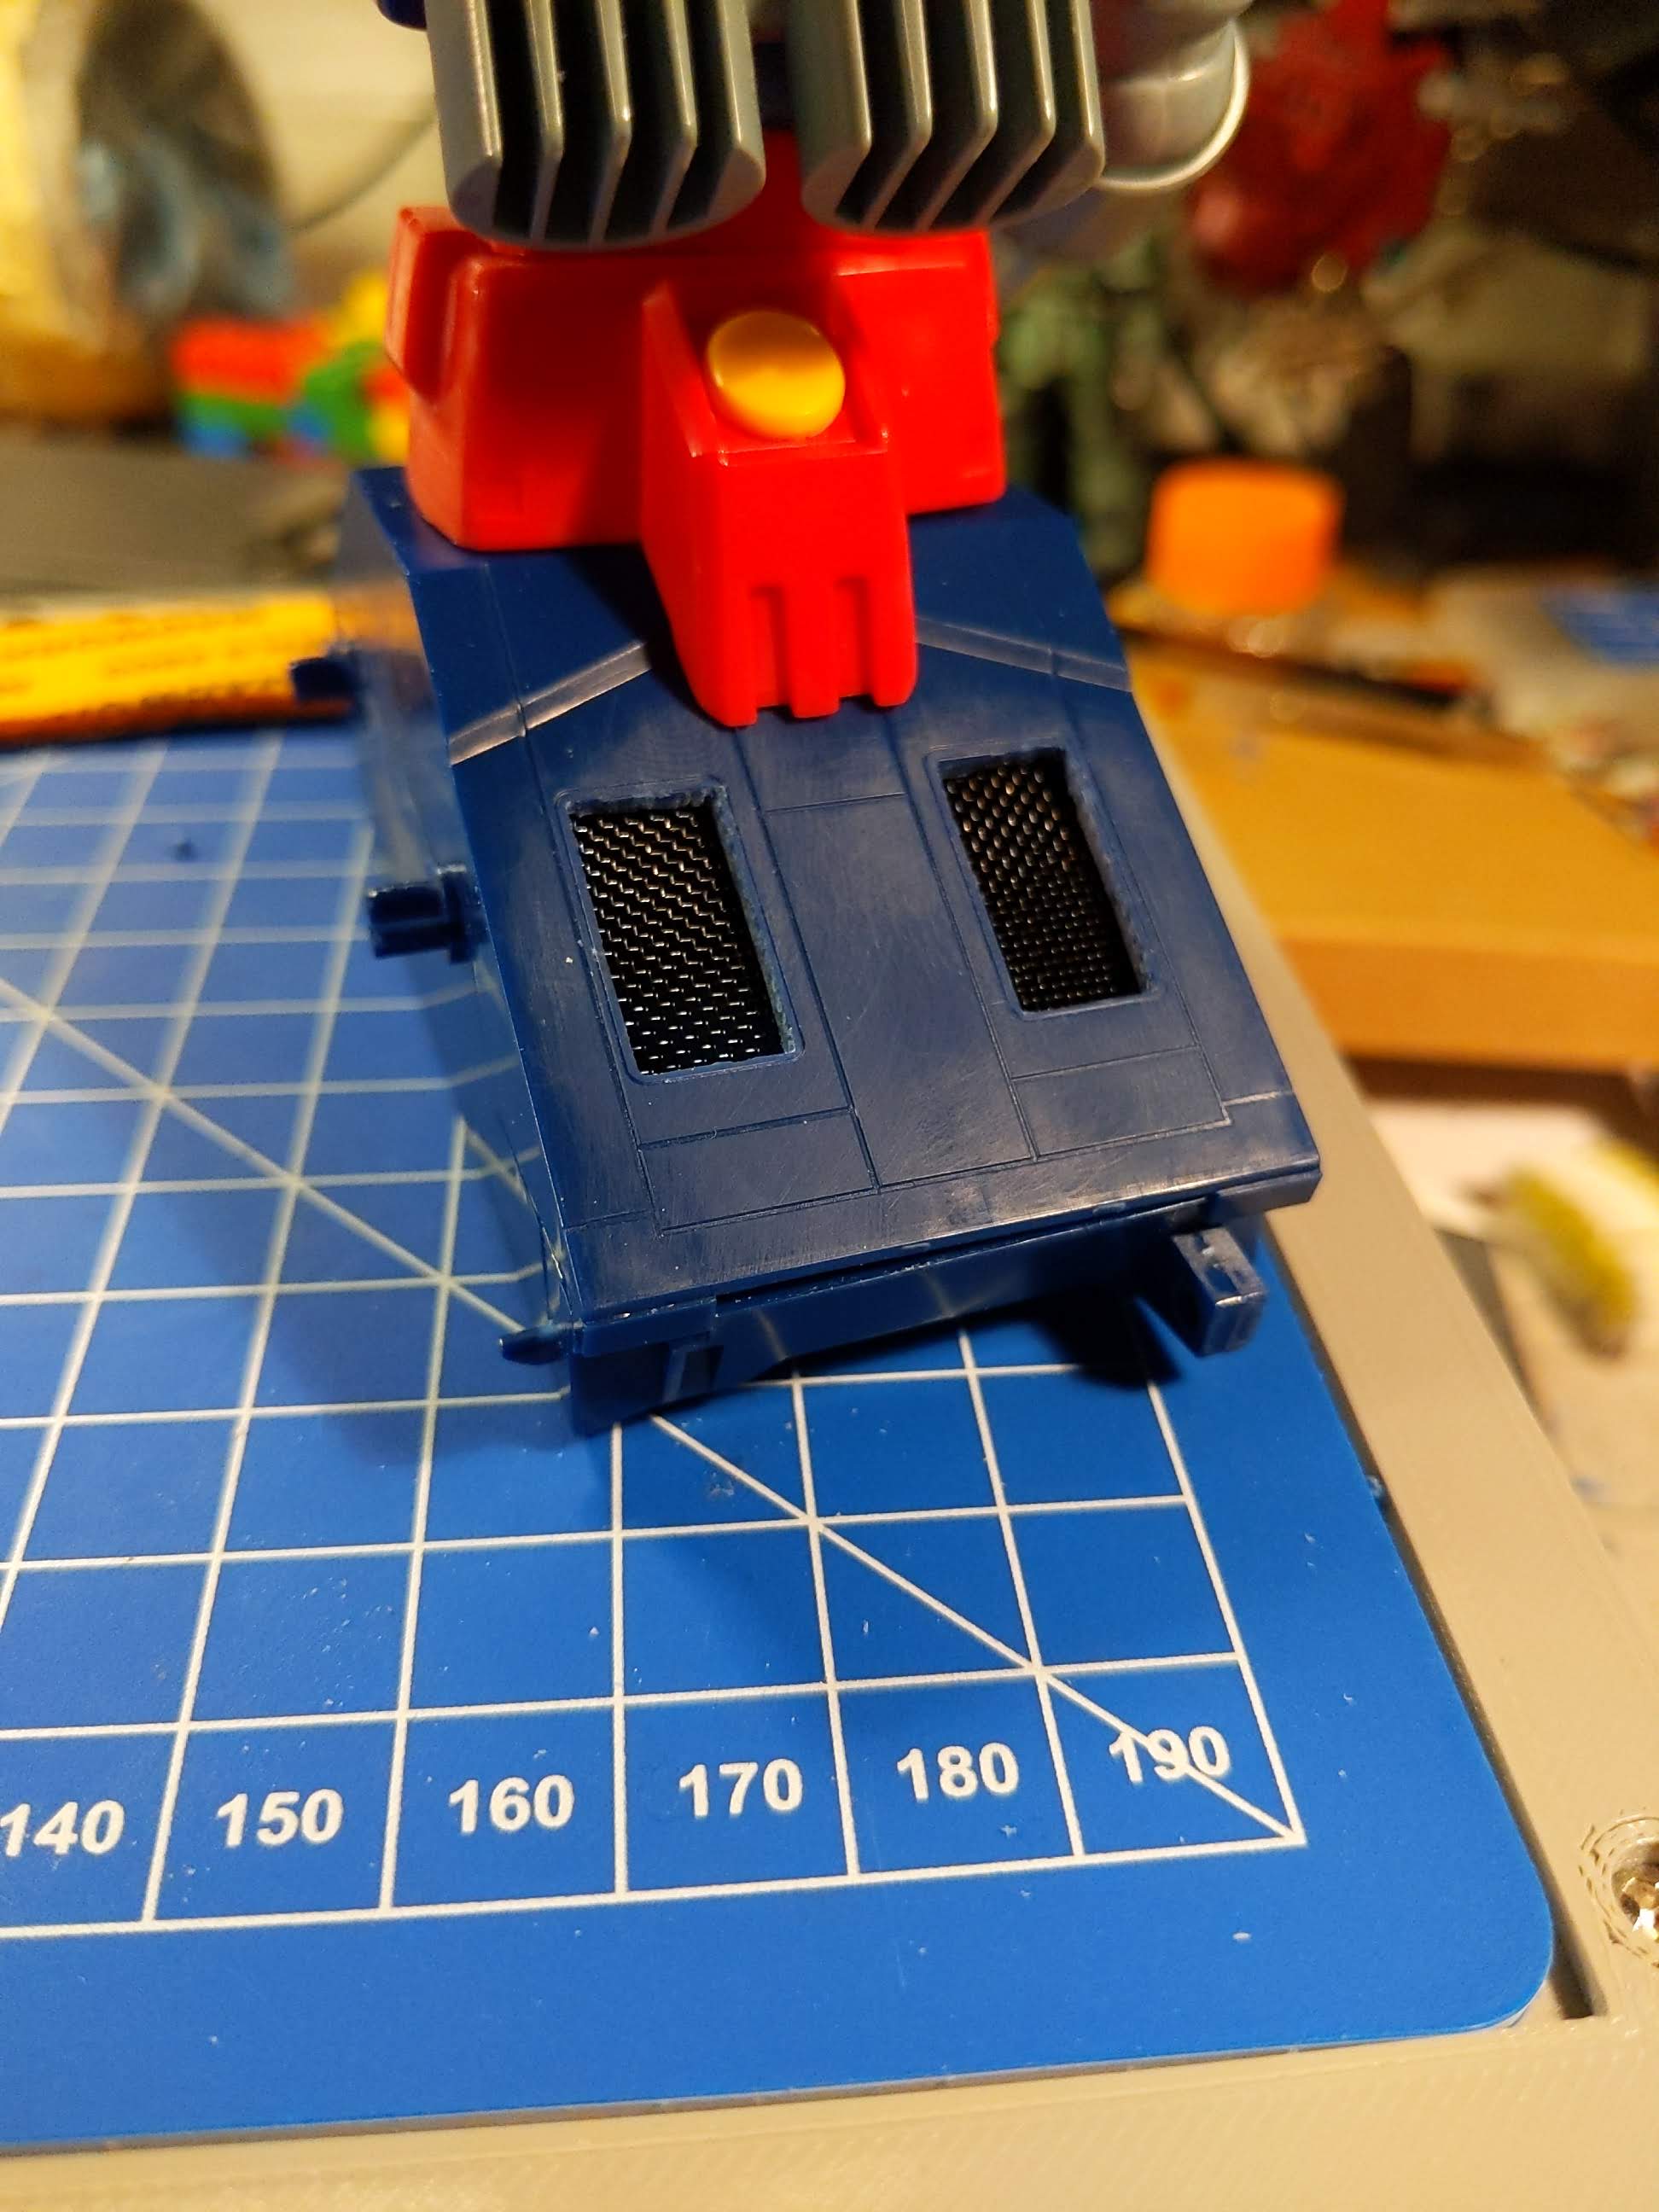
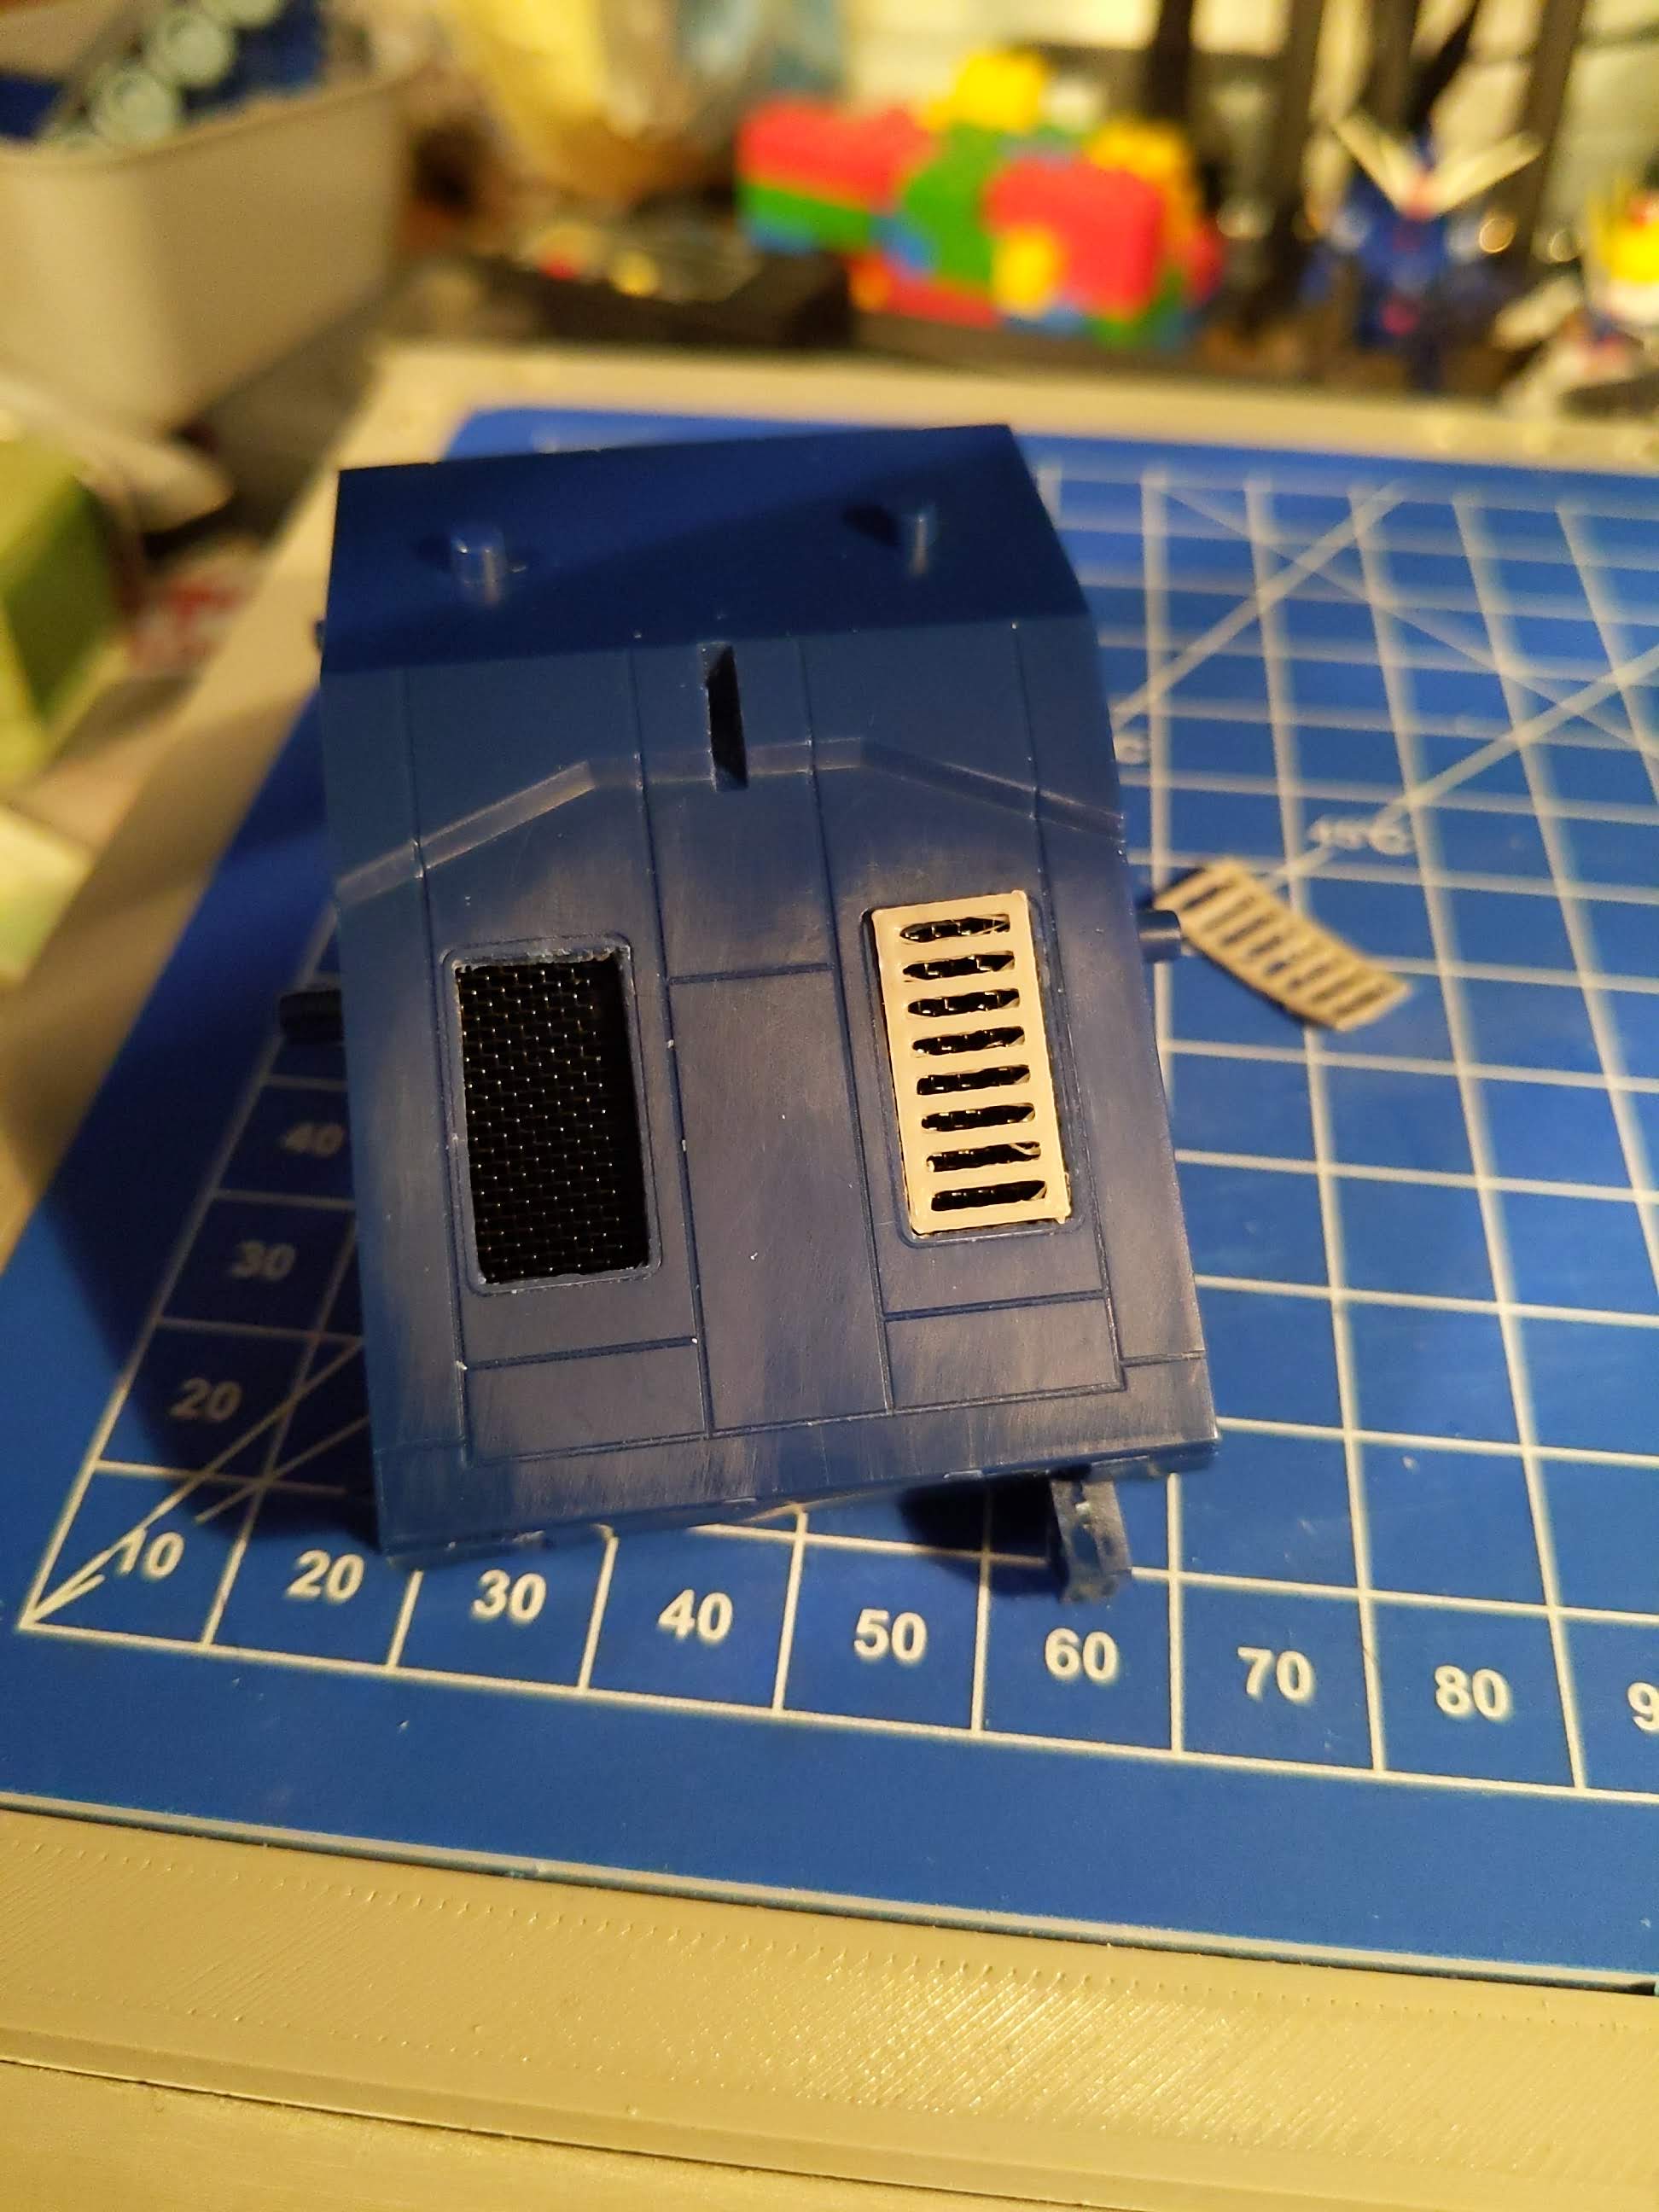
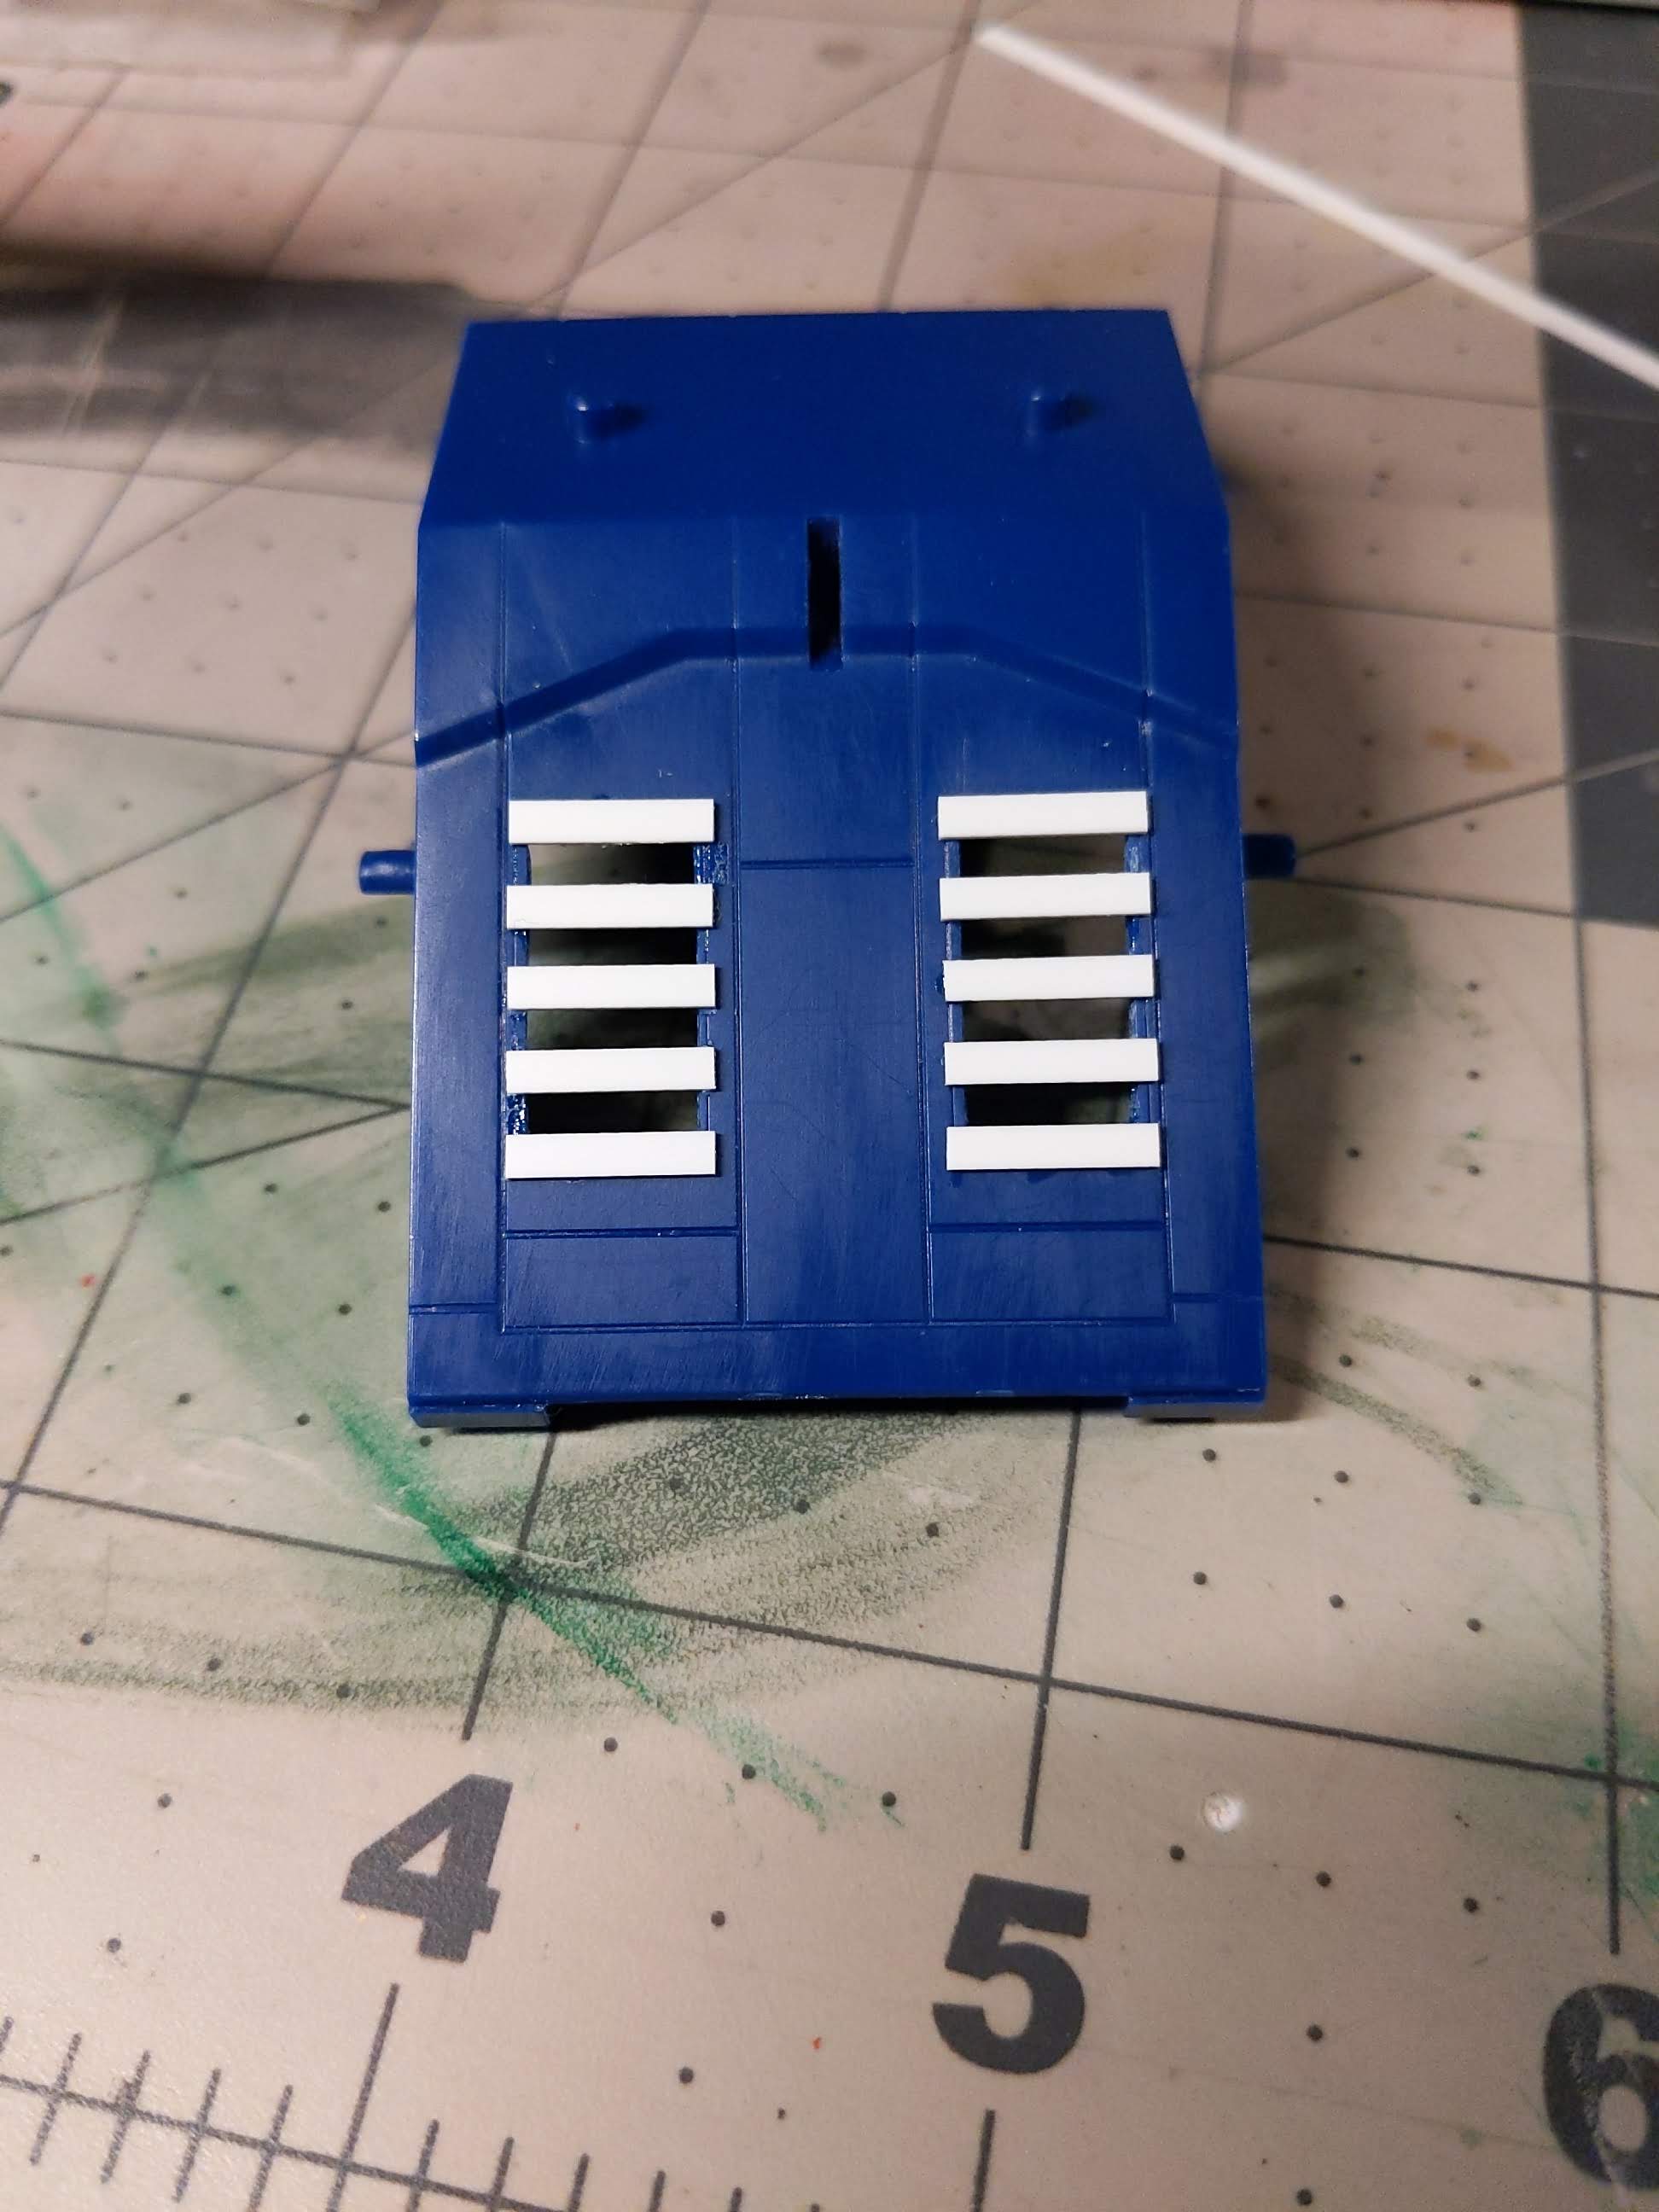
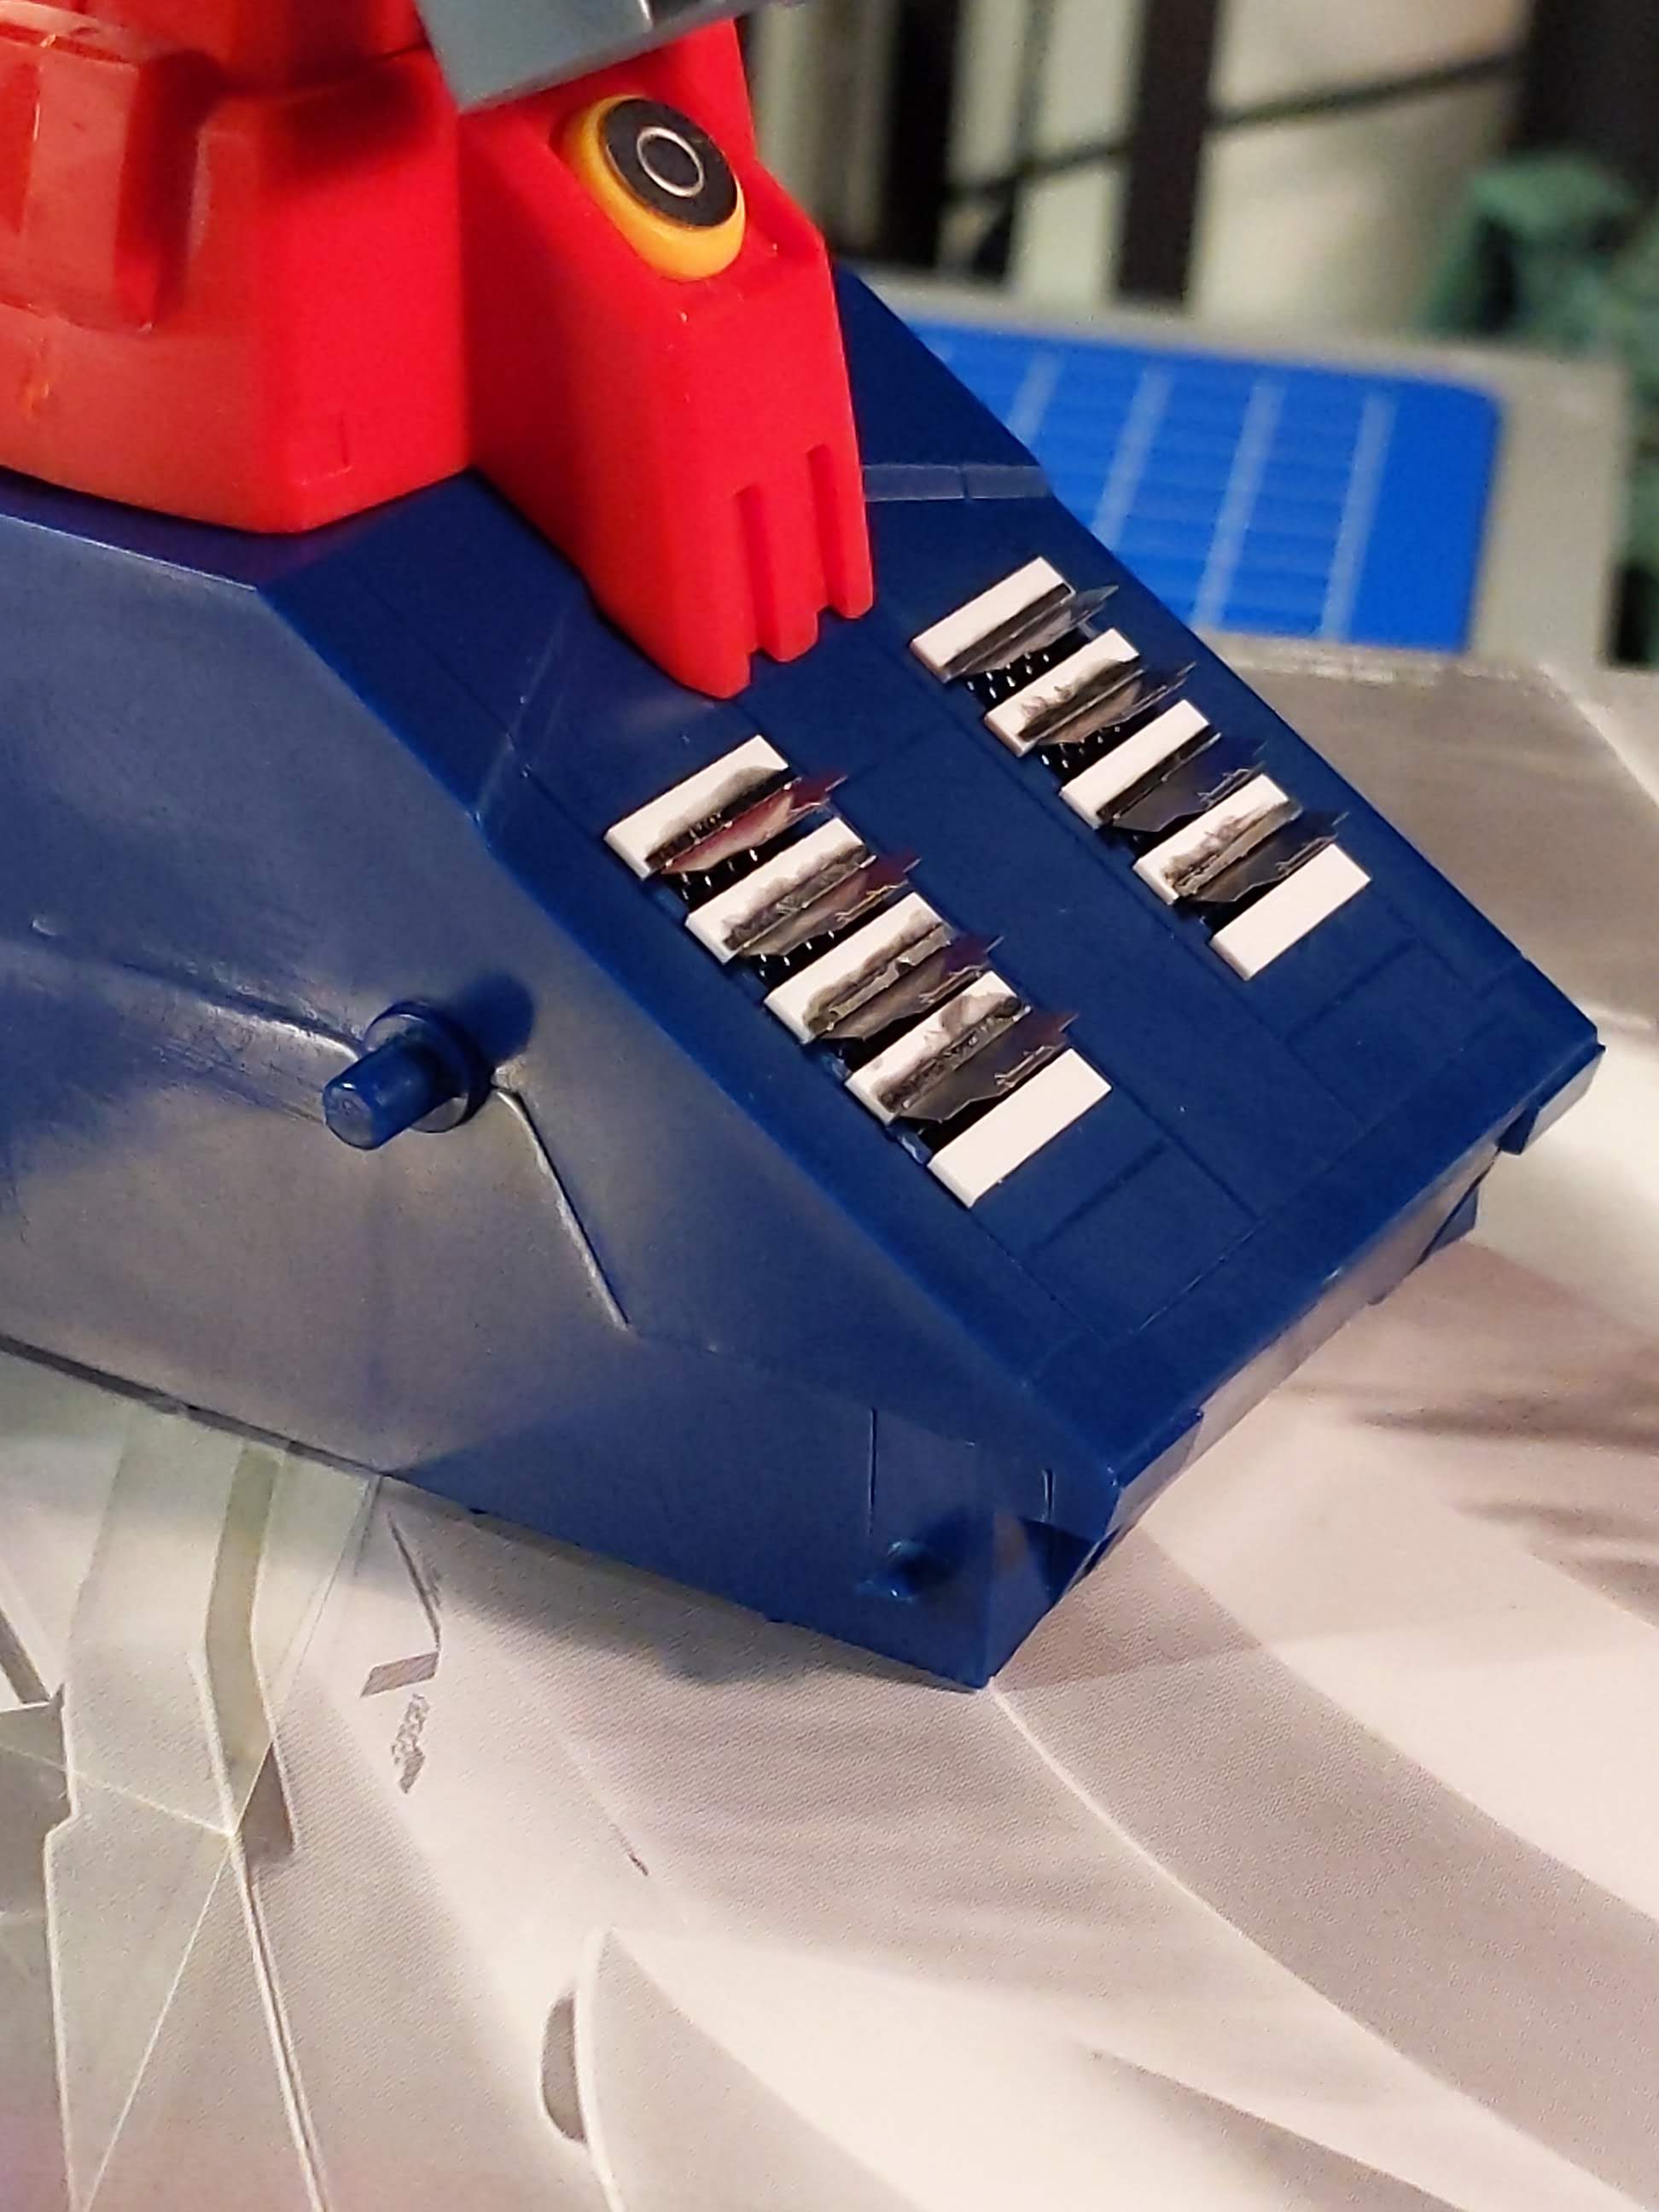
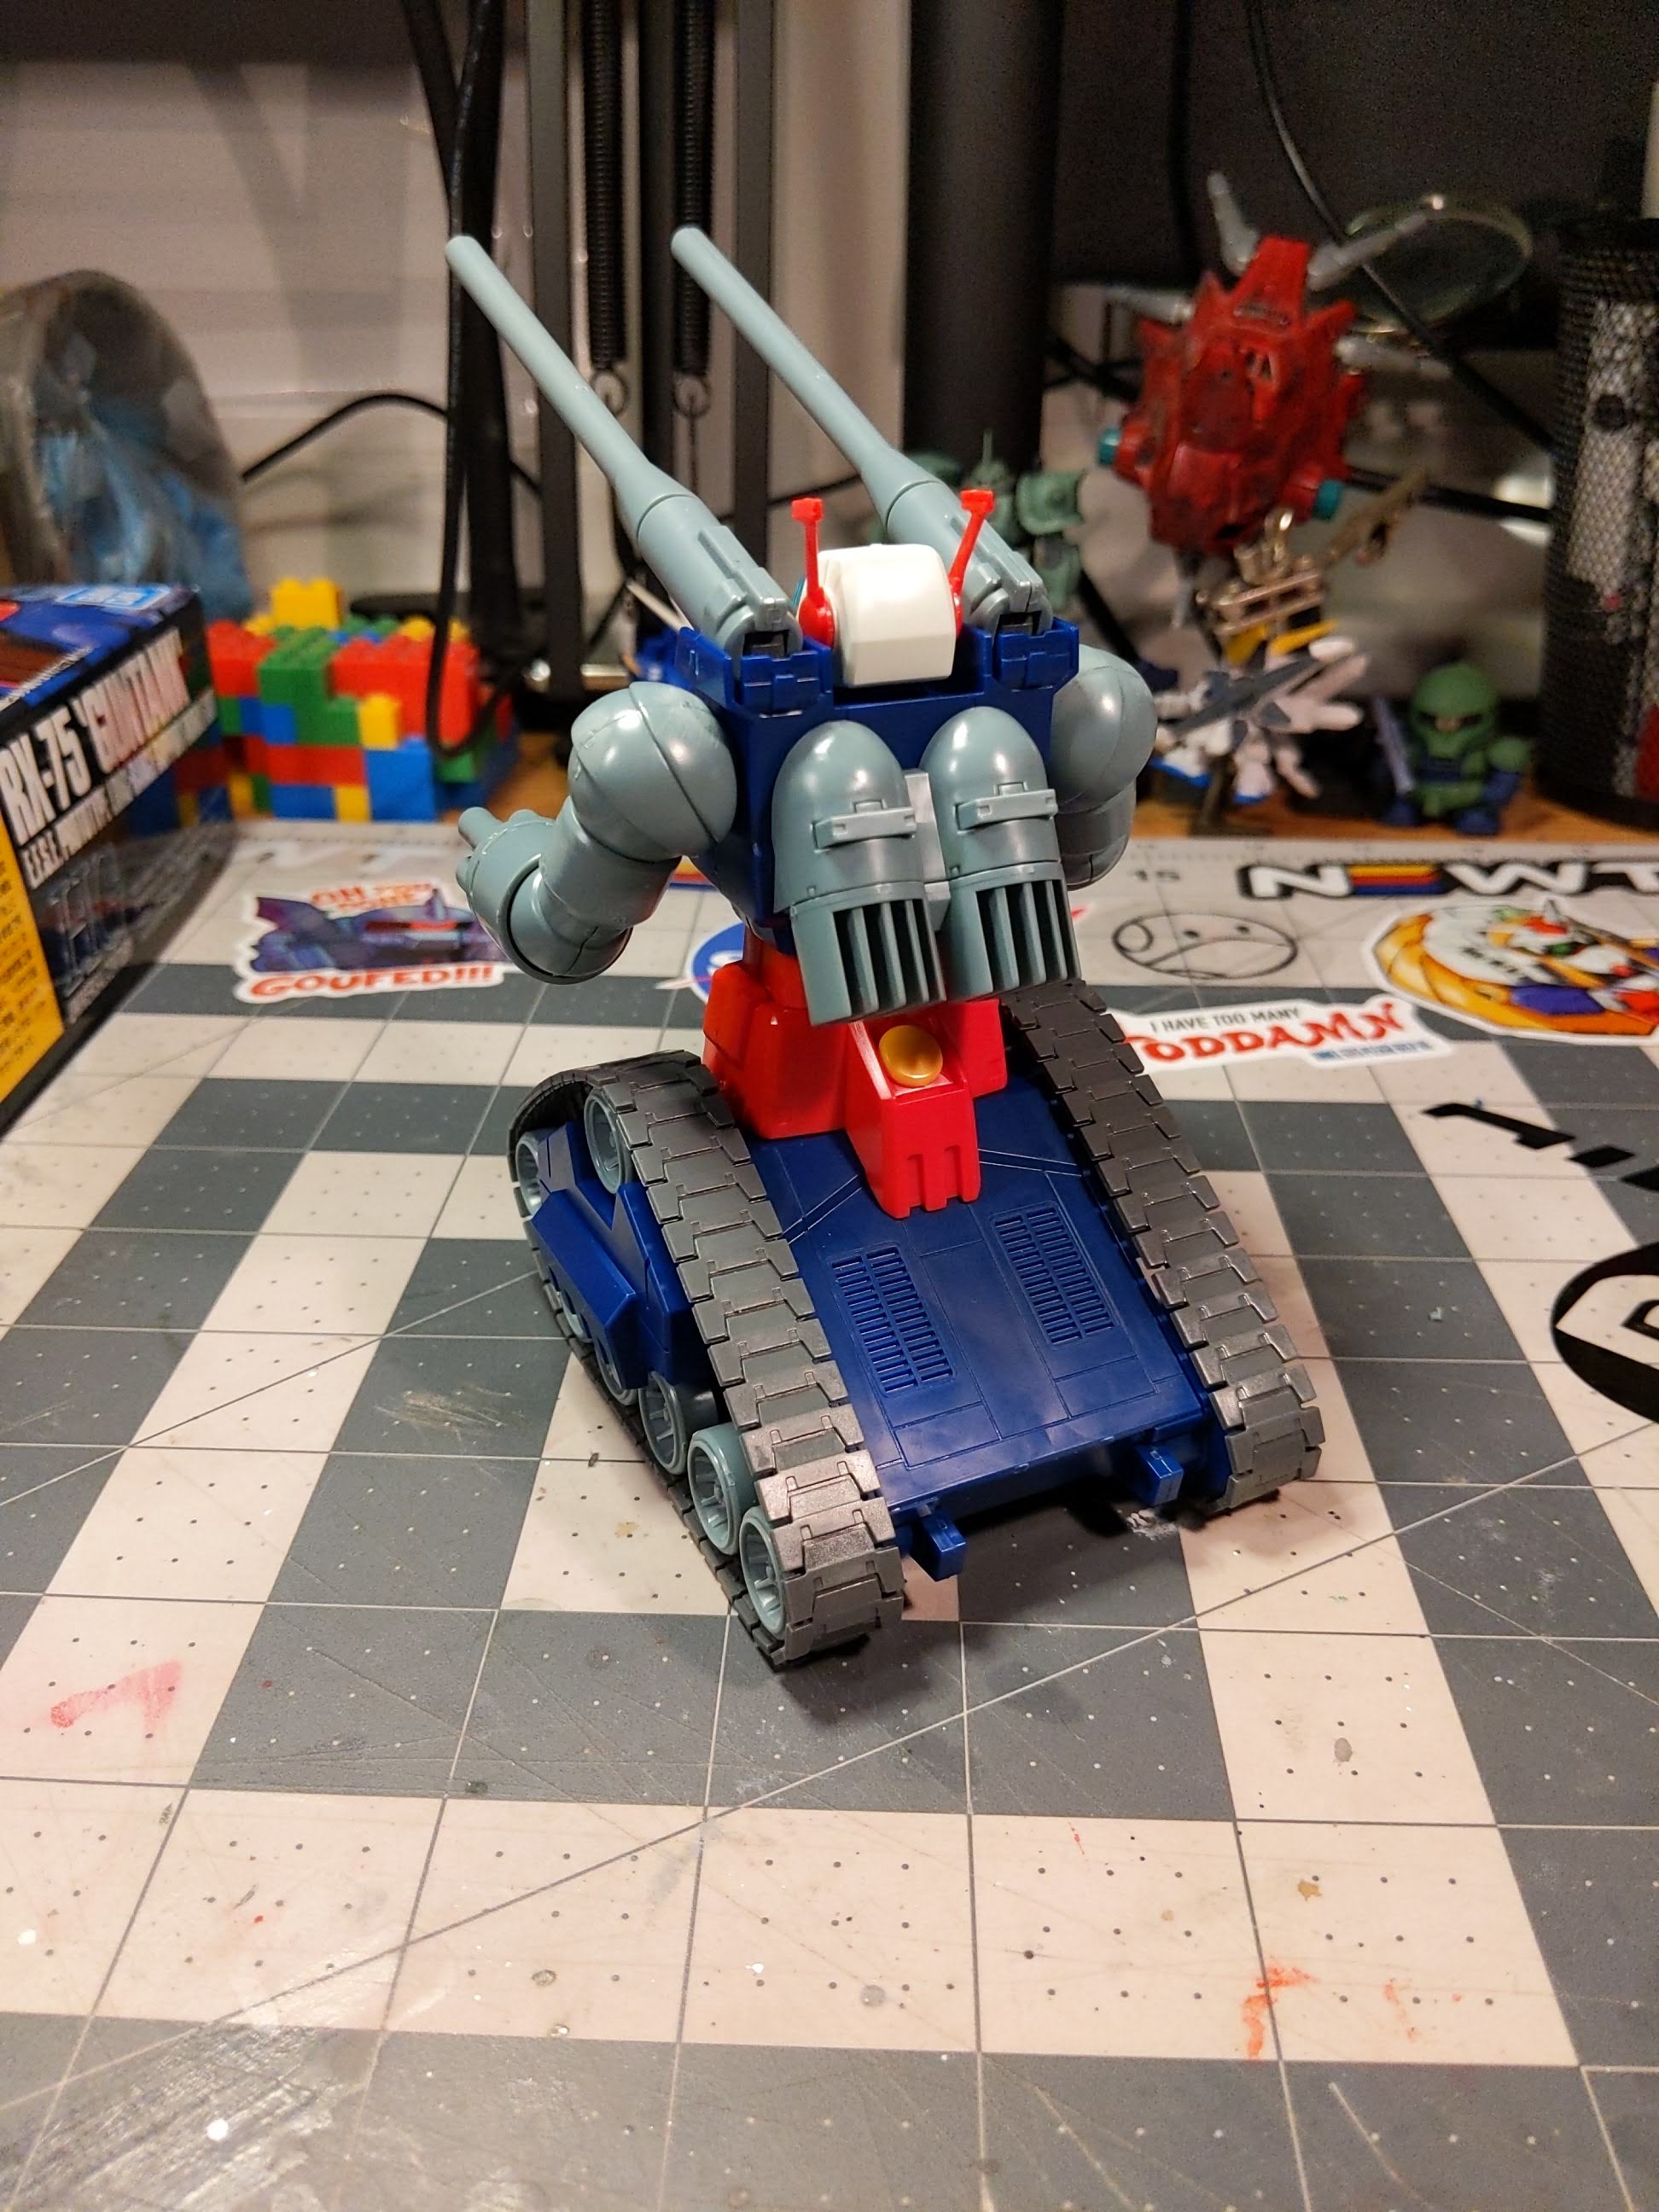
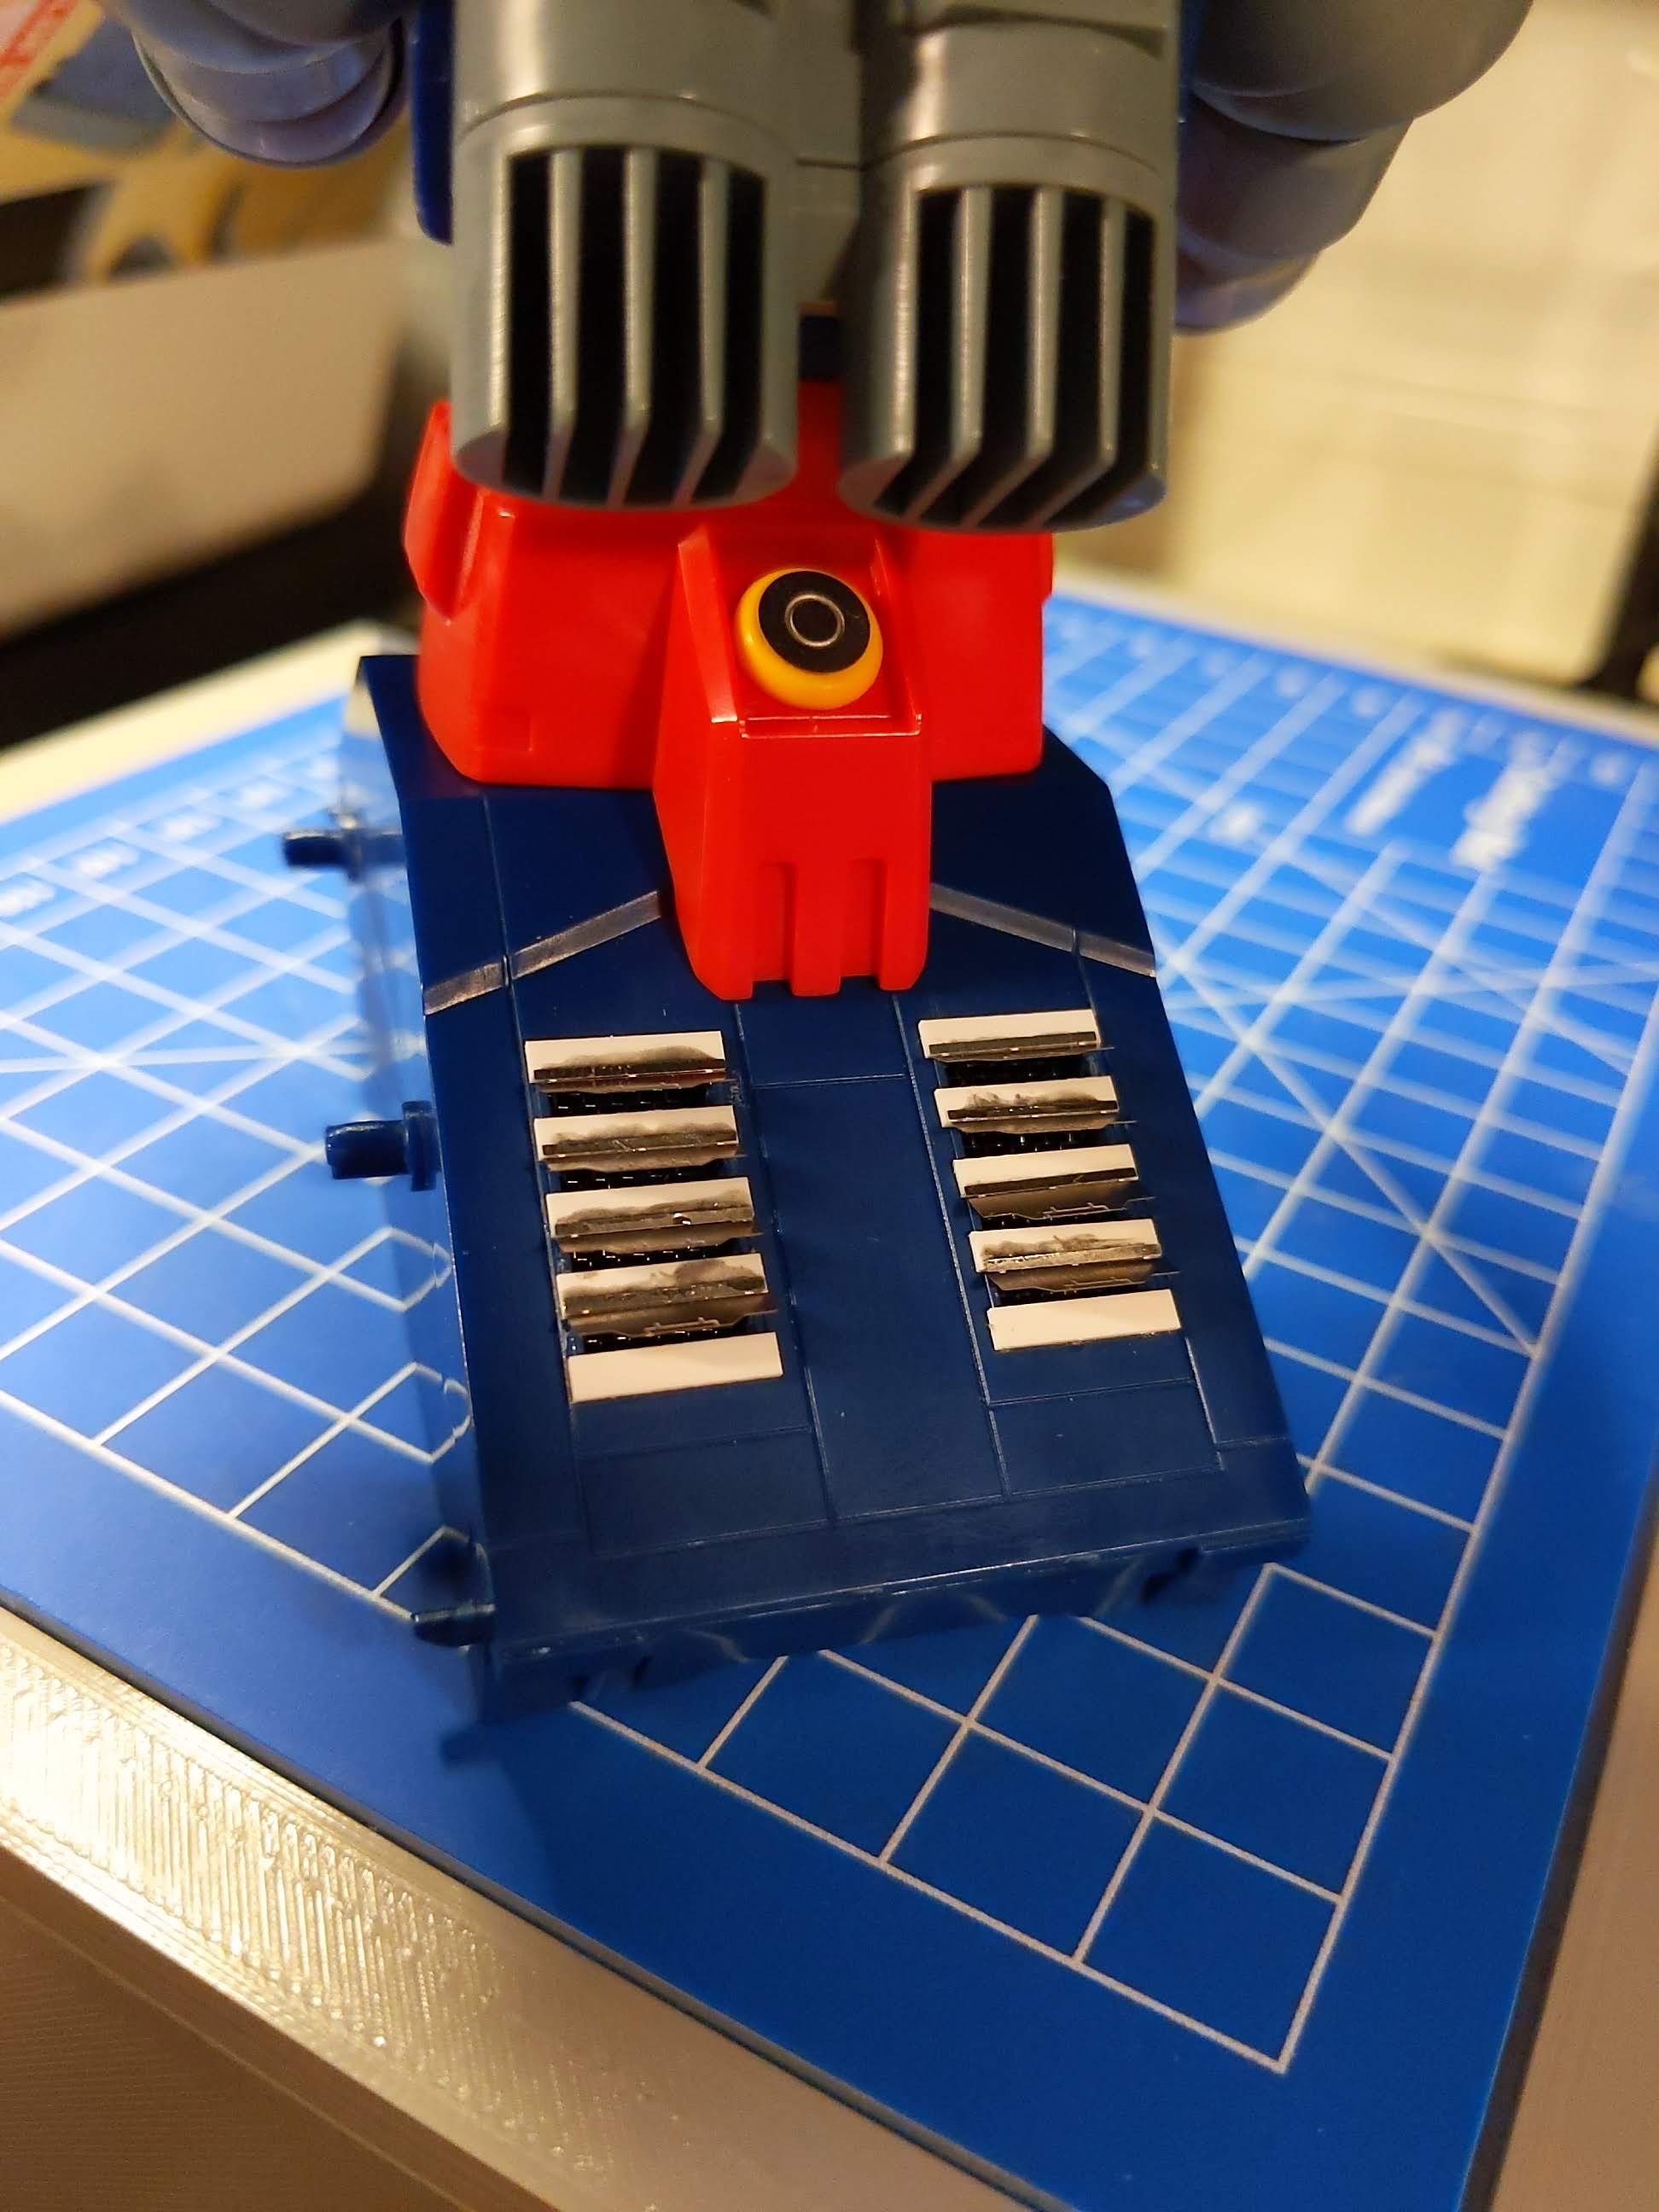
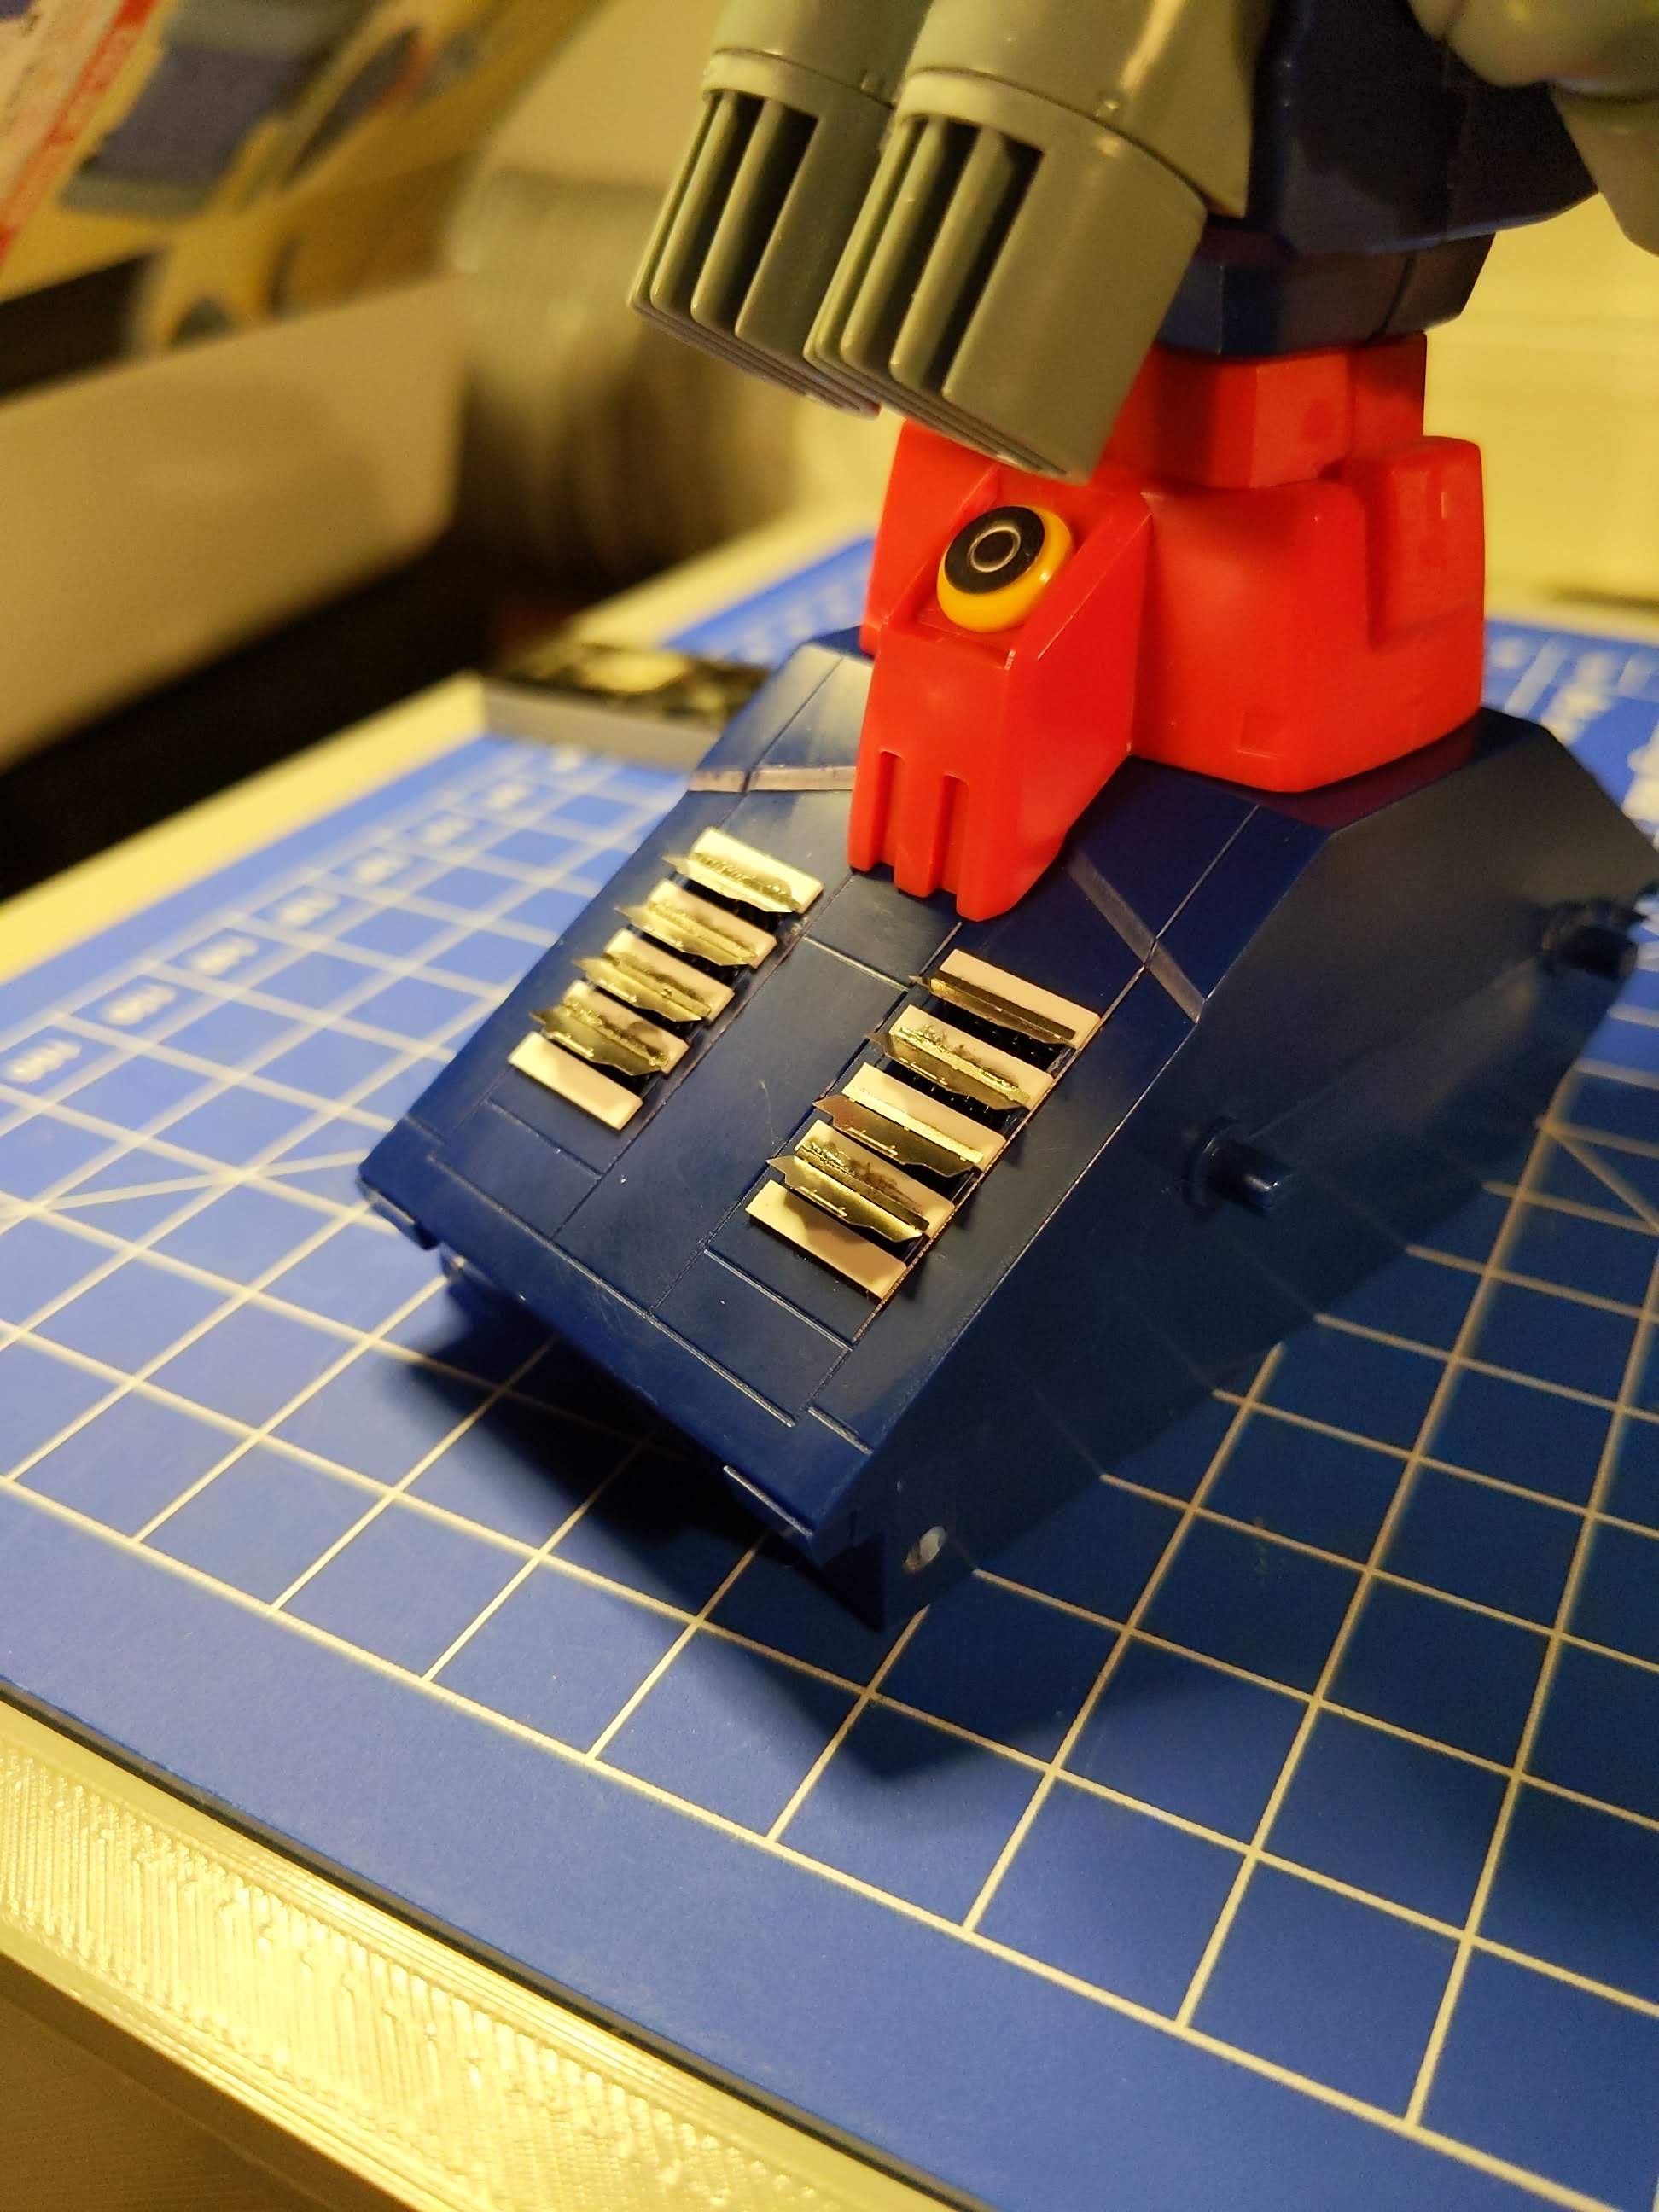
The premolded vents were something I really wanted to improve upon. My initial plan was to scribe out the existing grates to show through to a mesh on the underside. That went well for about a minute until it became way too tedious and I ended up breaking an already scribed grate off due to adding too much pressure.
At this point I figured it may work better if I had removed them entirely and replaced them. My first attempt was to 3D print a replacement and it looked alright but not like I had envisioned in my head. So I opted instead to rebuild it with polystyrene strips and affix Madworks thruster photo etch parts on top of this to provide a raised detail to the otherwise flat backside and give it a semi-realistic feel.
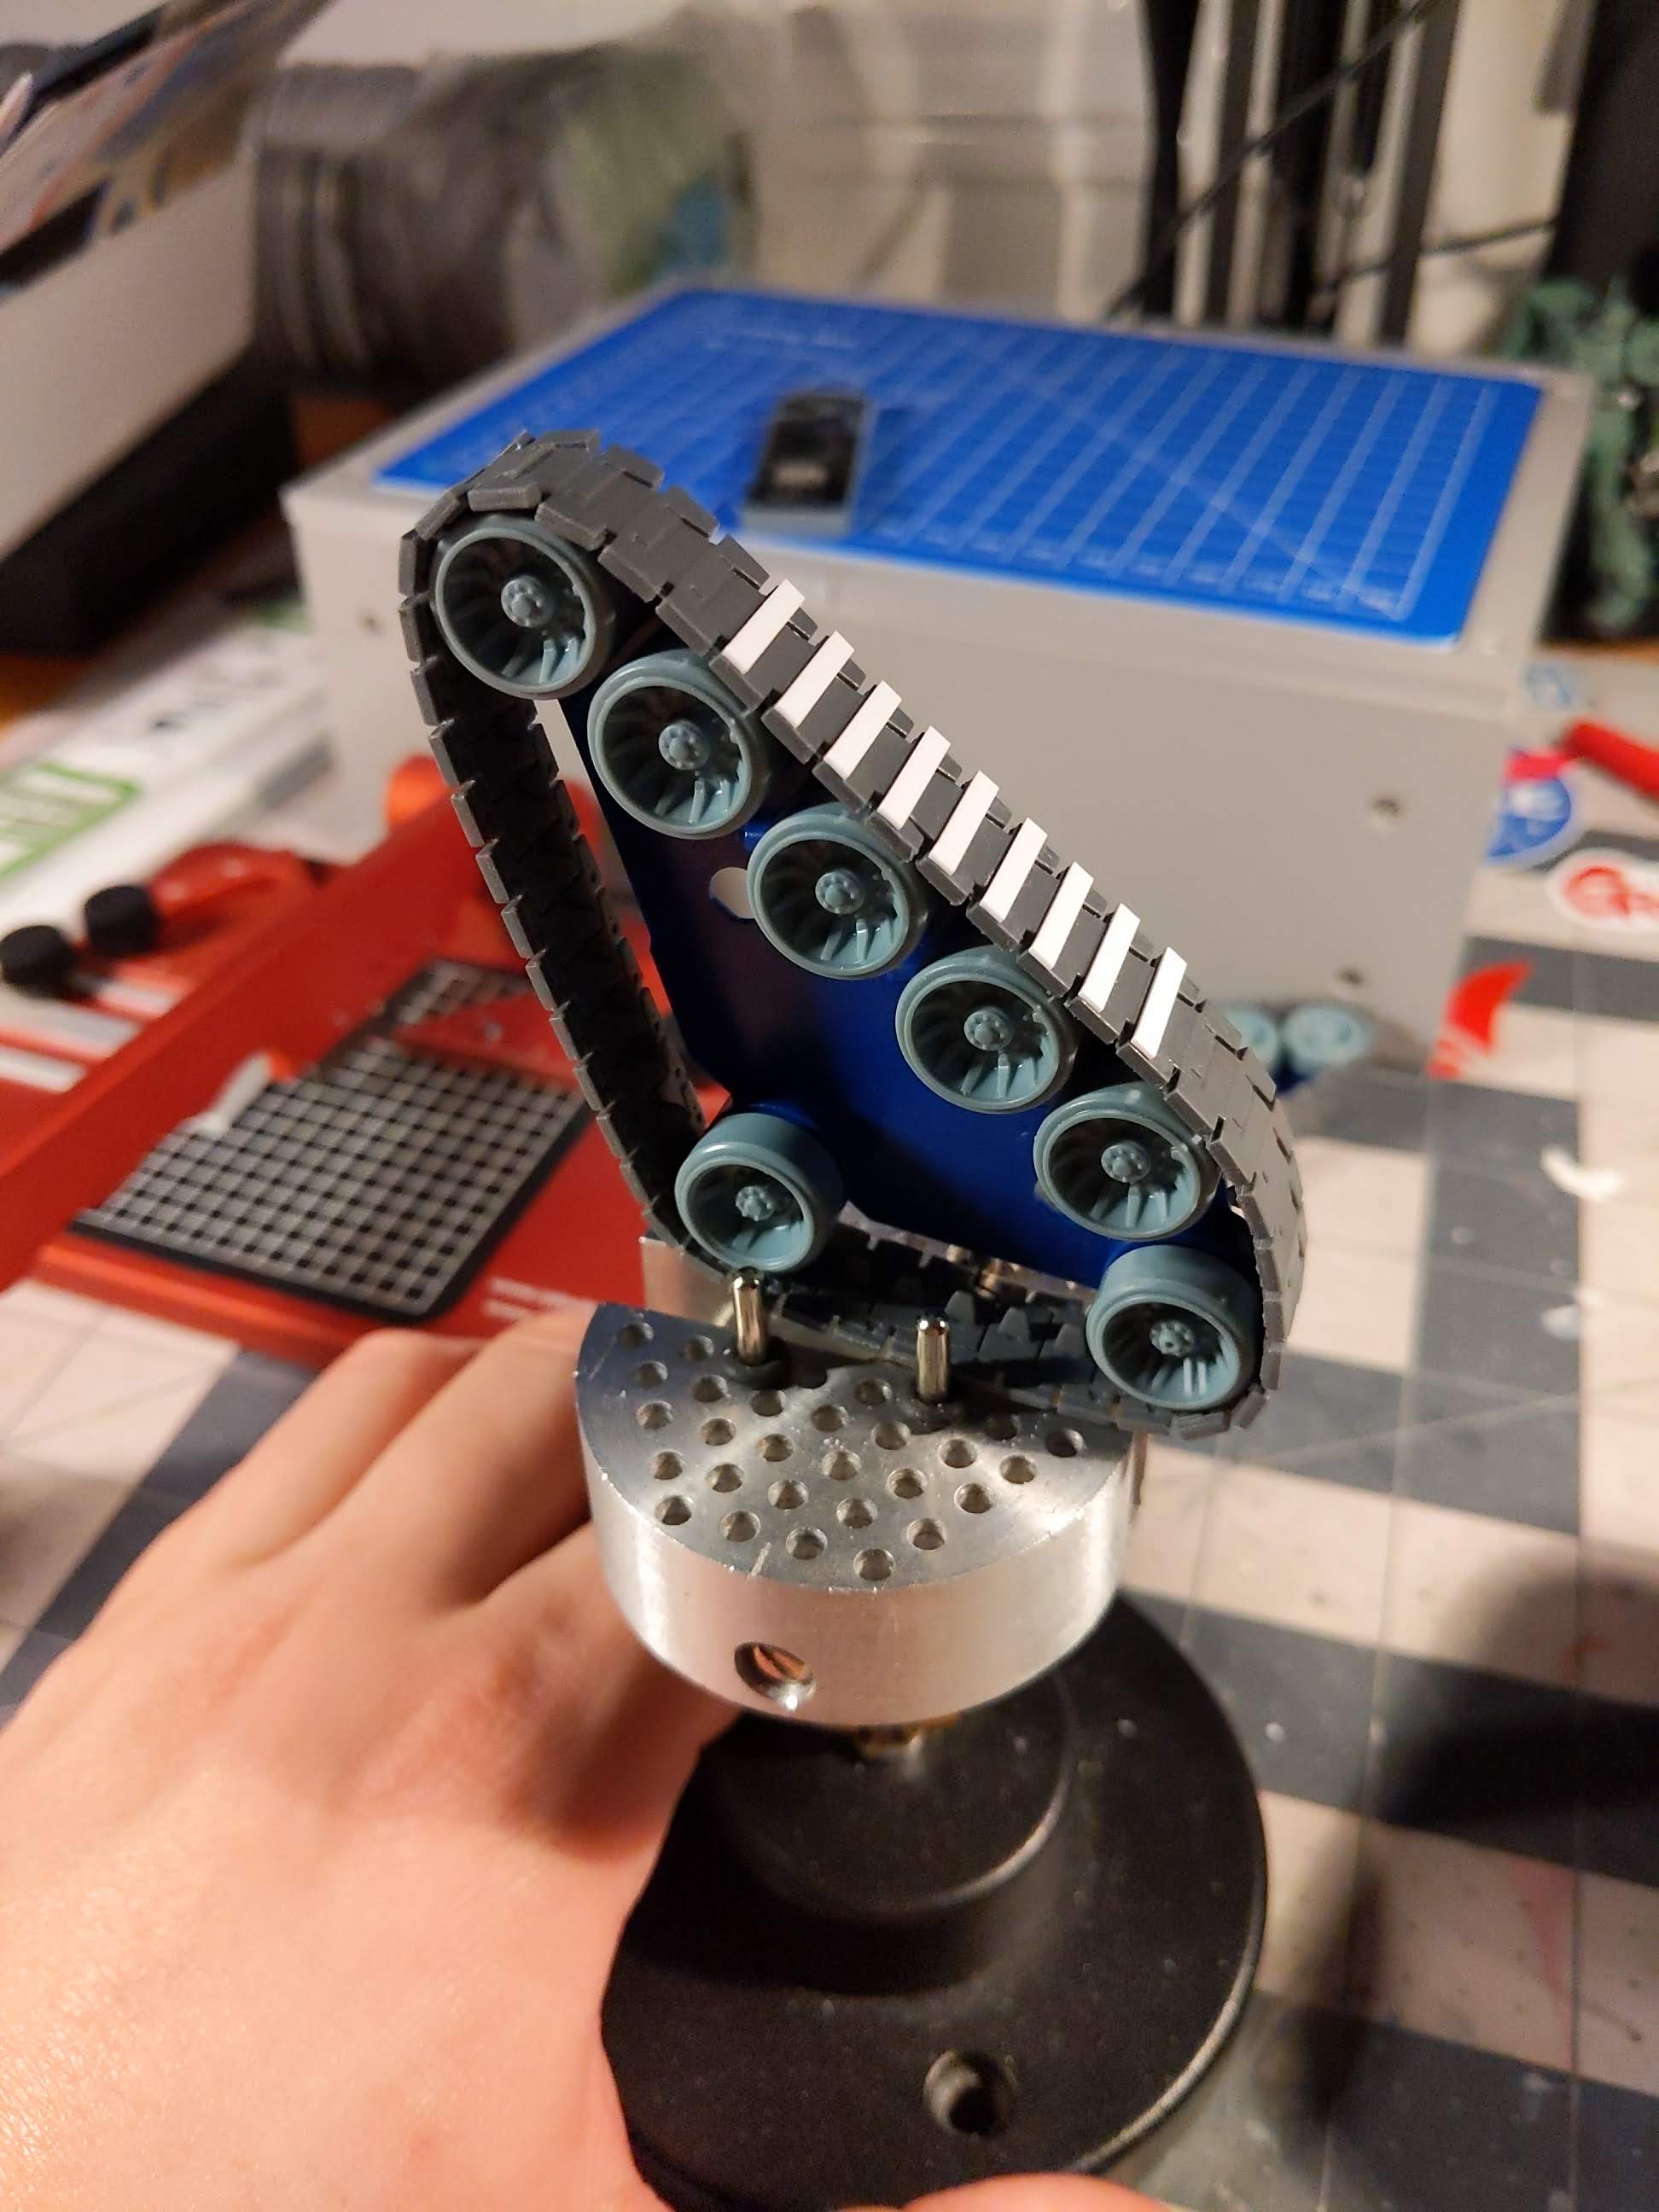
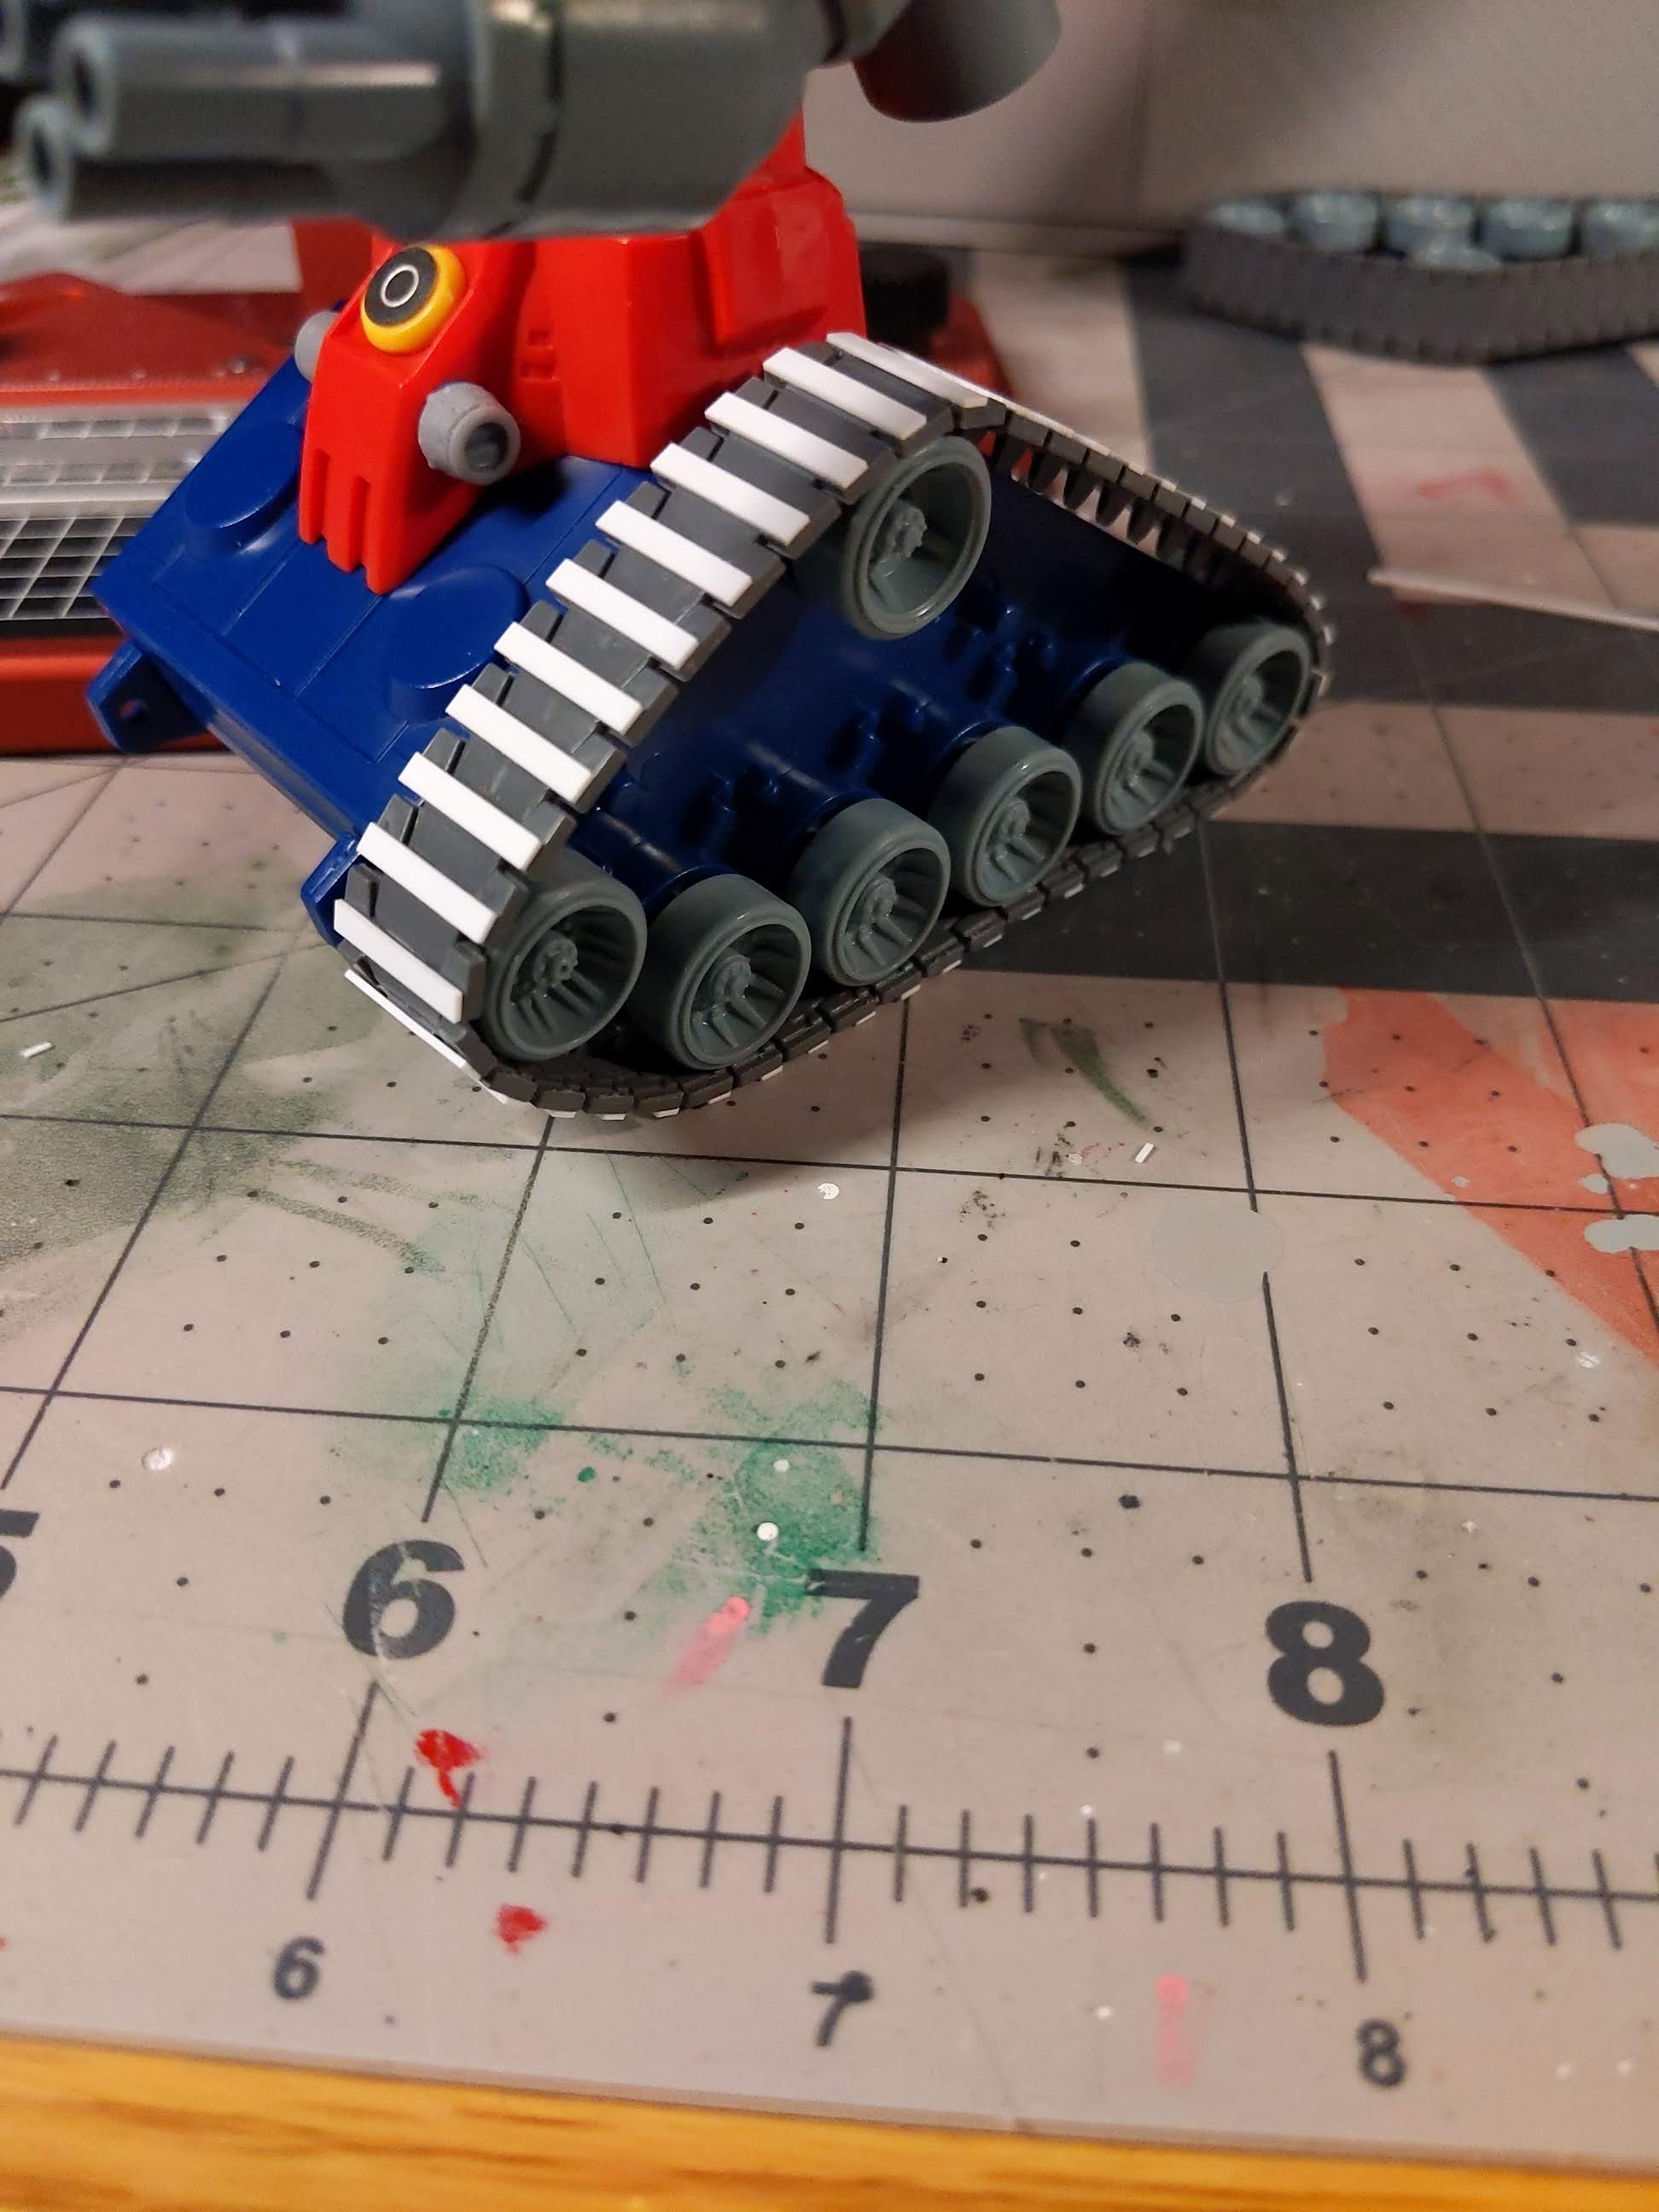
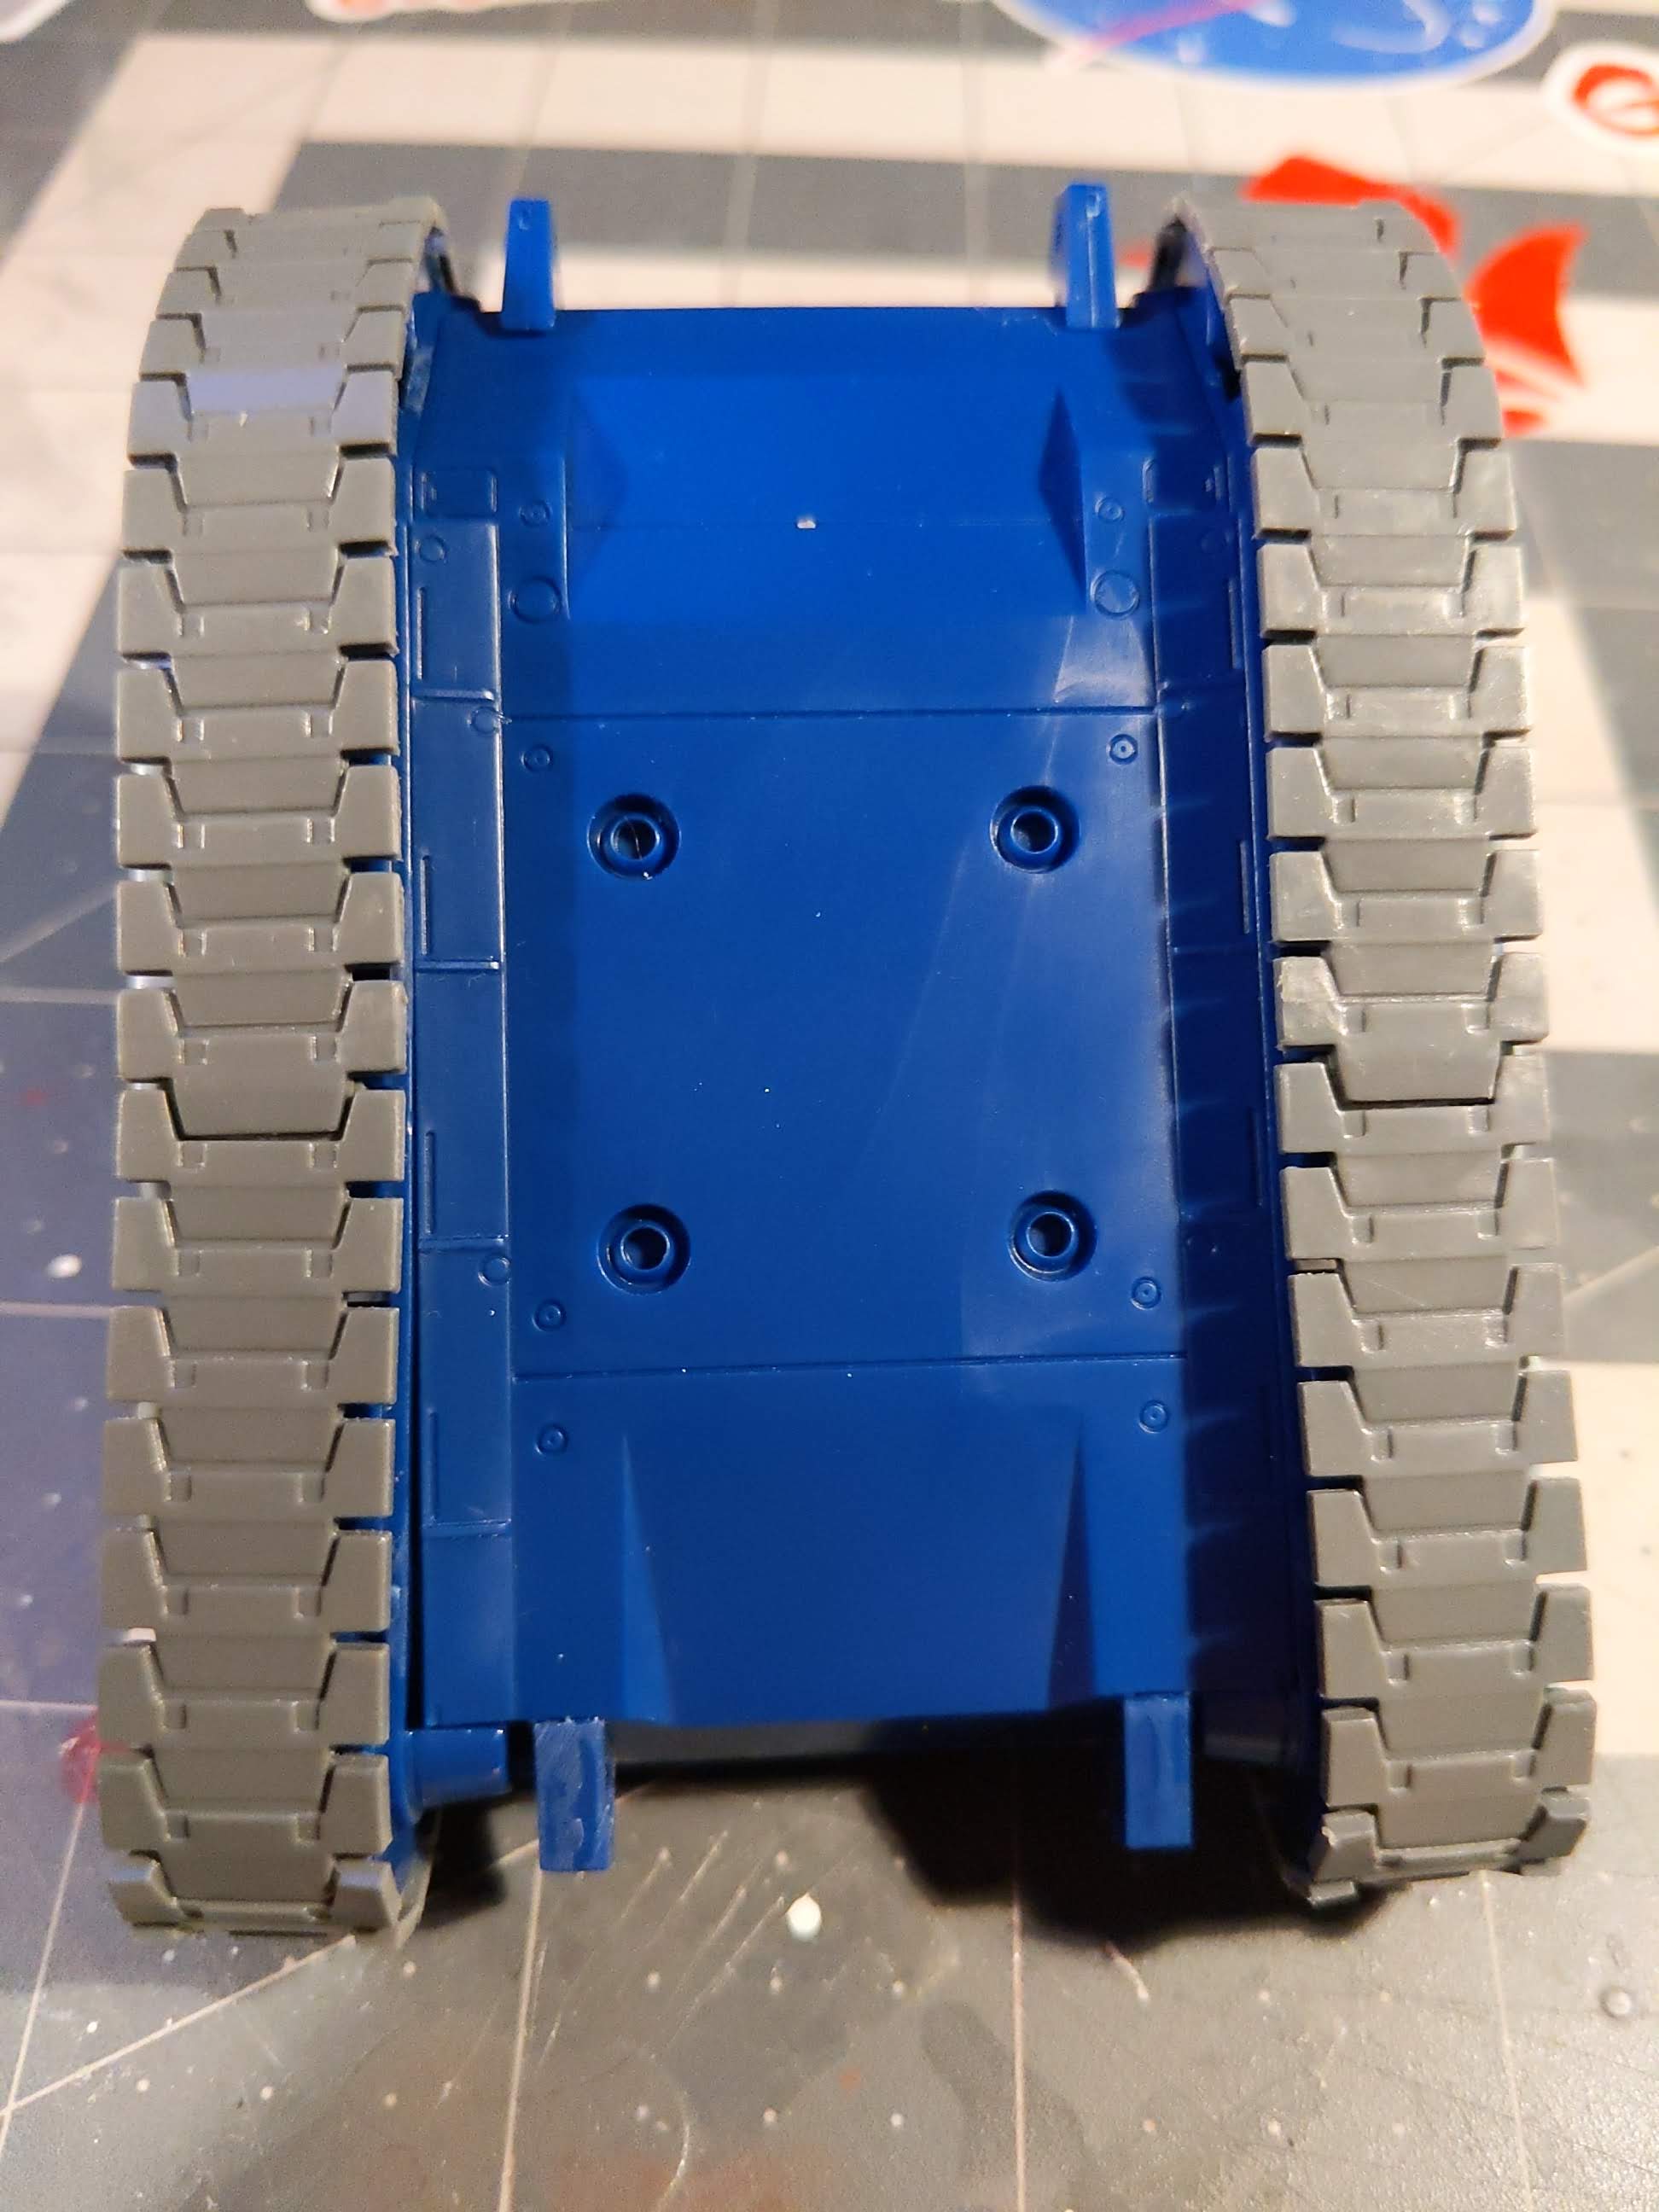
And to continue the theme of working with polystyrene, I decided to undergo the plan of enhancing the tank treads with a strip of plastic on each individual track. I do not regret how monotonous it ended up being.
The end result makes it feel more grippy and I now know how rivet counters feel.
I’m very pleased with the current state of my Guntank project. At the time of writing it has been the most intensive piece of work I’ve done in the are of greebling, scratch building, and just general detail enhancements. It’s the culmination of all my previous works and I am still weighing some options of going a bit further in terms of enhancements applied before working on the painting preparation phase.
Thank you for reading, I hope you enjoyed it and found some inspiration from my project. Please check out the other completed projects and WIPs we have here at Hangar V and stay tuned for the follow up progress posts